Google Apps Script(GAS)で、スプレッドシートからTwitter API v2経由でツイッターに自動投稿するTwitter botの作成方法を備忘録として記載。本記事では準備編としてTwitter Developerアカウント登録してTwitter認証設定までを行う。
実際のTwitter Bot作成とコードに関しては、下記に記載。
テキスト投稿のみ
テキスト+画像投稿
Twitter 設定
Twitter developerアカウント登録
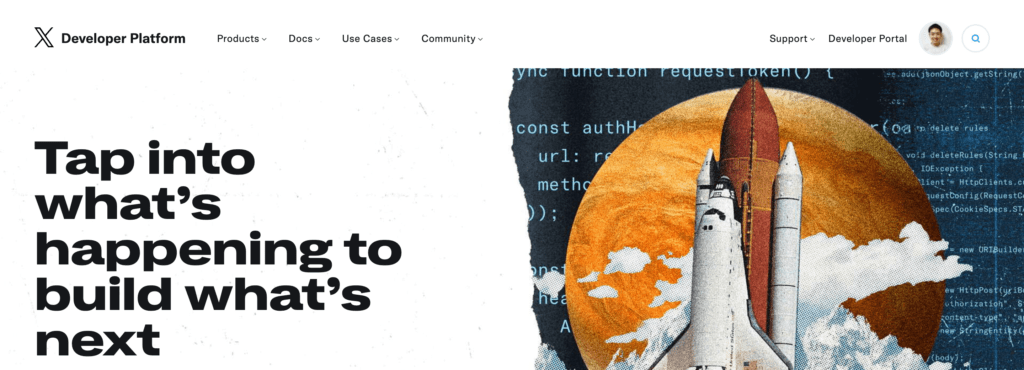
TwitterのDeveloper Platformにアクセスし、ナビゲーション右にある「Developer Portal」をクリック。

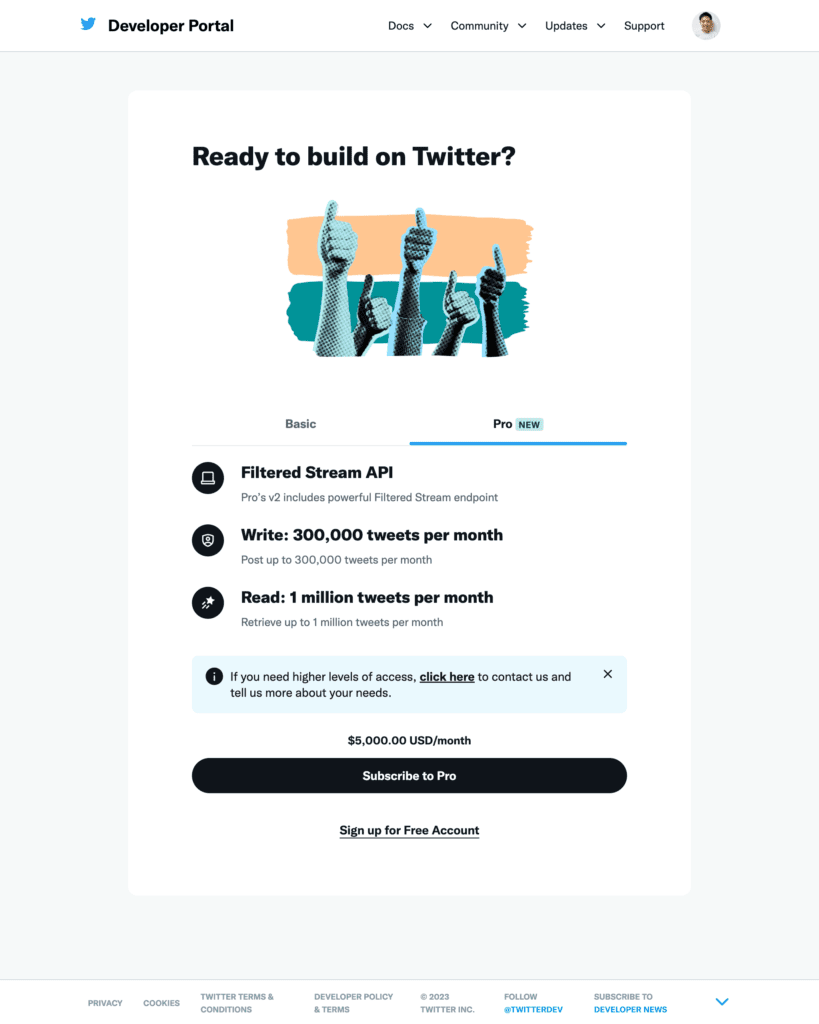
自動的にProアカウント作成を勧められるが、今回はフリーアカウントを作成したいので、ボタンの下にある『Sign up Free Account』をクリック
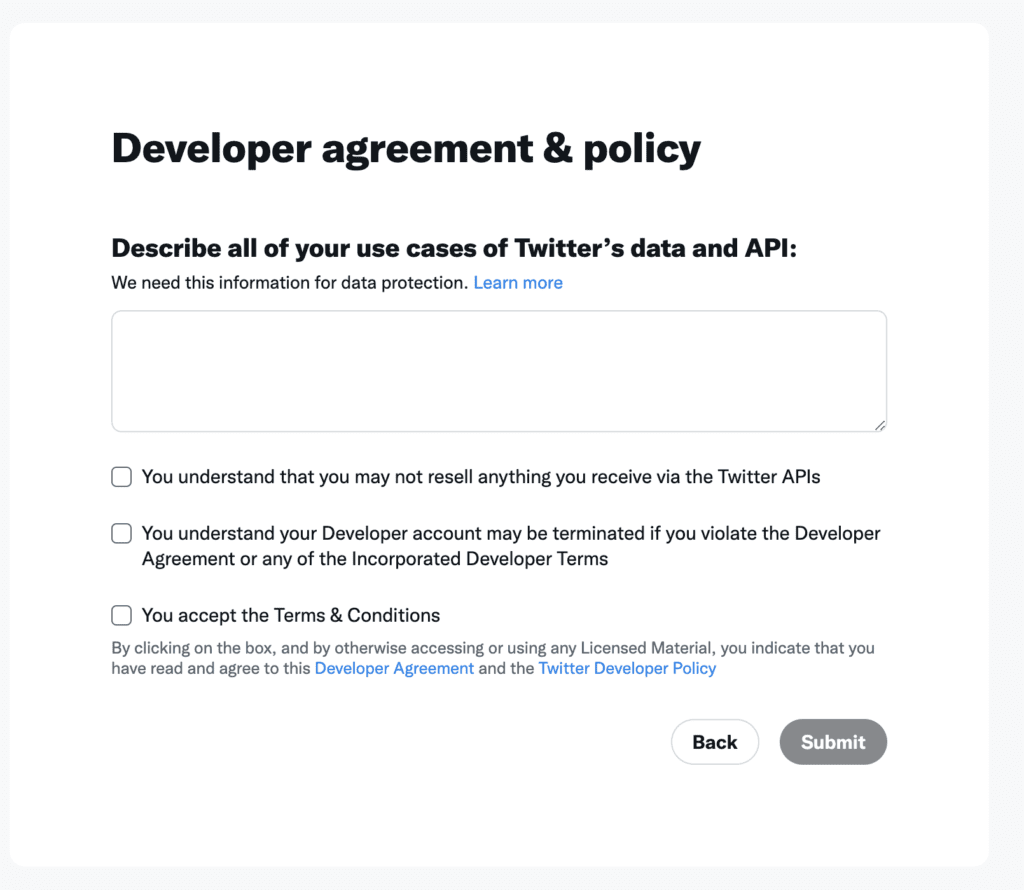
下記の画面に移動し、Twitter dataとAPIの利用目的の記入を促される。
250文字以上入力する必要があるが、審査ないので内容は何でもOK。
私の場合は、ChatGptに下記のように質問したら、即座に利用目的を英語で出力してくれたので、これをコピペ
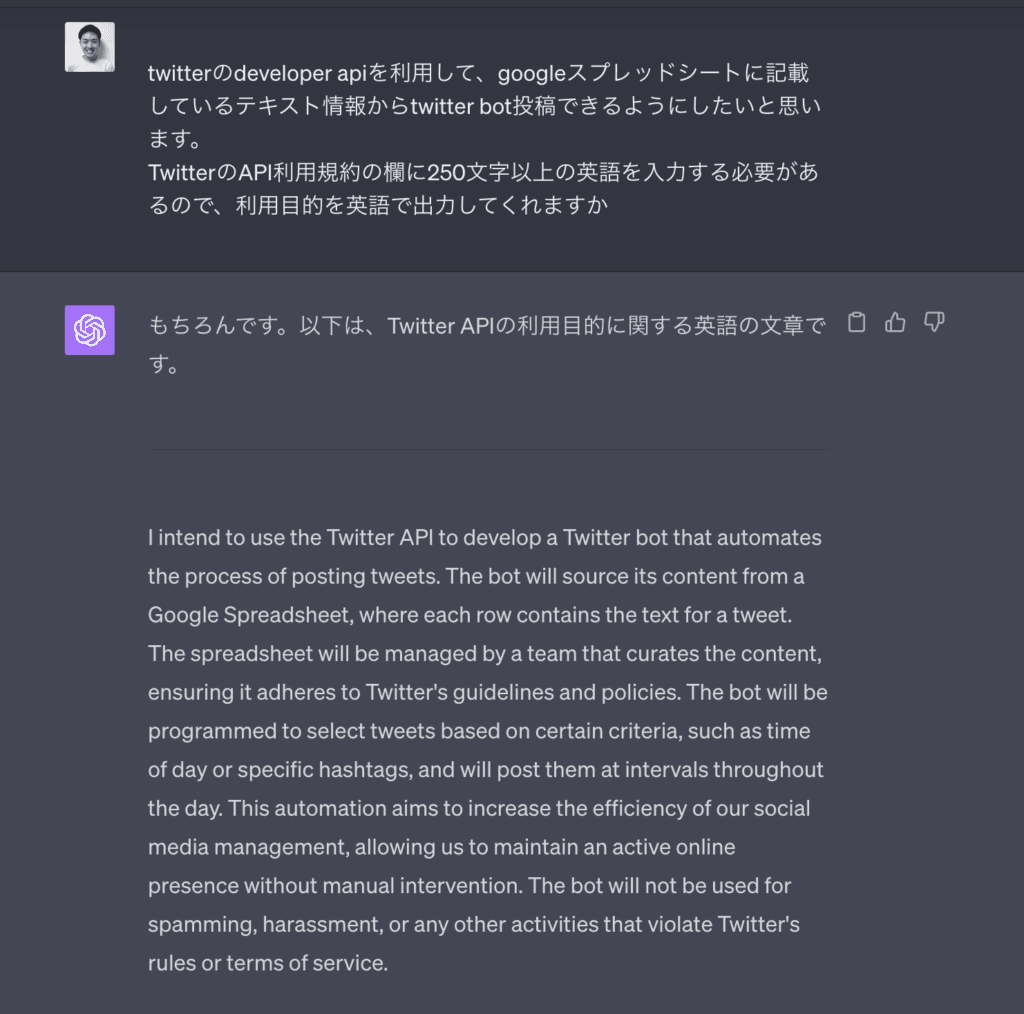
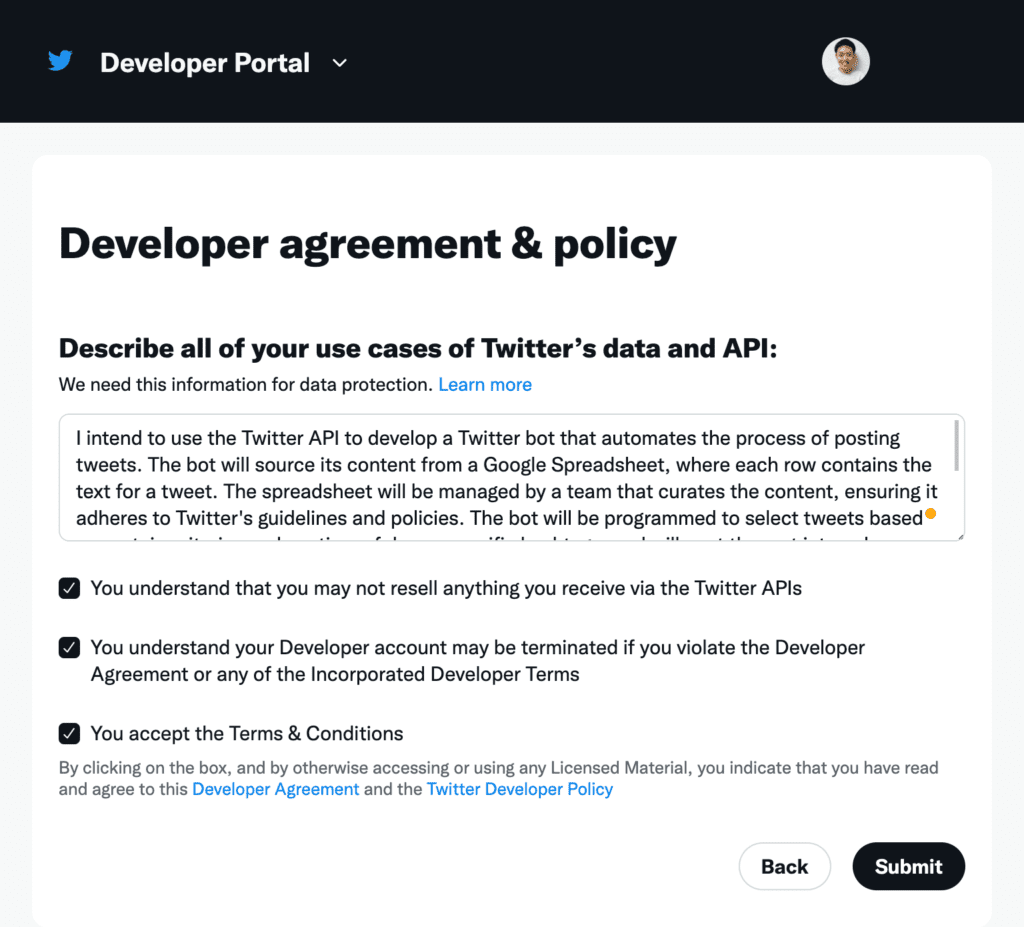
I intend to use the Twitter API to develop a Twitter bot that automates the process of posting tweets. The bot will source its content from a Google Spreadsheet, where each row contains the text for a tweet. The spreadsheet will be managed by a team that curates the content, ensuring it adheres to Twitter’s guidelines and policies.
Submitボタンを押すと、管理画面にすぐにリダイレクトされる。承認待ちで数時間・数日かかるとかはない。
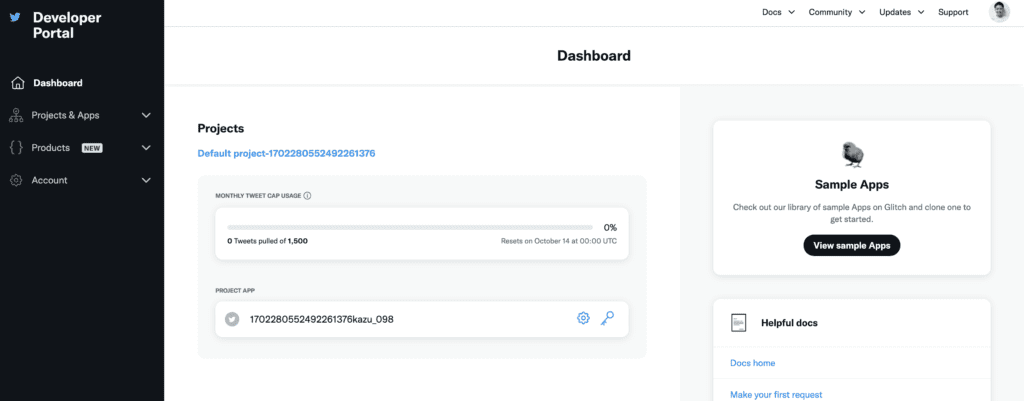
Client ID・Client Secret取得
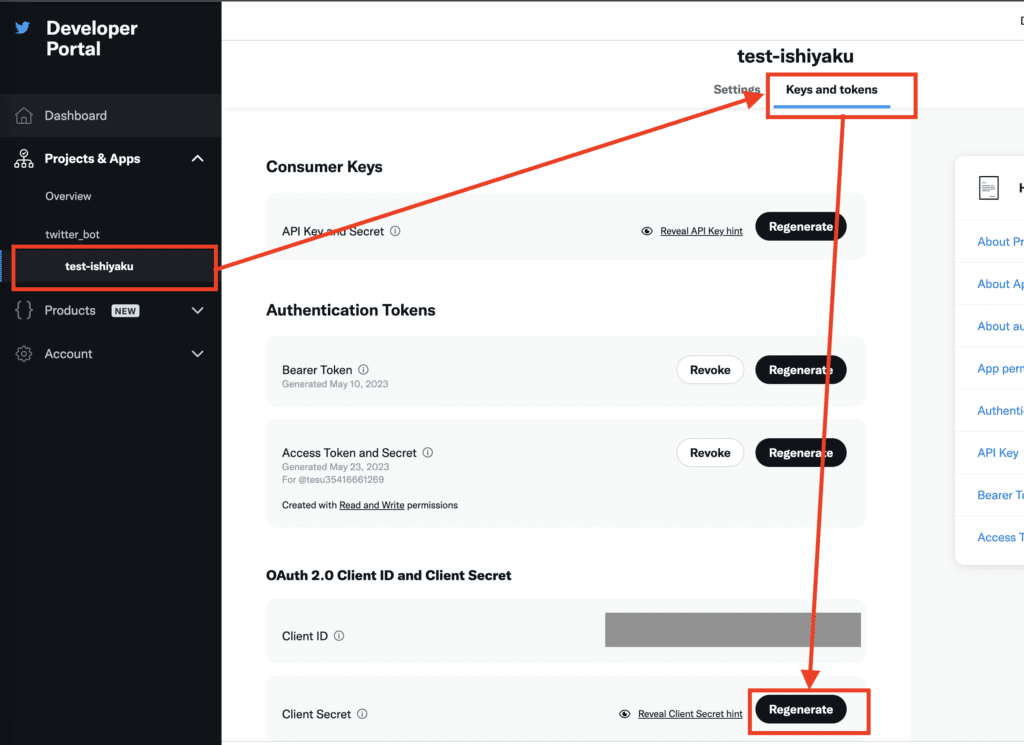
左サイドバーの赤枠の部分(画像では名前を変えているが、デフォルトではDefault project-XXXの下にある、TwitterIDから始まっている)をクリック。
上部のタブのうち、「Keys and tokens」をクリックし、下にスクロールすると、「OAuth 2.0 Client ID and Client Secret」という項目がある。
Client IDは記載されているのでコピーしてメモ。Client SecretはRegenerateボタンを押して表示された値をコピーしてメモしておく。あとで、GASのスクリプトに記載する。
User authentication設定
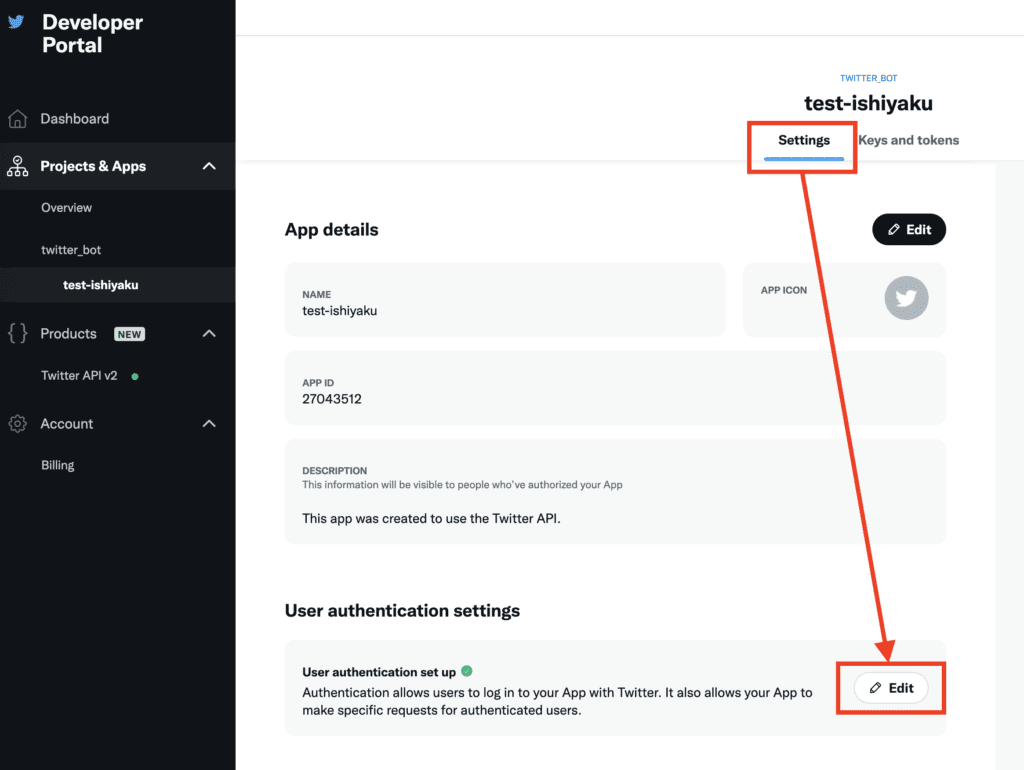
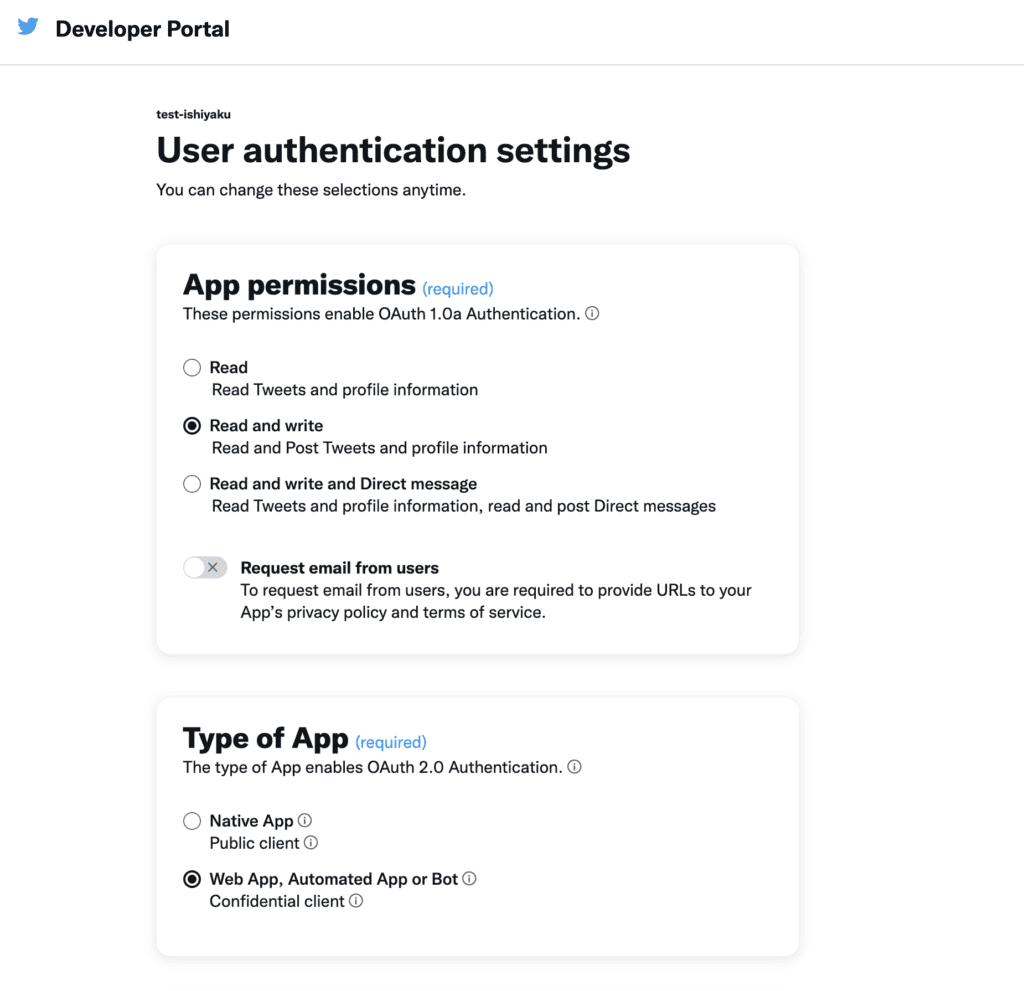
同じ画面の上部の「Settings」タブをクリックし、「User authentication settings」項目のEditボタンをクリック。
App permissions:Read and write
Type of App:Web App, Automated App or Bot
を選択
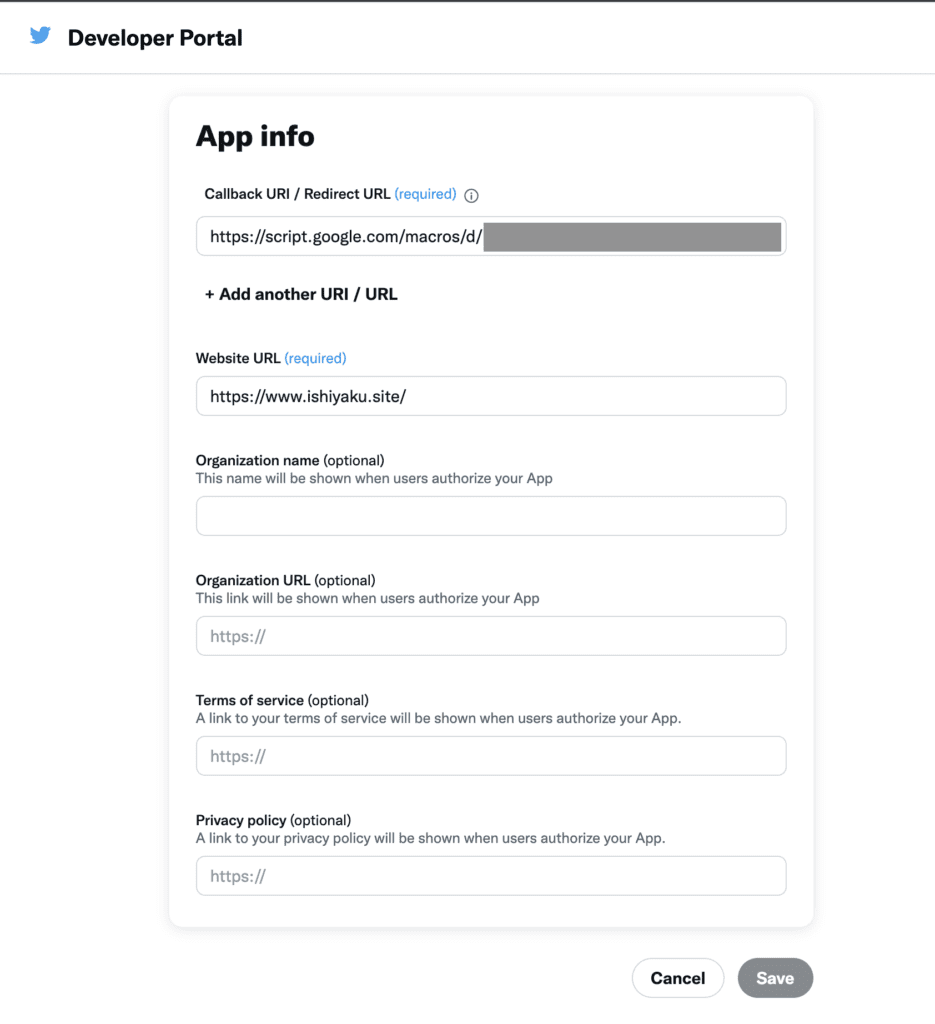
App info
「Callback URI / Redirect URL (required) 」にGASのコールバックURLを設定する。
GASのコールバックURL:https://script.google.com/macros/d/GASのスクリプトID/usercallback
GASのスクリプトIDの部分は、GASを作成する時に表示されるので、GASの作成にうつる。
Google App Scriptでtwitter認証を作成
Twitterボット作成の元となるスプレッドシートを新規作成する。
拡張機能タブから「Apps Script」を選択し、GASプロジェクトを表示する。

表示されるGASコード作成画面のURLのうち、projects/と/editの間に表示されている固有の値が、GASのスクリプトIDになるので、コピーする。
先ほどのTwitterのUser authentication設定のApp infoのCallback URI設定の画面に、スクリプトIDを添えてコールバックURLを設定する。
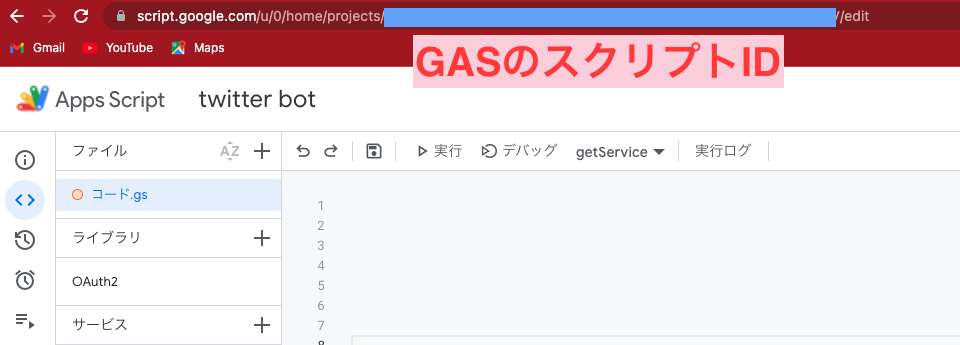
https://script.google.com/macros/d/GASのスクリプトID/usercallback
OAuth2ライブラリ追加
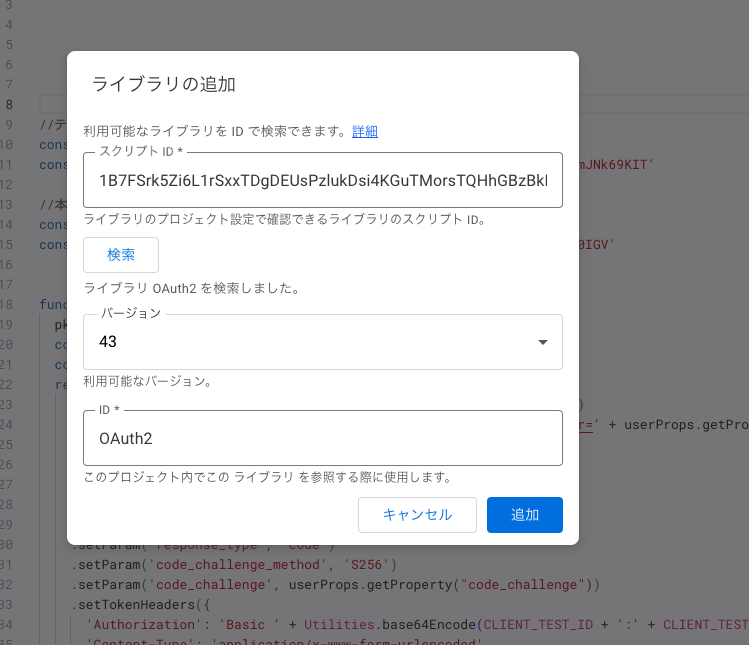
GASコード作成画面の左サイドバーの「ライブラリ」をクリックする。ライブラリの追加という画面が開くので、スクリプトIDの欄に、下記のスクリプトIDを入力して検索。
OAuth2のスクリプトID1B7FSrk5Zi6L1rSxxTDgDEUsPzlukDsi4KGuTMorsTQHhGBzBkMun4iDF
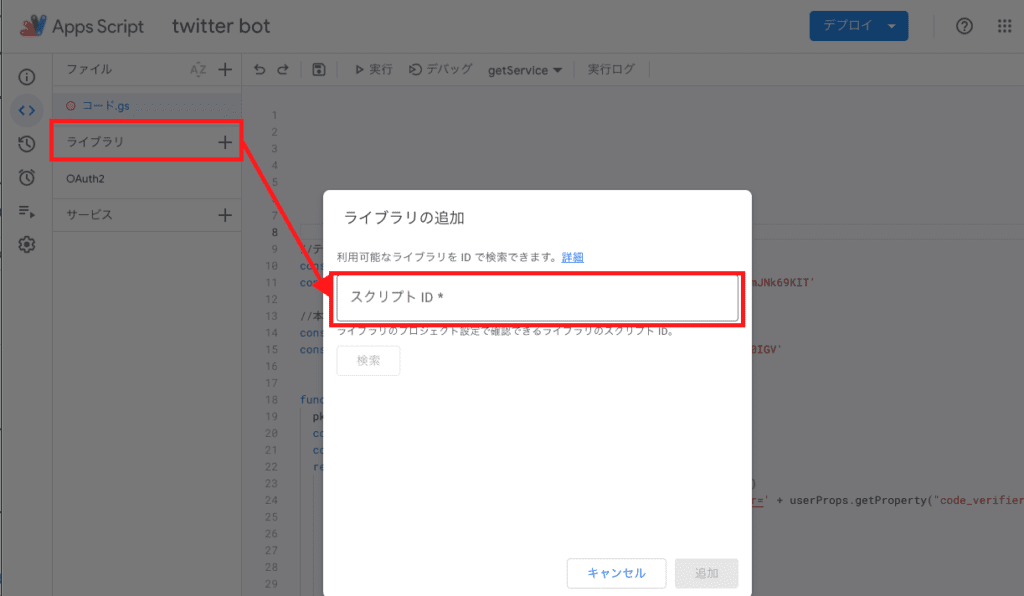
すると、IDの欄にOauth2と記載された検索結果が表示されるので、追加ボタンをクリックして、Oauth2ライブラリを追加する。
Twitter API認証処理のGASコード作成
下記のTwitter API認証処理のGASコードをコピペ。
CLIENT_IDとCLIENT_SECRETは、Twitter APIの「OAuth 2.0 Client ID and Client Secret」の項目で取得してメモした「Client ID」と「Client Secret」を記載する。
const CLIENT_ID = 'XXX'
const CLIENT_SECRET = 'XXX'

function getService() {
  pkceChallengeVerifier();
  const userProps = PropertiesService.getUserProperties();
  const scriptProps = PropertiesService.getScriptProperties();
  return OAuth2.createService('twitter')
    .setAuthorizationBaseUrl('https://twitter.com/i/oauth2/authorize')
    .setTokenUrl('https://api.twitter.com/2/oauth2/token?code_verifier=' + userProps.getProperty("code_verifier"))
    .setClientId(CLIENT_ID)
    .setClientSecret(CLIENT_SECRET)
    .setCallbackFunction('authCallback')
    .setPropertyStore(userProps)
    .setScope('users.read tweet.read tweet.write offline.access')
    .setParam('response_type', 'code')
    .setParam('code_challenge_method', 'S256')
    .setParam('code_challenge', userProps.getProperty("code_challenge"))
    .setTokenHeaders({
      'Authorization': 'Basic ' + Utilities.base64Encode(CLIENT_ID + ':' + CLIENT_SECRET),
      'Content-Type': 'application/x-www-form-urlencoded'
    })
}

function authCallback(request) {
  const service = getService();
  const authorized = service.handleCallback(request);
  if (authorized) {
    return HtmlService.createHtmlOutput('Success!');
  } else {
    return HtmlService.createHtmlOutput('Denied.');
  }
}

function pkceChallengeVerifier() {
  var userProps = PropertiesService.getUserProperties();
  if (!userProps.getProperty("code_verifier")) {
    var verifier = "";
    var possible = "ABCDEFGHIJKLMNOPQRSTUVWXYZabcdefghijklmnopqrstuvwxyz0123456789-._~";

    for (var i = 0; i < 128; i++) {
      verifier += possible.charAt(Math.floor(Math.random() * possible.length));
    }

    var sha256Hash = Utilities.computeDigest(Utilities.DigestAlgorithm.SHA_256, verifier)

    var challenge = Utilities.base64Encode(sha256Hash)
      .replace(/\+/g, '-')
      .replace(/\//g, '_')
      .replace(/=+$/, '')
    userProps.setProperty("code_verifier", verifier)
    userProps.setProperty("code_challenge", challenge)
  }
}

function logRedirectUri() {
  var service = getService();
  Logger.log(service.getRedirectUri());
}

function main() {
  const service = getService();
  if (service.hasAccess()) {
    Logger.log("Already authorized");
  } else {
    const authorizationUrl = service.getAuthorizationUrl();
    Logger.log('Open the following URL and re-run the script: %s', authorizationUrl);
  }
}
Twitter API認証テスト
Twitter APIで初回実行する際には、認証が必要。
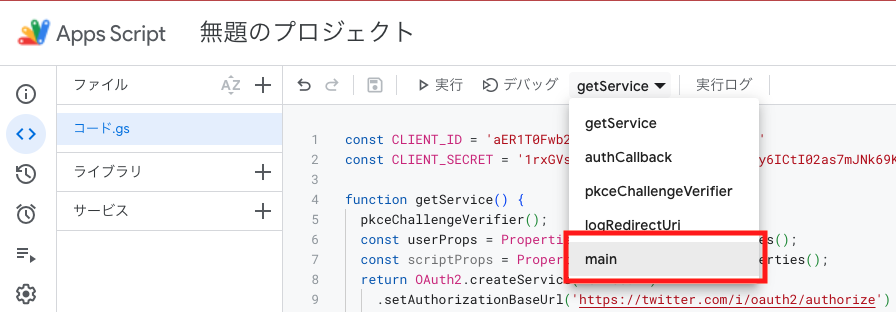
実行する関数のプルダウンでmainを選択し(コピペした段階ではデフォルトでgetService関数になっているのでmain関数に変更しないと認証テストが実行されない)、「実行」ボタンをクリック。

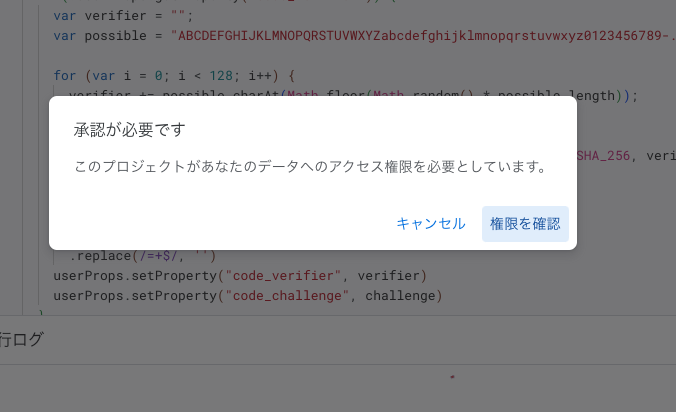
「承認が必要です」というポップアップが表示されるので、「権限を確認」をクリック
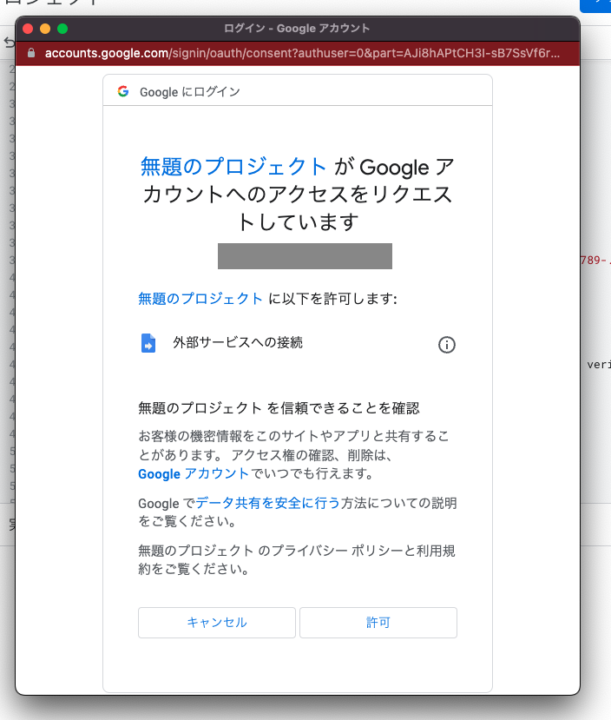
さらにポップアップが開くので、「許可」をクリック
すると、GASスクリプトの実行ログの欄に、下記ログが表示される。
「Open the following URL and re-run the script:URL」というログになっており、URL部分をコピーして、ブラウザの新規タブにペーストして開く必要がある。
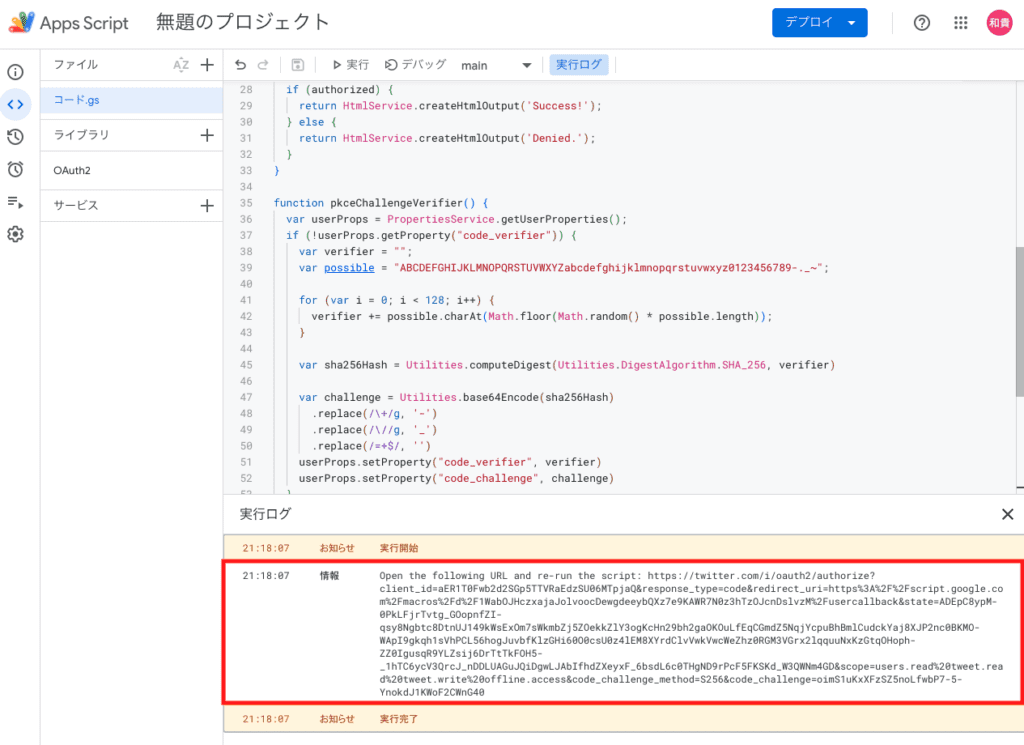
こんな感じでコピーして、新規タブに貼り付けて開く

すると、twitter apiの認証画面が開くので「Authorize app」ボタンをクリックして認証する。
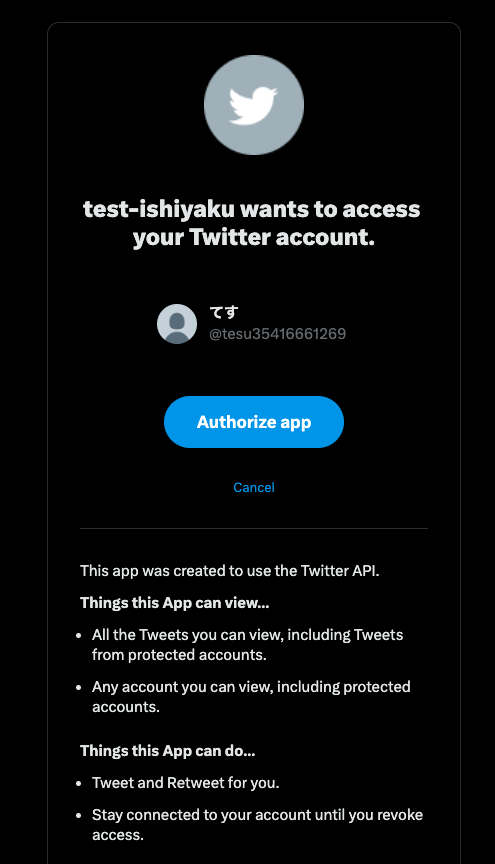
すると、ブラウザで「Success!」と表示されるので、これでTwitter API認証の完成!
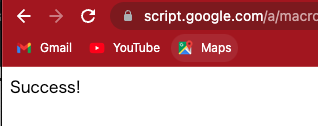
これで、スプレッドシートからTwitter botを投稿する準備完了である。
次は、いよいよ、twitter bot投稿の中身をスプレッドシートとGASで作成していく。
それでは♪

コメント
最後のところで
問題が発生しました
アプリにアクセスを許可できません。前に戻ってもう一度ログインしてください。
と出てしまいます。
コメントありがとうございます。
書き記事を参考に、「詳細」をクリックし、「無題のプロジェクト(安全ではないページ)に移動」をクリックして、許可いただければと思います。
https://best-cloud.jp/google-apps-script-authentication/
twitter apiの認証画面が開くので「Authorize app」ボタンをクリックして認証する。
トークンが無効か、有効期限が切れています。もう一度お試しください。と表示されてしまいます
コメントありがとうございます。
Access TokenとAccess Token Secretが有効期限切れになっていることが原因だと思いますので、Twitter Developer Portalにログイン→プロジェクトとアプリを選択→「Keys and tokens」タブを開いて、Access TokenとAccess Token Secretの箇所でRegenerateボタンをクリックして新しいトークンを生成してみてください。