This is a memorandum of how to create a Twitter bot that automatically posts from a spreadsheet to Twitter via Twitter API v2 using Google Apps Script (GAS). In this article, we will go through the process of registering a Twitter Developer account and setting up Twitter authentication as a preparatory part.
The actual Twitter Bot creation and code is described below.
Text Submission Only
Text + Image Submission
Twitter Settings
Register for a Twitter developer account
Go to Twitter’s Developer Platform and click on “Developer Portal” on the right side of the navigation.


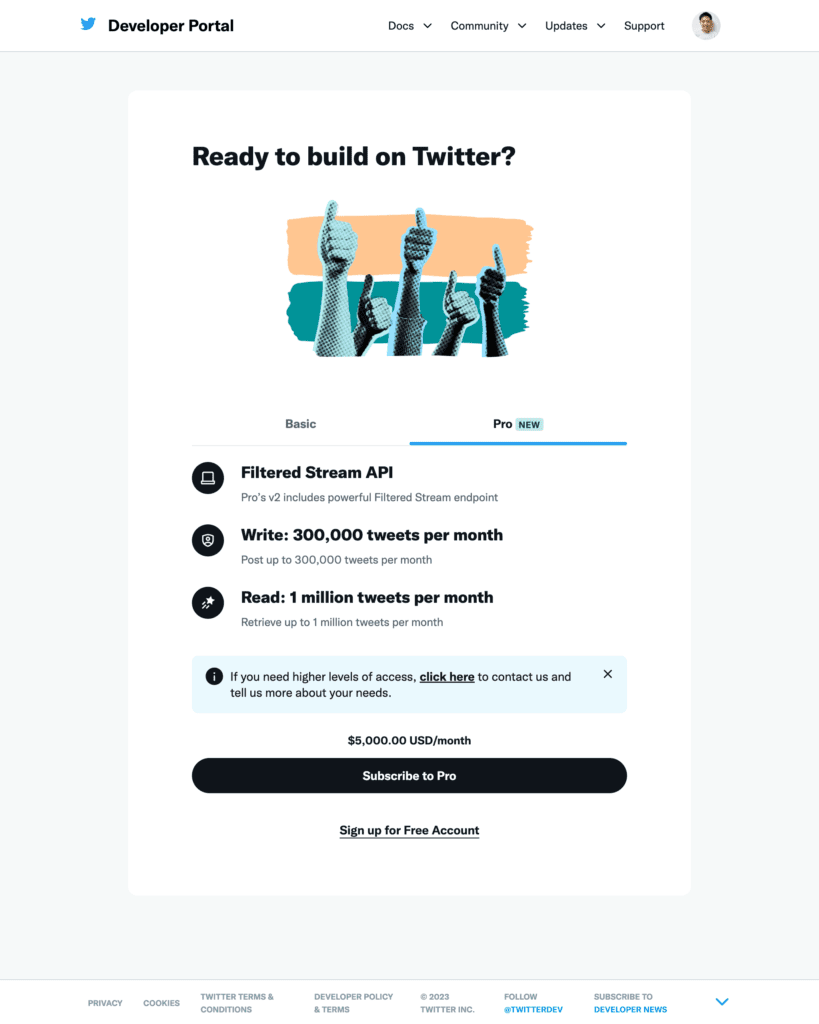
You will be automatically recommended to create a Pro account, but this time we want to create a free account, so click on the “Sign up Free Account” button below the button.
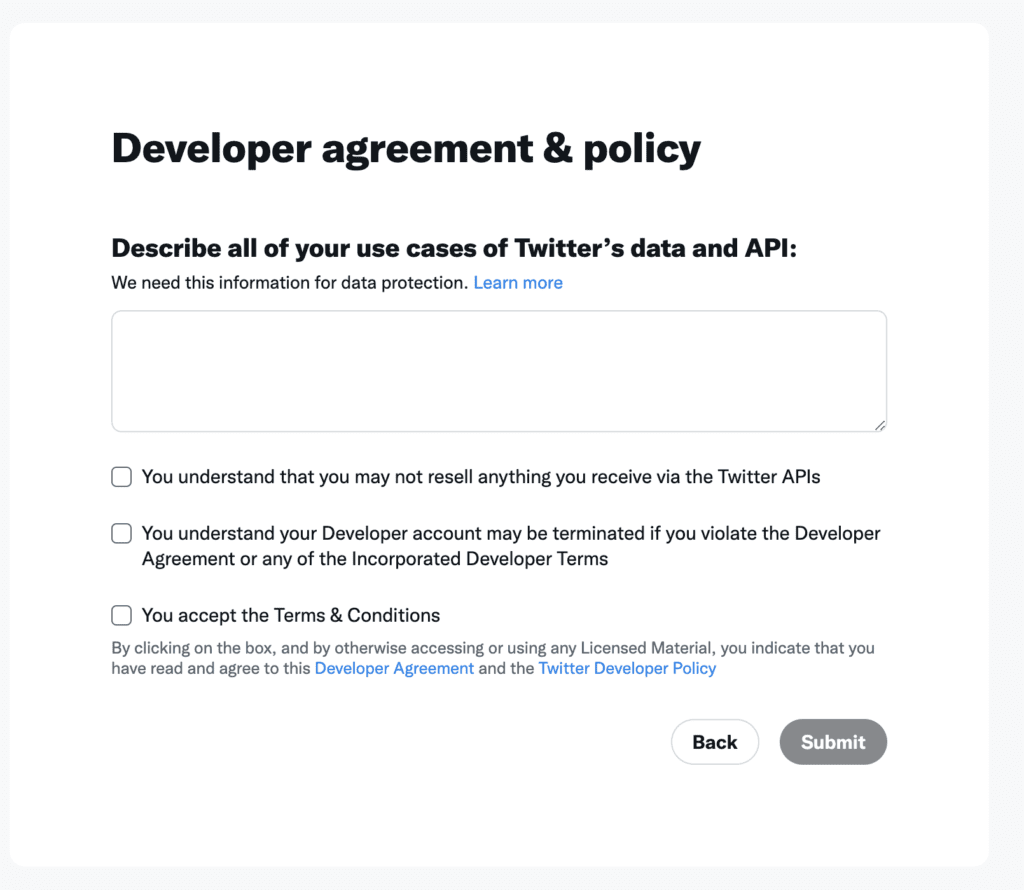
You will be taken to the following screen, where you will be prompted to fill in Twitter data and the purpose of API usage.
You must enter at least 250 characters, but there is no screening process, so any content is acceptable.
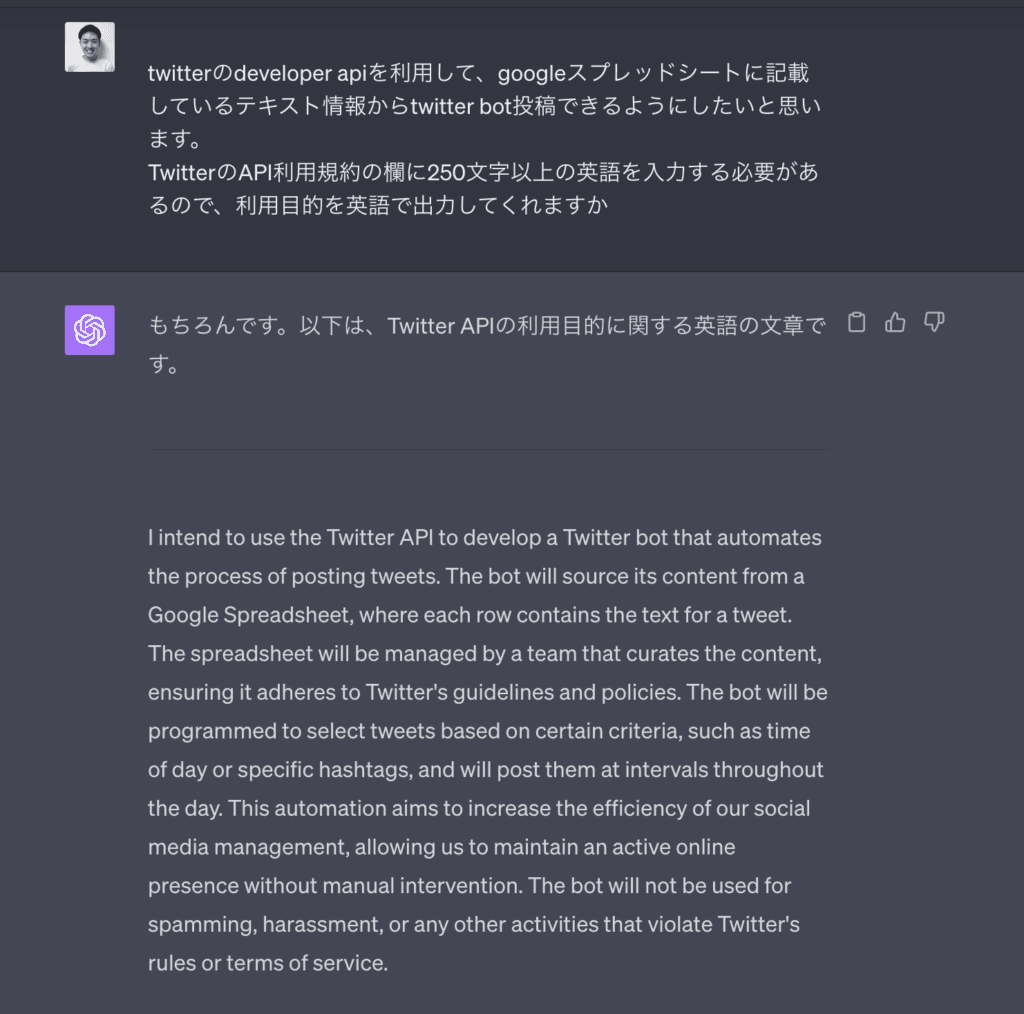
In my case, I asked ChatGpt the following question and it immediately output the purpose of use in English, which I copied and pasted
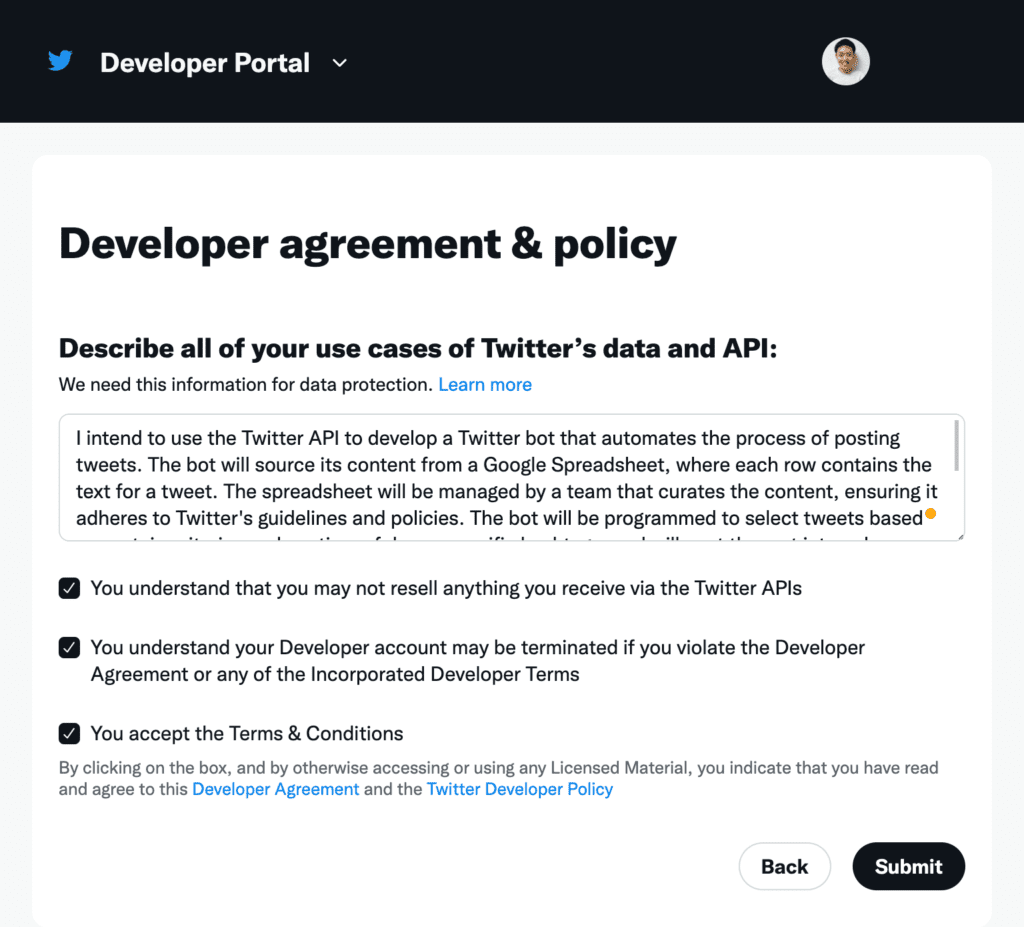
When you click the Submit button, you are immediately redirected to the administration page. There is no waiting for approval, which can take hours or days.
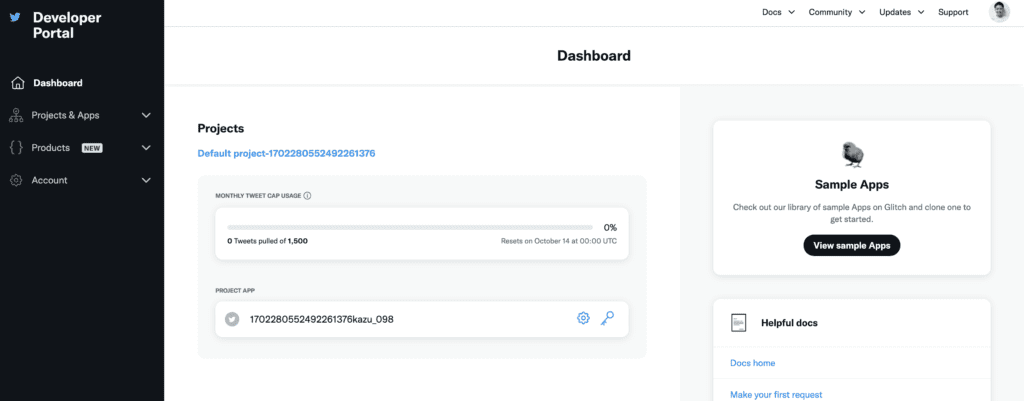
Obtain Client ID and Client Secret
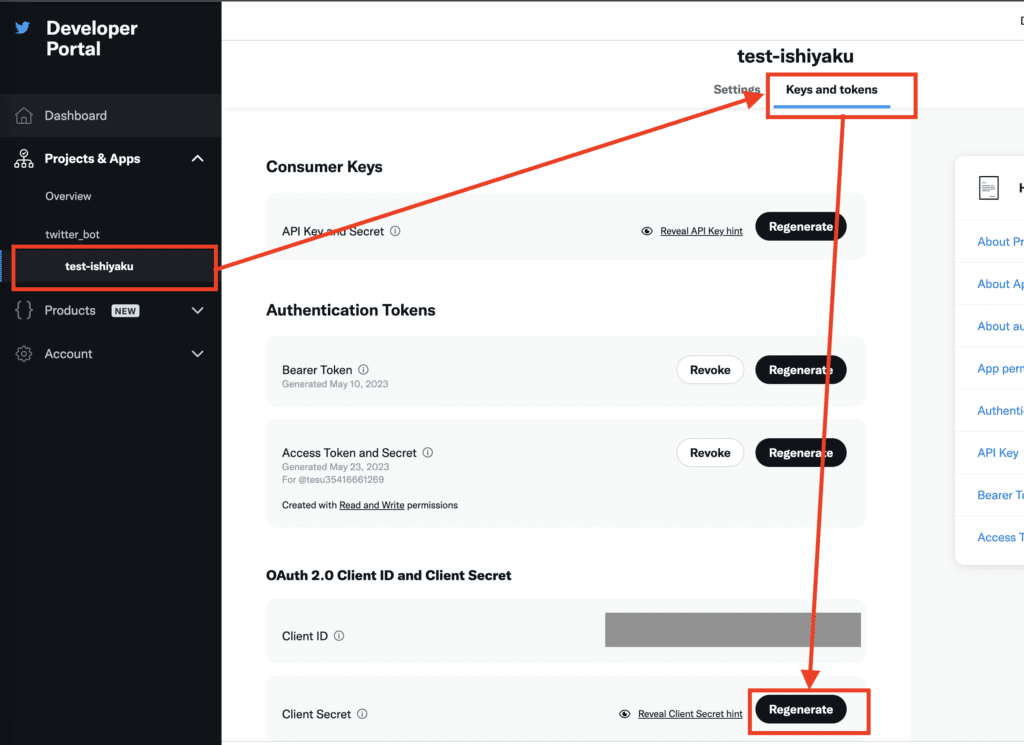
Click on the red box on the left sidebar (renamed in the image, but by default it is under Default project-XXX, starting with TwitterID).
Among the tabs at the top, click on “Keys and tokens” and scroll down to find “OAuth 2.0 Client ID and Client Secret”.
For the Client ID, copy and write down the value shown by pressing the “Regenerate” button and for the Client Secret, copy and write down the value shown by pressing the “Regenerate” button. Later, write it in the GAS script.
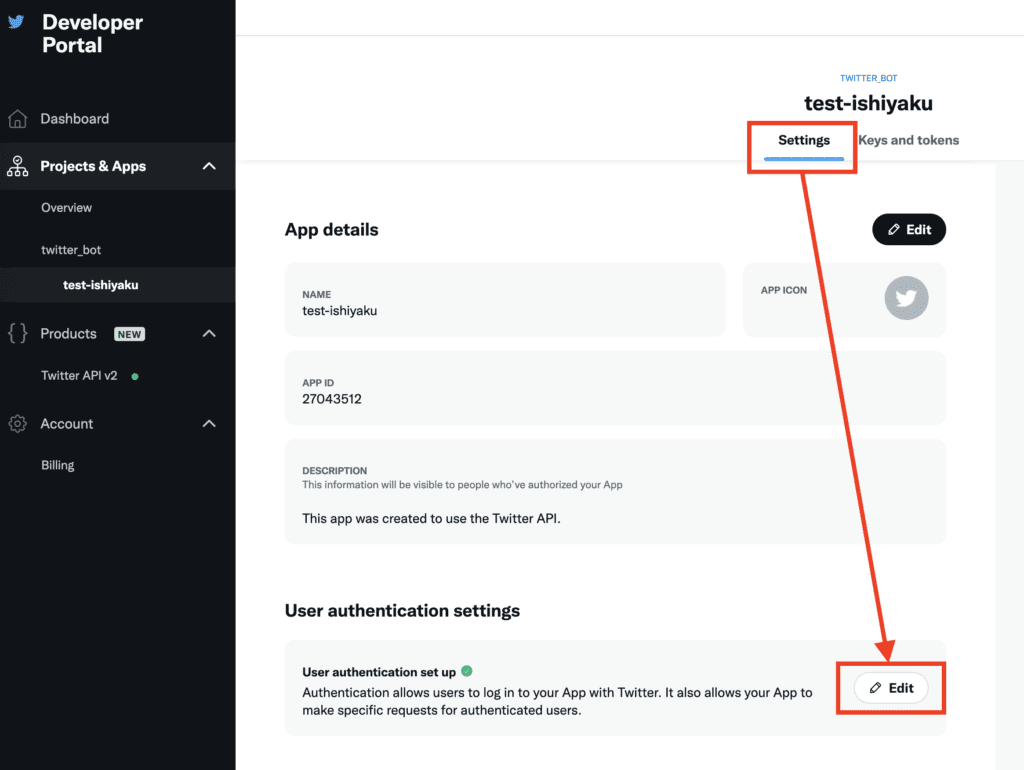
User authentication settings
Click on the “Settings” tab at the top of the same screen and click on the Edit button for the “User authentication settings” item.
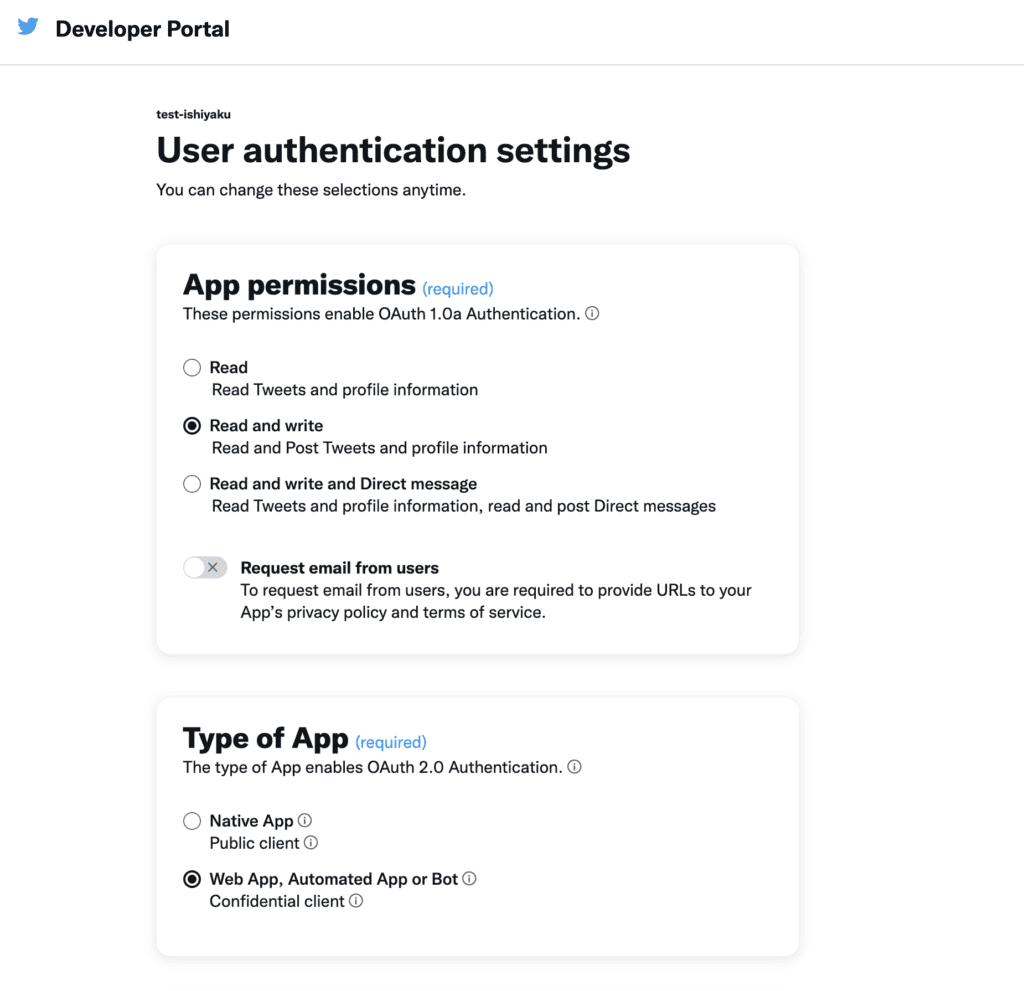
App permissions: Read and write
Type of App: Web App, Automated App or Bot
Select
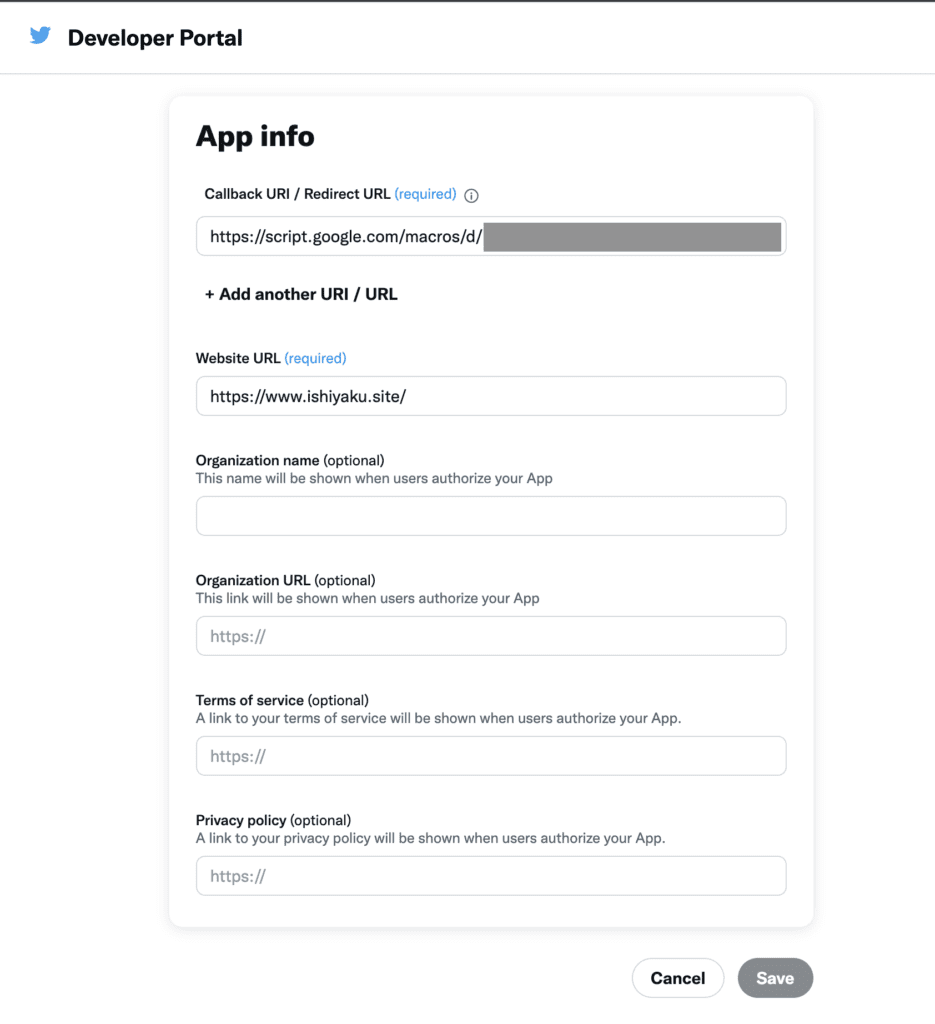
App info
Set the GAS callback URL in the “Callback URI / Redirect URL (required)” field.
GAS callback URL: https://script.google.com/macros/d/GASのスクリプトID/usercallback
The script ID portion of the GAS will be displayed when creating the GAS, so go on to create the GAS.
Create twitter authentication with Google App Script
Create a new spreadsheet that will be used as the basis for creating the Twitter bot.
From the Extensions tab, select “Apps Script” to display the GAS project.

In the URL of the GAS code creation screen that appears, copy the unique value displayed between /projects/ and /edit, which is the GAS script ID.
Set the callback URL with the script ID in the Callback URI setting screen of App info in the User authentication settings of Twitter as described earlier.
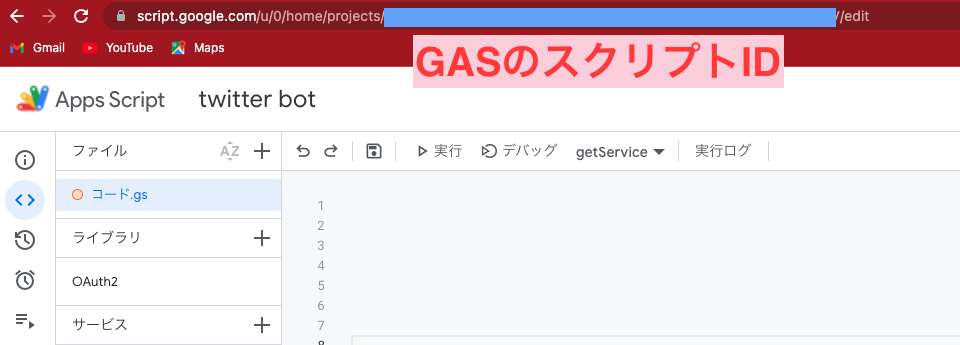
https://script.google.com/macros/d/GASのスクリプトID/usercallback
OAuth2 library added
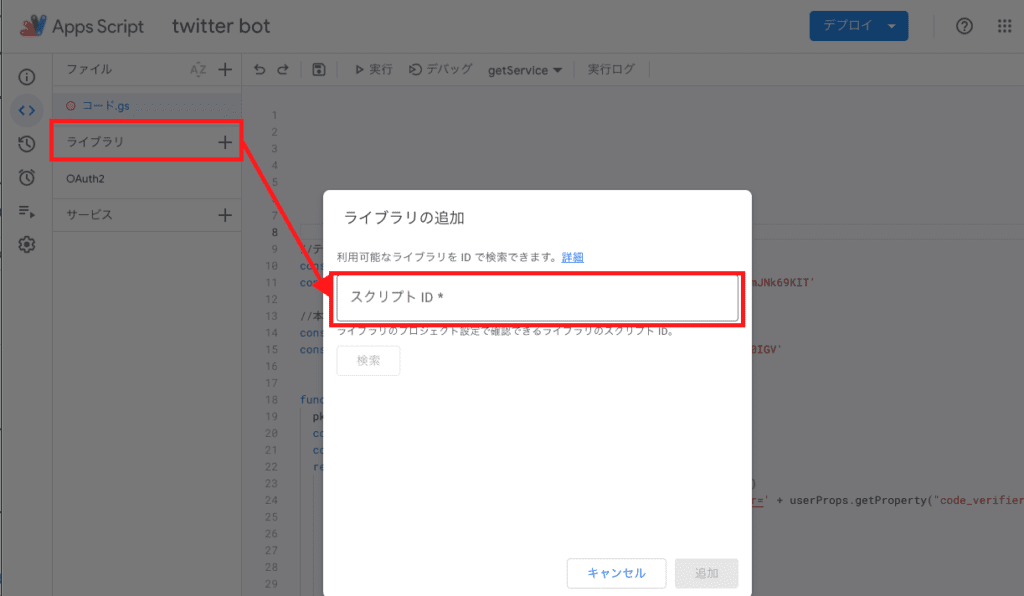
Click “Library” on the left sidebar of the GAS code creation screen. A screen called “Add Library” will open. Enter the following script ID in the “Script ID” field to search.
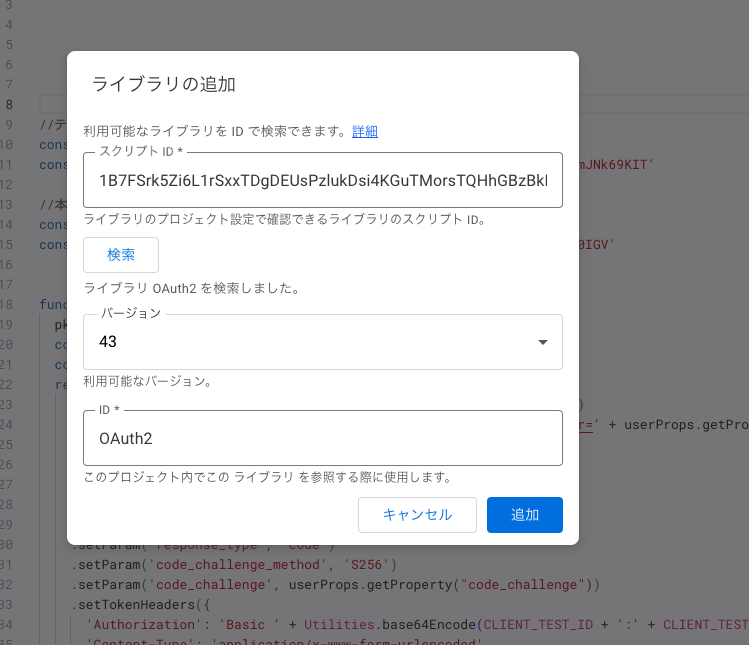
OAuth2 Script ID1B7FSrk5Zi6L1rSxxTDgDEUsPzlukDsi4KGuTMorsTQHhGBzBkMun4iDF
Then, search results with Oauth2 in the ID field will be displayed, and click the Add button to add the Oauth2 library.
Creation of GAS code for Twitter API authentication process
Copy and paste the following GAS code for the Twitter API authentication process.
CLIENT_ID and CLIENT_SECRET should be the “Client ID” and “Client Secret” obtained and noted in the “OAuth 2.0 Client ID and Client Secret” section of the Twitter API.
const CLIENT_ID = 'XXX'
const CLIENT_SECRET = 'XXX'

function getService() {
  pkceChallengeVerifier();
  const userProps = PropertiesService.getUserProperties();
  const scriptProps = PropertiesService.getScriptProperties();
  return OAuth2.createService('twitter')
    .setAuthorizationBaseUrl('https://twitter.com/i/oauth2/authorize')
    .setTokenUrl('https://api.twitter.com/2/oauth2/token?code_verifier=' + userProps.getProperty("code_verifier"))
    .setClientId(CLIENT_ID)
    .setClientSecret(CLIENT_SECRET)
    .setCallbackFunction('authCallback')
    .setPropertyStore(userProps)
    .setScope('users.read tweet.read tweet.write offline.access')
    .setParam('response_type', 'code')
    .setParam('code_challenge_method', 'S256')
    .setParam('code_challenge', userProps.getProperty("code_challenge"))
    .setTokenHeaders({
      'Authorization': 'Basic ' + Utilities.base64Encode(CLIENT_ID + ':' + CLIENT_SECRET),
      'Content-Type': 'application/x-www-form-urlencoded'
    })
}

function authCallback(request) {
  const service = getService();
  const authorized = service.handleCallback(request);
  if (authorized) {
    return HtmlService.createHtmlOutput('Success!');
  } else {
    return HtmlService.createHtmlOutput('Denied.');
  }
}

function pkceChallengeVerifier() {
  var userProps = PropertiesService.getUserProperties();
  if (!userProps.getProperty("code_verifier")) {
    var verifier = "";
    var possible = "ABCDEFGHIJKLMNOPQRSTUVWXYZabcdefghijklmnopqrstuvwxyz0123456789-._~";

    for (var i = 0; i < 128; i++) {
      verifier += possible.charAt(Math.floor(Math.random() * possible.length));
    }

    var sha256Hash = Utilities.computeDigest(Utilities.DigestAlgorithm.SHA_256, verifier)

    var challenge = Utilities.base64Encode(sha256Hash)
      .replace(/\+/g, '-')
      .replace(/\//g, '_')
      .replace(/=+$/, '')
    userProps.setProperty("code_verifier", verifier)
    userProps.setProperty("code_challenge", challenge)
  }
}

function logRedirectUri() {
  var service = getService();
  Logger.log(service.getRedirectUri());
}

function main() {
  const service = getService();
  if (service.hasAccess()) {
    Logger.log("Already authorized");
  } else {
    const authorizationUrl = service.getAuthorizationUrl();
    Logger.log('Open the following URL and re-run the script: %s', authorizationUrl);
  }
}
Twitter API Authentication Test
Authentication is required for the first run on the Twitter API.
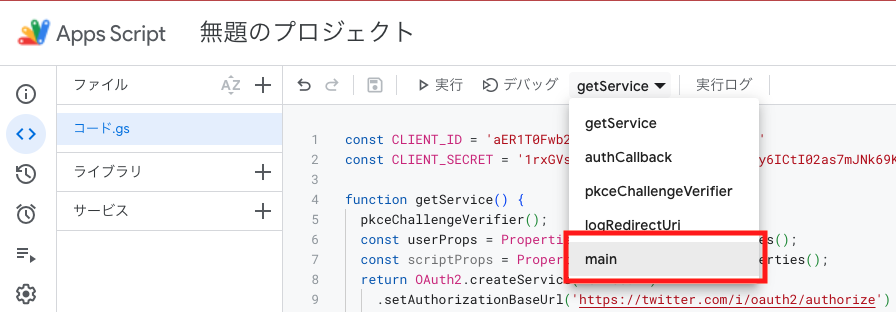
Select “main” in the pull-down menu for the function to execute (at the stage of copy and paste, the default function is the getService function, so the authentication test will not be executed unless it is changed to the main function), and click the “Execute” button.

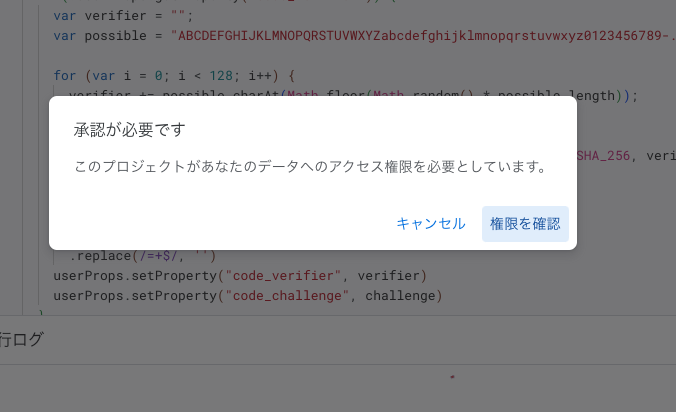
A pop-up window will appear saying “Approval Required.” Click on “Check Authorization.
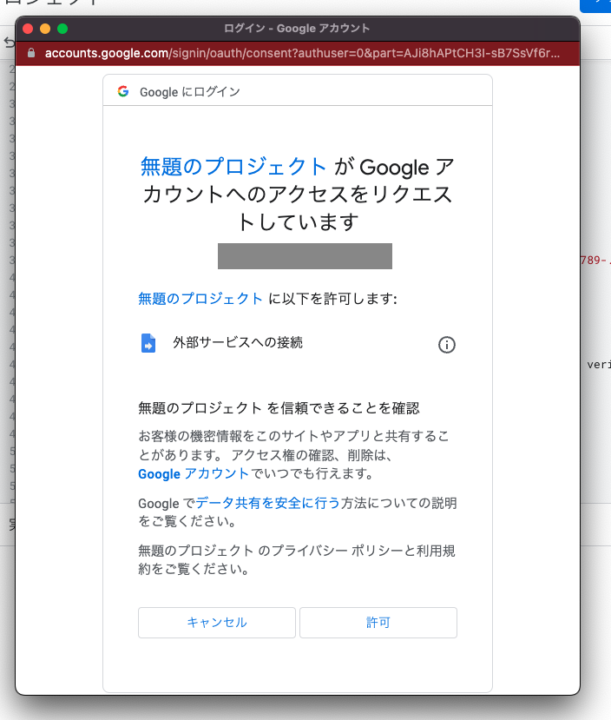
A further pop-up will open, click “Allow
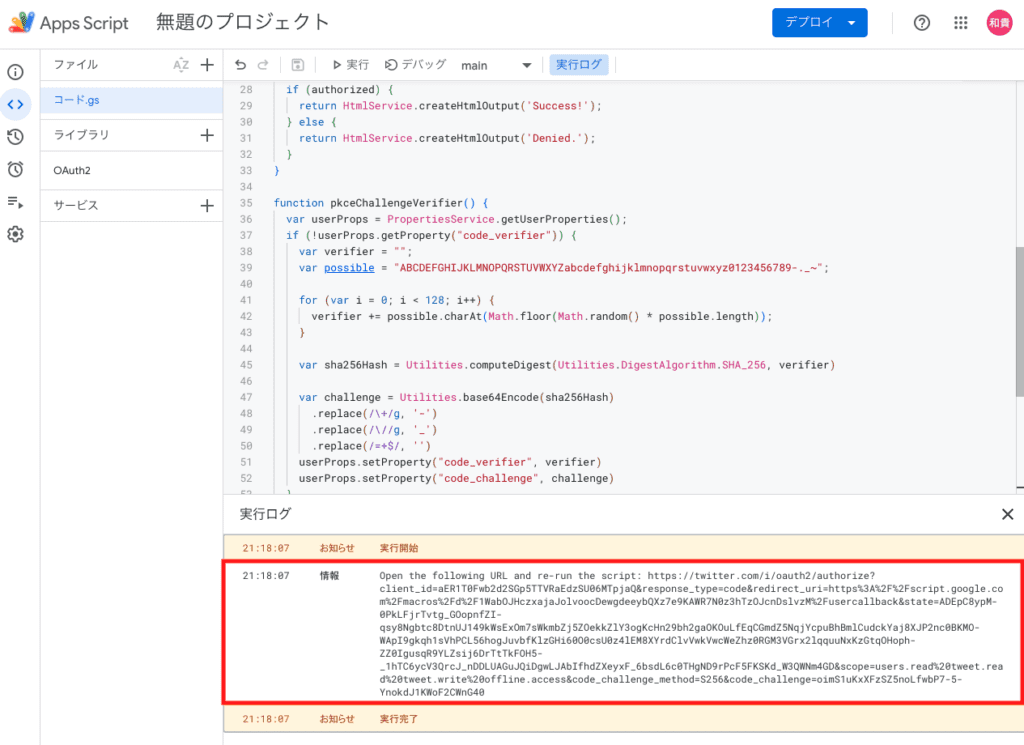
Then, the following log will appear in the execution log column of the GAS script.
The log is “Open the following URL and re-run the script: URL,” and you need to copy the URL part and paste it into a new tab of your browser to open it.
Copy and paste into a new tab like this to open it

Then the authorization screen of the Twitter API will open, and click the “Authorize app” button to authorize it.
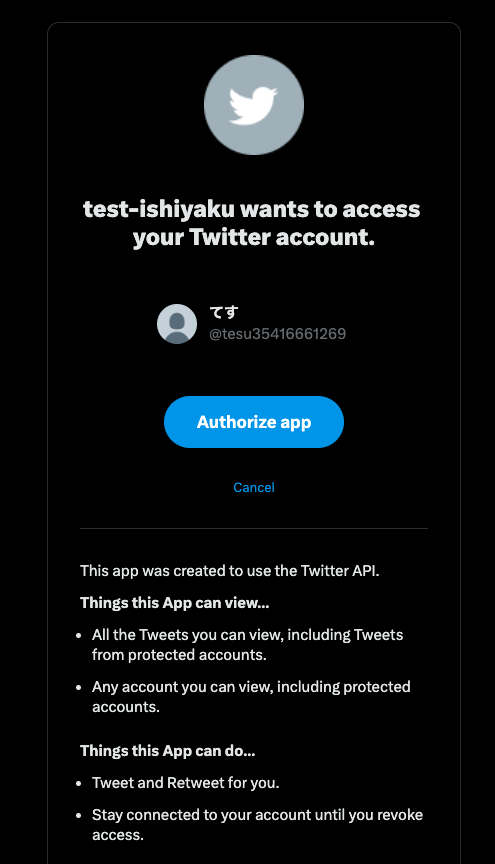
Then, the browser will display “Success!” and the Twitter API authentication is now complete!

Now you are ready to post your Twitter bot from your spreadsheet.
Next, we will finally create the contents of the Twitter bot post in spreadsheets and GAS.
Now then… ♪


コメント