Introduction.
Developing “Mia,” a talking cat-shaped robot that speaks dialects.
In a previous article here, we implemented a function to retrieve weather forecast information on the back-end and display it in a Flutter application.
This time, I would like to improve the daily weather information displayed at the top of the home screen so that users can receive a push notification at the time they set.

Flow of sending a Push using Firebase Cloud Messaging
Firebase Cloud Messaging (FCM) is a cross-platform messaging solution for sending messages free and reliably.
The process of push notification using FCM consists of the following three steps
- Sending messages from the server
- FCM-based delivery process
- Receive and display by app

Sending a notification request from the server to FCM
- Message creation: A backend server (e.g., Go server running on AWS) creates a message to be sent to the FCM. This message will include the content of the notification (title, body, etc.), the device token or topic to be sent, and if necessary, the time of sending (e.g., when the specific event occurred).
- Sending HTTP request: Send the created message in JSON format as an HTTP POST request to FCM’s API endpoint. At this time, the server key for authentication is required in the request header.
Processing messages by FCM and sending them to devices
- Device Identification: The FCM determines which device to send the notification to based on the message received from the server. This is identified by the device token or topic specified when the message is sent. The device token is issued by the FCM when the app is first launched on the user’s device and must be stored by the app.
- Platform-specific processing: FCM processes messages appropriately for different platforms, such as Android, iOS, and the Web. For example, notifications are sent via APNs on iOS devices and directly from FCM on Android.
Receiving and displaying messages through the application
- Receiving messages: An app can receive messages from the FCM in the background or in the foreground. The behavior when received depends on whether the app is running (foreground) or in the background (or exited).
- Display notifications: When the app is in the foreground, the app can choose to display custom notifications based on data received or none. If in the background, the device’s system will automatically display notifications received from FCM.
Now that the entire process of Push notification using FCM is understood, implementation begins.
Application (Flutter) side implementation
Configure FCM client application
Follow the instructions below to proceed with the FCM client setup in FLutter.
iOS: Enable push notifications and background mode
To be able to receive messages in your app, you need to enable push notifications and background mode in your Xcode project.
Open Xcode, select the target and click “Runner
→Select the “Signing & Capabilities” tab
→Click the “+ Capability” button in the upper left corner
→Type “Push Notifications” and “Background Modes” in the search box and add them.

For Background Modes, check the “Background fetch” and “Remote notifications” checkboxes that are required to receive push notifications and enable them.

iOS: Create APNs authentication key (p8) and upload to Firebase
When connecting to APNs (Apple Push Notification service) with FCM, there are two main methods: APNs authentication key and APNs certificate, but Firebase recommends authentication key.
APNs authentication keys are reusable for multiple applications and different environments (development and production) and, unlike APNs certificates, do not need to be reissued many times once set up and are easy to manage.
Authentication keys are the most up-to-date way to send notifications to Apple devices, so we recommend using them to configure them
So, create an authentication key with an Apple Developer Account and register it with Firebase.
Click here to learn how to create an authentication key.
In addition, a media ID must be registered in advance to create an authentication key.
After successful creation, the authentication key can be downloaded and saved in the download folder as a text file with a .p8 extension.

Configuration in Firebase Console
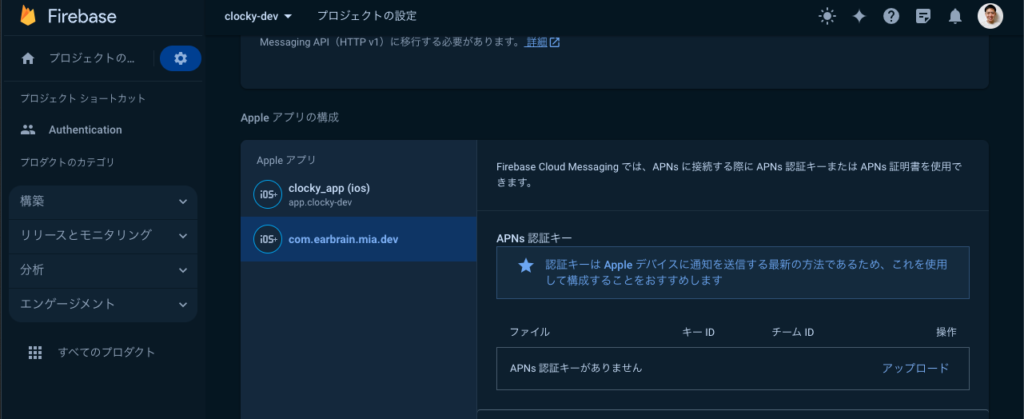
Go to the Firebase project settings page, open the “Cloud Messaging” tab, click on Upload APNs Authentication Key, and upload the p8 file you downloaded. Include your Key ID and Team ID.

By the way, as for Android, there is no need for troublesome (?) additional settings like iOS mentioned above. All you need is a device or emulator running Android 4.4 or later.
Test message transmission (background)
As a starting point for using FCM, first send test notification messages from Notifications Composer to the development device when the app is running in the background.
Install FCM plug-in
$ flutter pub add firebase_messaging
$ flutter pub getAccess the device’s registration token
In order to send a message to a specific device, the registration token for that device must be known.
Call getToken() in main.dart to get the token at app startup and display it in the console.
import 'package:flutter/material.dart';
import 'package:firebase_core/firebase_core.dart';
import 'package:firebase_messaging/firebase_messaging.dart';

void main() async {
  WidgetsFlutterBinding.ensureInitialized();
  await Firebase.initializeApp();

  // FCM の通知権限リクエスト
  final messaging = FirebaseMessaging.instance;
  NotificationSettings settings = await messaging.requestPermission(
    alert: true,
    announcement: false,
    badge: true,
    carPlay: false,
    criticalAlert: false,
    provisional: false,
    sound: true,
  );
  print('User granted permission: ${settings.authorizationStatus}');

  // トークンを取得して表示(デバッグ用)
  String? fcmToken = await messaging.getToken();
  print('FCM TOKEN: $fcmToken');

  runApp(MyApp());
}
I ran flutter and the FCM Token was successfully displayed in the log, so I noted it down.
flutter: FCM Token: XXXXXXXXXXXXXXXXXXXXXXXXXXXXSend a test notification message
When using this token to send push notifications from the Firebase console, during the testing phase, notifications can be sent directly to the token using the “Send Test” function in the “Cloud Messaging” section.
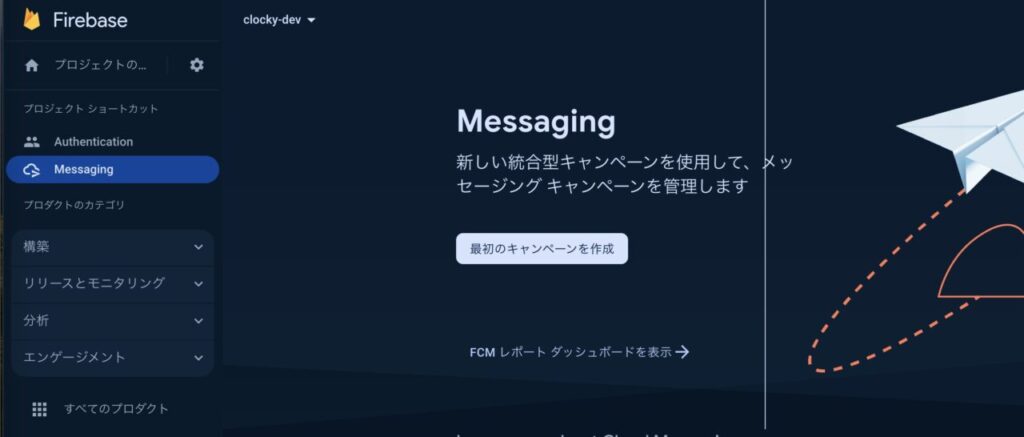
Open the [Messaging] page in the Firebase console.
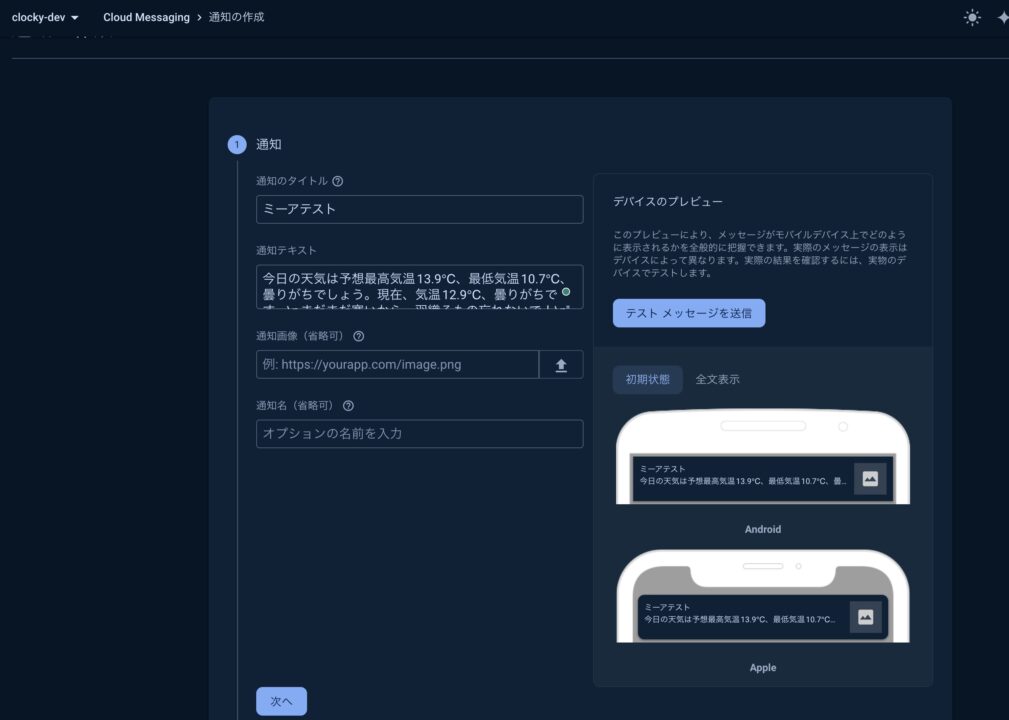
[Select ” Create First Campaign,” select ” Firebase Notification Messages,” and then select ” Create.
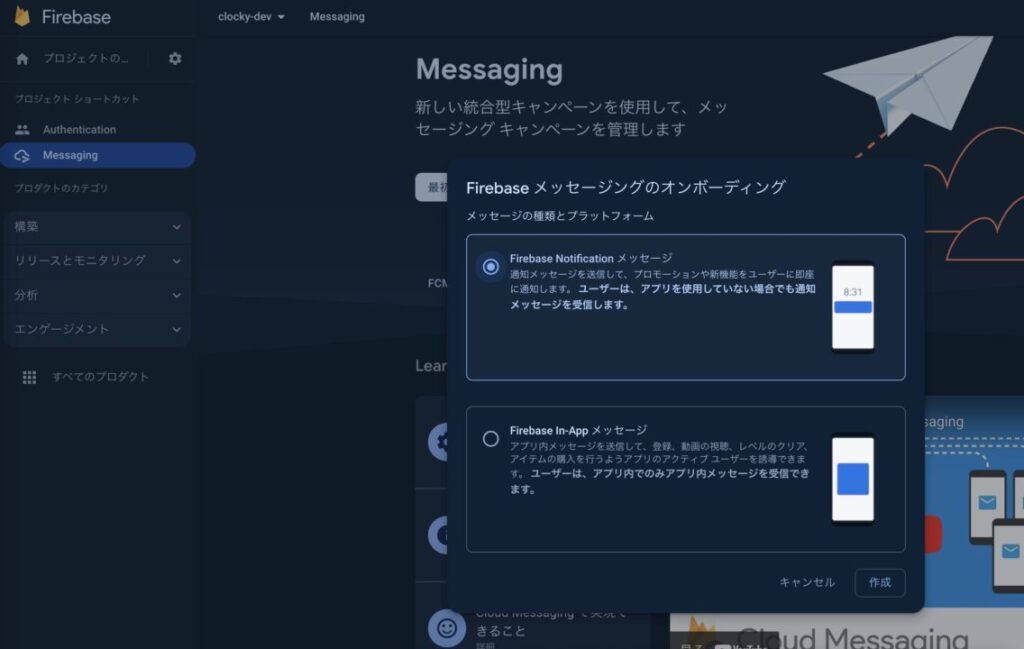
Fill in the notification title and the notification text. A preview of the notification will appear on the right side.
Click on the “Send Test Message” button.
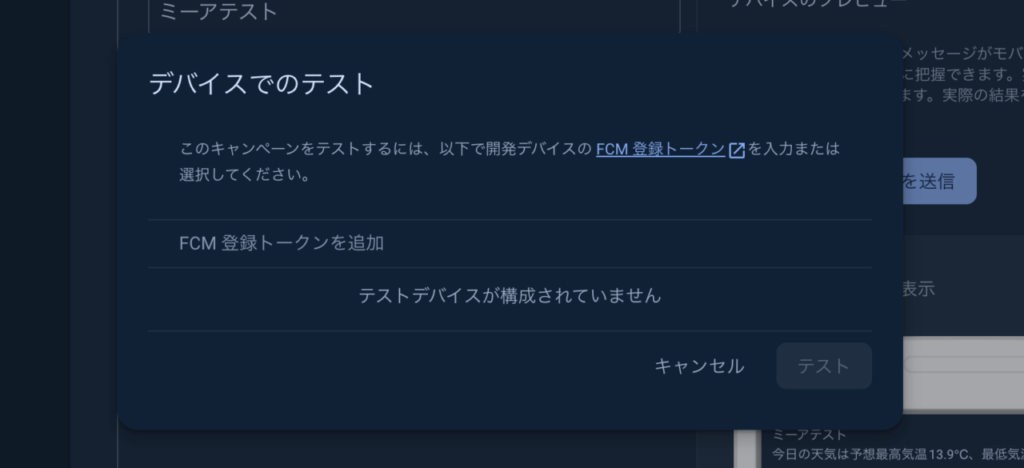
[In the field labeled ” Add FCM Registration Token,” enter the registration token obtained in the previous section of this guide and select Test.
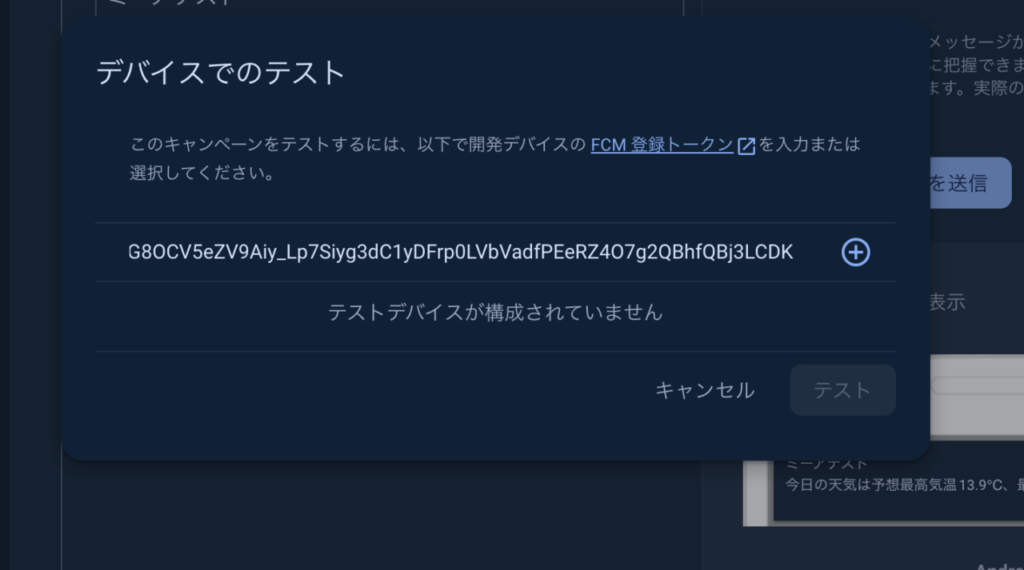
After entering the information, I have to press the “+” button on the right side to reflect the FCM token and cannot press the “Test” button. At first, I couldn’t figure it out, and I wasted a lot of time thinking that I might have gotten the wrong FCM token. Please improve the UI.
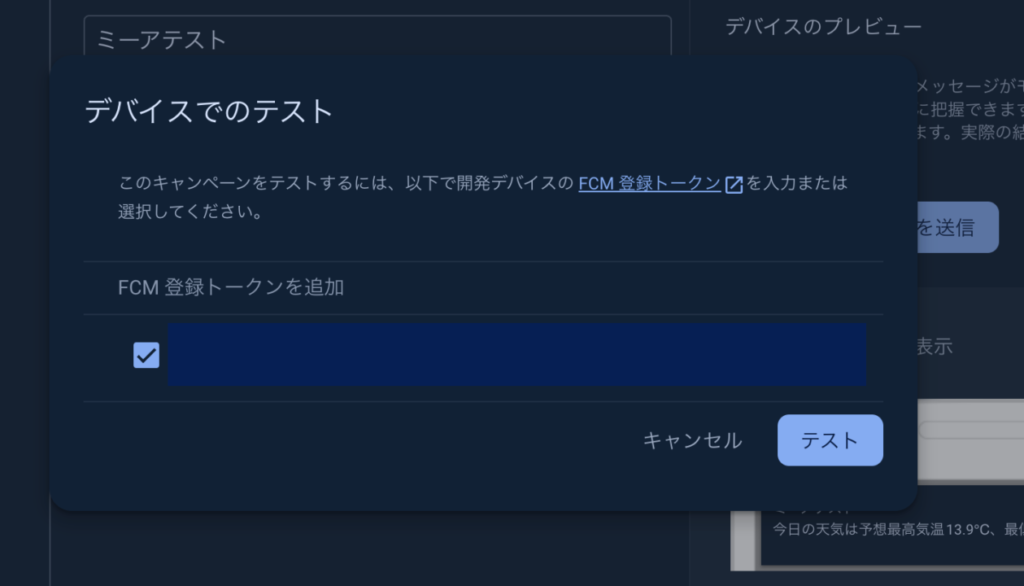
[When “Test ” was selected, the app was put into a background state and the notification was displayed on the actual iOS device!
Incidentally, we also tested the same with an Android emulator and confirmed that background transmission is possible.

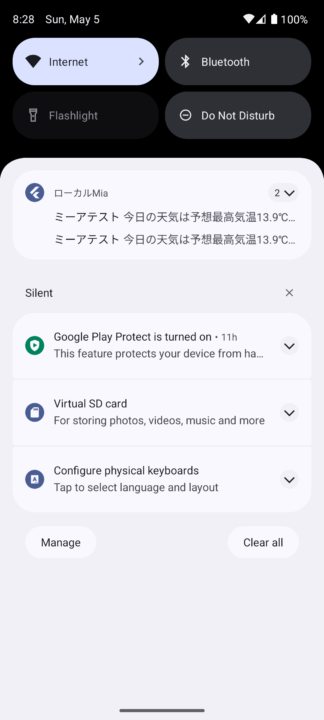
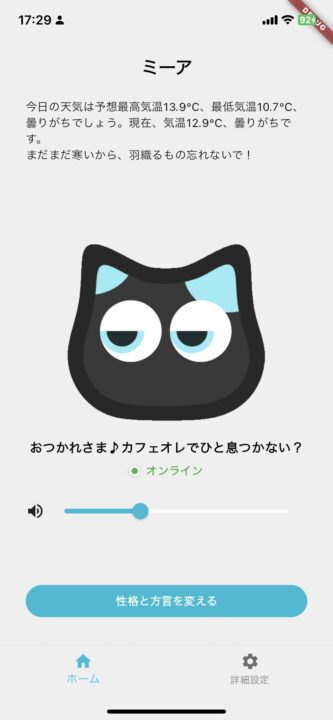
The processing of notifications in the background when they are tapped can be controlled by adding FirebaseMessaging.onMessageOpenedApp, but in this case, we only need to move to the app’s home screen when the user taps the notification, so we did not set anything and left the default behavior as it is. However, in this case, since we only need to move the notification to the app’s home screen when the user taps it, we did not implement any additional settings.
When I actually tapped the notification, the home screen opened.
Test message transmission (foreground)
In order to receive FCM push notifications when in the foreground on iOS, a specific listener must be set up in the Flutter app. This will allow the app to catch and properly handle notification messages even when the app is active.
Use FirebaseMessaging.onMessage to receive notifications while the app is running in the foreground and overlay them using the overlay_support package.
// lib/main.dart
import 'package:firebase_core/firebase_core.dart';
import 'package:firebase_messaging/firebase_messaging.dart';
import 'package:flutter/material.dart';
import 'package:overlay_support/overlay_support.dart';

void main() async {
  WidgetsFlutterBinding.ensureInitialized();
  await Firebase.initializeApp(options: DefaultFirebaseOptions.currentPlatform);

  // FCM の通知権限リクエスト
  final messaging = FirebaseMessaging.instance;
  NotificationSettings settings = await messaging.requestPermission(
    alert: true,
    announcement: false,
    badge: true,
    carPlay: false,
    criticalAlert: false,
    provisional: false,
    sound: true,
  );
  print('User granted permission: ${settings.authorizationStatus}');

  // トークンの取得
  final token = await messaging.getToken();
  print('FCM TOKEN: $token');

  // フォアグラウンドでの通知受信時のハンドラ
  FirebaseMessaging.onMessage.listen((RemoteMessage message) {
    // 通知があるか確認
    if (message.notification != null) {
      // 通知のタイトルと本文をオーバーレイで表示
      showSimpleNotification(
        Text('${message.notification!.title}'),
        subtitle: Text('${message.notification!.body}'),
        background: Colors.blue,
        duration: const Duration(seconds: 3),
      );
    }
  });

  runApp(const ProviderScope(child: ClockyApp()));
}
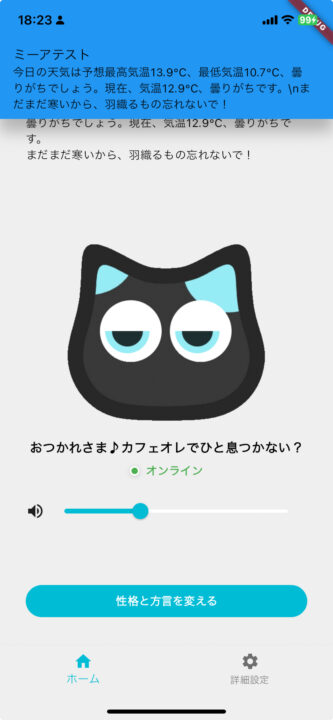
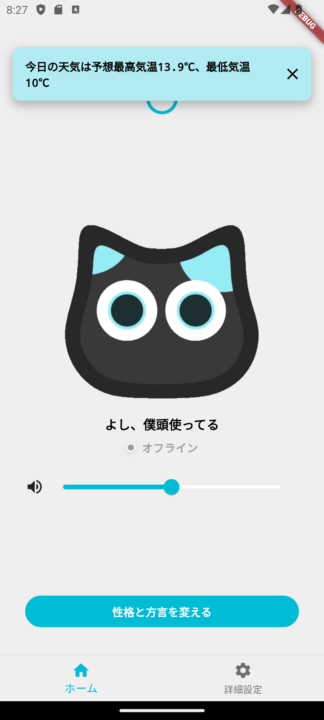
When the application was put in the foreground and a test transmission was performed with FCM, a Push notification was successfully displayed.
Then, minor modifications were made to the notification UI to match the application color and to display the close icon on the right side, and the results were checked with an Android emulator (right).
Now that the configuration of the application receiving side of FCM is complete, the next step is to implement the server side of the function to send push notifications to FCM on a regular basis.



コメント