Introduction.
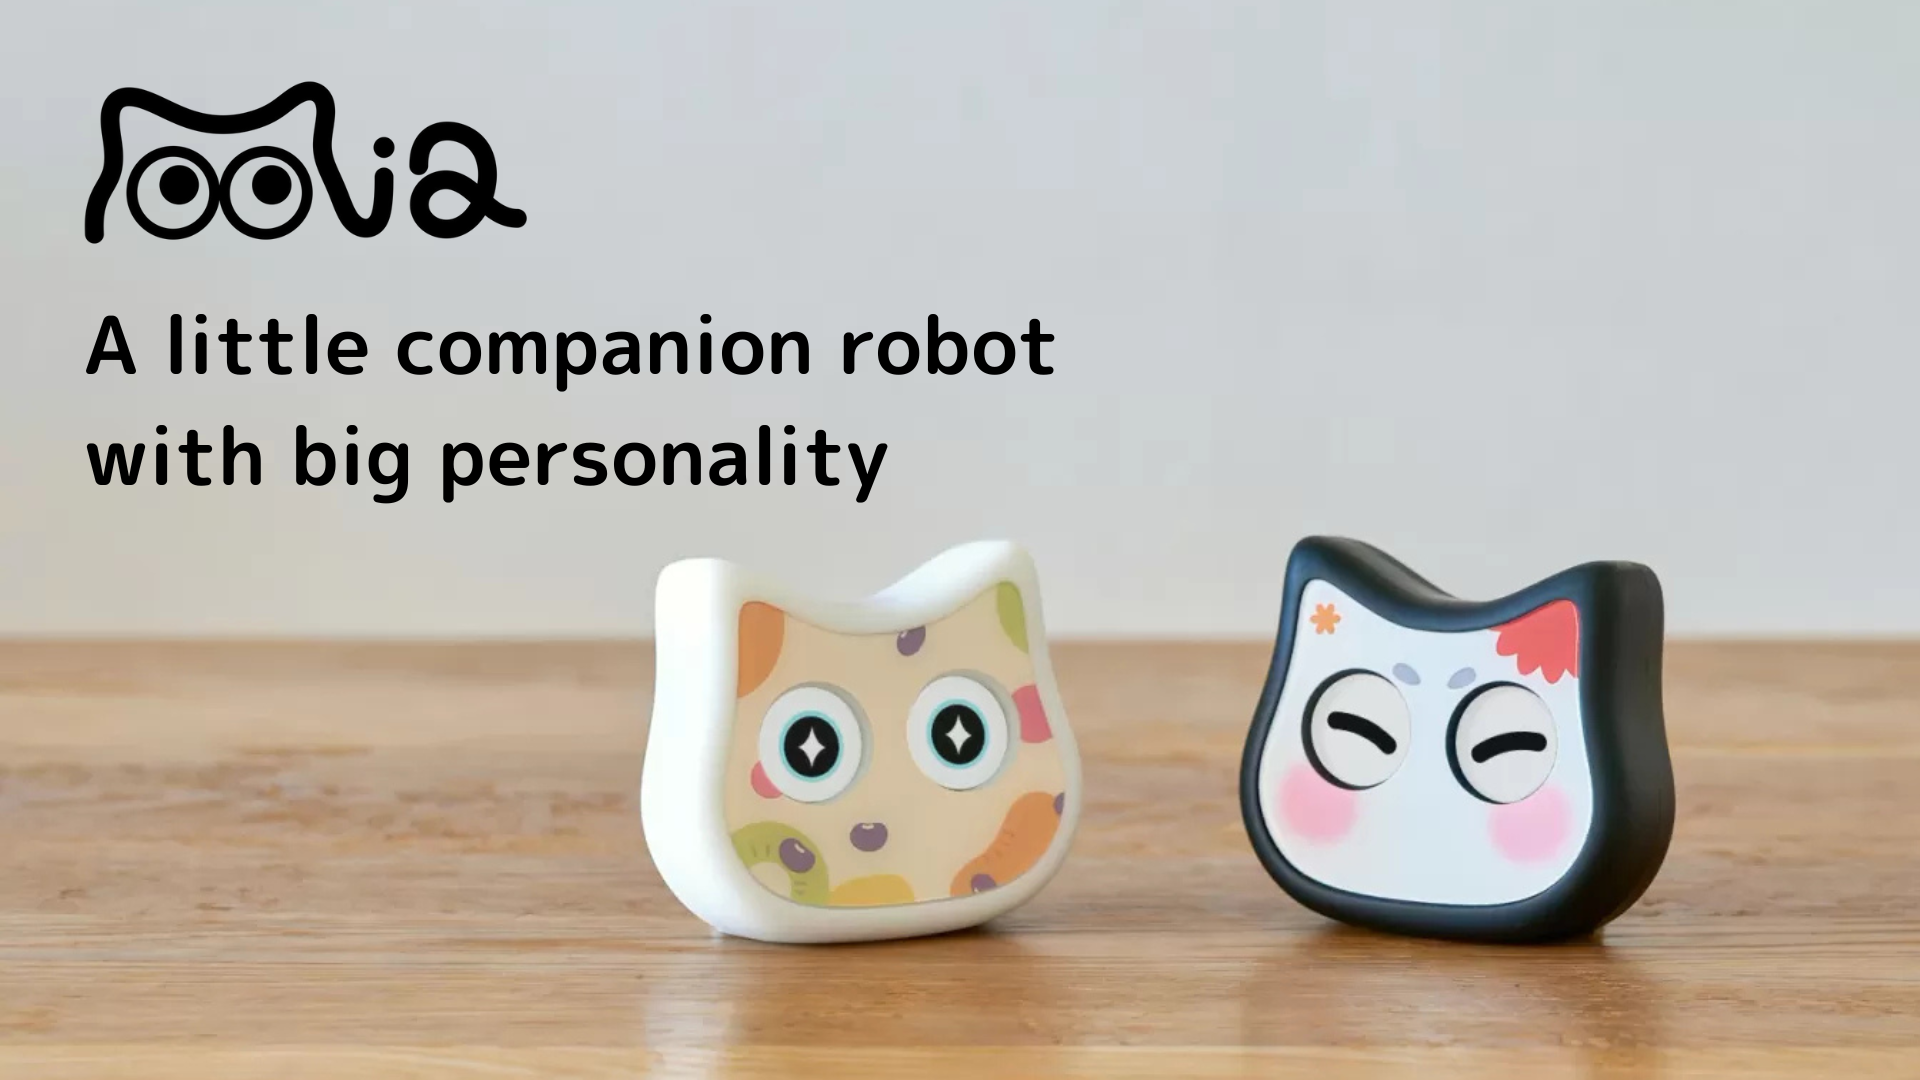
I am developing a talking cat robot “Mia”, which speaks various dialects.
One useful feature currently offered by Mia is the ability to voice the day’s weather and a word of advice (e.g., “Don’t forget your folding umbrella” if it is raining) at that time of day, if you enter your place of residence in the application and set a weather notification time.

I wondered what other features I would use, and decided to add a “calendar linkage to notify appointments” feature.
For example, assume the following scenario
Example: “The next meeting, a development meeting, will begin in five minutes. Are your presentation materials ready?”
This kind of voice notification of appointments based on calendar information helps users manage their time.
Implementation overview of voice notification of appointments with calendar linkage
The following steps are required to achieve this functionality
1) Linking the Flutter application to Google Calendar
Retrieve appointment information from the user’s Google Calendar.
Required appointments are within the “same day (today’s 0:00 to 23:59)” range.
Appointments are updated every few hours to accommodate user changes.
2) 5-minute notification trigger
Event information is processed in the application 5 minutes prior to the start of the appointment.
(3) Generation and transmission of voice notification
The server synthesizes speech from the text of the schedule title and sends it to the main unit of Mia.
(4) Voice playback
Mia plays back voice data and notifies the user
This time, at the very front, I would like to implement accessing Google Calendar from the Flutter application and displaying the day’s schedule information (start time and title) in the console once it is done.
The text to speech synthesis and the part that sends the text to Mia’s main unit for voice playback are already done by the weather notification function, so once the above is done, all that is left is to connect them together.
Enable Google Calendar API in GCP
To access Google Calendar, the “Google Calendar API” must be used.
Open google cloud, enter “google calendar api” in the search field, and click “Enable” for the displayed calendar api.

Set OAuth consent screen
When using the Google Calendar API, the OAuth consent screen must also be set up to use OAuth 2.0 authentication.

This time, since the service will also be offered for all users with a general Google account, select “External” and click Create.
Edit App Registration
You will then be taken to the app registration edit screen, where you enter the app information (app name, support email address). There are other optional setting items such as logo and app domain, but we will skip them this time.

Setting Scope
To access the Google Calendar API, you need to add the following scope, so add
https://www.googleapis.com/auth/calendarhttps://www.googleapis.com/auth/calendar.readonly

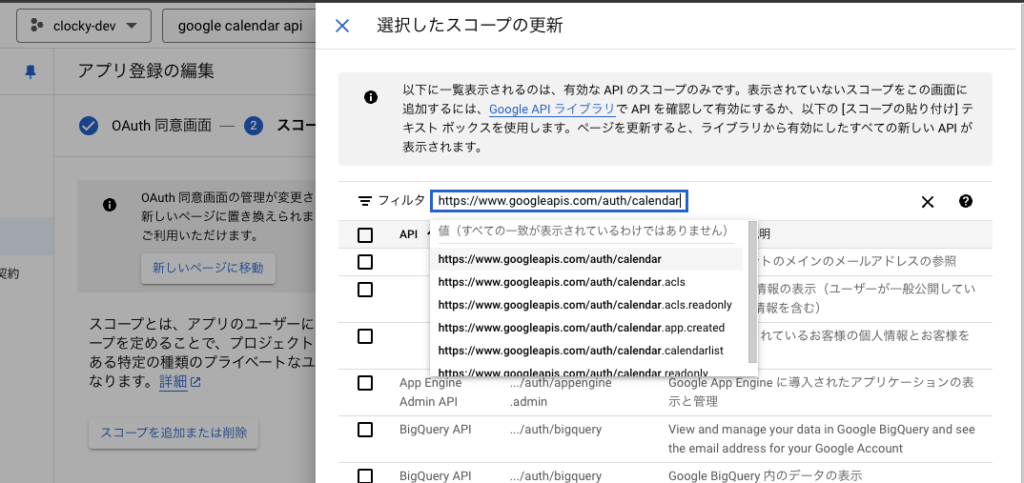
When added, the following appears in the sensitive scope column.

Test User Setup
During the development phase, you will need to set up test users (Google accounts) who can use the app, so add your or your developer’s gmail to the list.
Only test users can access the app while the publish status is set to “testing”. The maximum number of authorized users before the app is verified is 100.

Generate OAuth 2.0 client ID
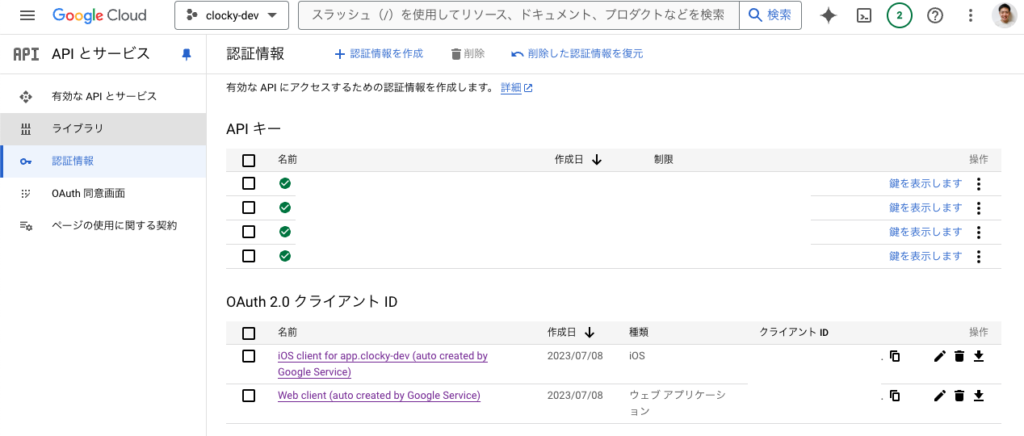
After setting up the OAuth consent screen, generate an OAuth 2.0 client ID in the API and Services → “Authentication Information” tab.
If you are using Firebase or Google Cloud, Google may automatically create the required OAuth client ID when you activate certain services (e.g. Firebase Authentication), and you may see “(auto created by Google Service)” and a bare OAuth 2.0 client ID may be displayed.
In that case, open the contents and check if the “Approved JavaScript Generator” and “Approved Redirect URI” are set correctly, and if there are no problems, use the automatically generated client ID.
Flutter App Settings
Install required packages: googleapis, googleapis_auth, google_sign_in
Install the following three required packages
googleapis: Official package for accessing various Google APIs.extension_google_sign_in_as_googleapis_auth: Package for completing OAuth 2.0 authentication in-app without a transition to the browser.http: HTTP client for sending API requests.google_sign_in: Package for signing in with a Google account
flutter pub add googleapis
flutter pub add googleapis_auth
flutter pub add http
flutter pub add google_sign_in
Flow of calendar integration when using Google Sign-In
sign-in request
- Use the
google_sign_inpackage to require users to sign in.
OAuth Consent Screen
- At first sign-in, Google automatically displays a consent screen for the scope requested by the application. Users can grant or deny permissions.
Token Acquisition
- If the user agrees, an authentication token (access token) is returned, allowing access to the Google Calendar API, etc.
The official flutter describes how to authenticate and access Google APIs, including the Google Calendar API.
Add URL scheme to Info.plist
Add GIDClientID (required by Google Sign-In) and URL scheme (reverse client ID) to Info.plist as necessary settings to make Google Sign -In work with iOS apps.
Adding external linkages or specific URL schemes to Info.plist, iOS will treat this as a permission list. settings needed to meet iOS security requirements
GIDClientID
- An “iOS Client ID” created in Google Cloud Platform (GCP) under “APIs and Services > Authentication Information”.
CFBundleURLSchemes
- This setting registers a “redirect URL scheme” for Google Sign-In to return to the application after authentication.
- Convert the client ID to reverse format and register it (e.g.
com.googleusercontent.apps.YOUR_REVERSED_CLIENT_ID).
	<!-- 既存のキーはそのまま維持 -->
	CFBundleDevelopmentRegion
	$(DEVELOPMENT_LANGUAGE)
	...

	<!-- Google Sign-In の設定を追加 -->
	CFBundleURLTypes


			CFBundleTypeRole
			Editor
			CFBundleURLSchemes

				<!-- firebaseIosIosClientId のリバースIDを設定 -->
				com.googleusercontent.apps.YOUR_REVERSED_CLIENT_ID


	GIDClientID
	YOUR_IOS_CLIENT_ID
Example: Get the day’s schedule and display it in the console
Initialization of Google Sign-In
- The
iosClientIddefined infirebase_options.dart(same asGIDClientID, so you can put it directly in your code and call it and it will work) is used by Google Sign-In.
Specify a date range: set timeMin and timeMax to the current date in order to get only the appointments for the current day.
Data acquisition for events:.
Display of acquired data:.
import 'package:clocky_app/firebase_options.dart';
import 'package:extension_google_sign_in_as_googleapis_auth/extension_google_sign_in_as_googleapis_auth.dart';
import 'package:flutter/material.dart';
import 'package:google_sign_in/google_sign_in.dart';
import 'package:googleapis/calendar/v3.dart' as calendar;

class CalendarIntegrationScreen extends StatelessWidget {
  const CalendarIntegrationScreen({super.key});

  @override
  Widget build(BuildContext context) {
    return Scaffold(
      appBar: AppBar(
        title: const Text('当日の予定を表示'),
      ),
      body: Center(
        child: ElevatedButton(
          onPressed: () async {
            await _getTodayEvents(context);
          },
          child: const Text('予定を取得する'),
        ),
      ),
    );
  }

  Future _getTodayEvents(BuildContext context) async {
    try {
      // Google Sign-Inの初期化
      final GoogleSignIn googleSignIn = GoogleSignIn(
        scopes: [
          'https://www.googleapis.com/auth/calendar.readonly', // Google Calendarの読み取りスコープ
        ],
        clientId:
            DefaultFirebaseOptions.ios.iosClientId, // FirebaseのiOSクライアントID
      );

      // サインイン実行
      final GoogleSignInAccount? account = await googleSignIn.signIn();
      if (account == null) {
        // サインインがキャンセルされた場合
        print('サインインがキャンセルされました');
        return;
      }

      // 認証クライアントの取得
      final authClient = await googleSignIn.authenticatedClient();
      if (authClient == null) {
        throw Exception('認証クライアントの取得に失敗しました');
      }

      // Google Calendar APIの初期化
      final calendarApi = calendar.CalendarApi(authClient);

      // 当日の開始時刻と終了時刻を設定
      final now = DateTime.now();
      final startOfDay = DateTime(now.year, now.month, now.day).toUtc();
      final endOfDay =
          DateTime(now.year, now.month, now.day, 23, 59, 59).toUtc();

      // 当日の予定を取得
      final events = await calendarApi.events.list(
        'primary', // デフォルトのカレンダー
        timeMin: startOfDay,
        timeMax: endOfDay,
        singleEvents: true,
        orderBy: 'startTime',
      );

      // 取得した予定をコンソールに表示
      if (events.items != null && events.items!.isNotEmpty) {
        debugPrint('当日の予定: ${events.items!.length}件');
        for (var event in events.items!) {
          final startTime = event.start?.dateTime ?? event.start?.date; // 開始時間
          final title = event.summary ?? 'タイトルなし'; // イベントタイトル
          debugPrint('予定: $title, 開始時間: $startTime');
        }
      } else {
        debugPrint('本日の予定はありません');
      }
    } catch (e) {
      // エラーハンドリング
      debugPrint('エラーが発生しました: $e');
    }
  }
}
operation check
On the app’s settings screen, click Calendar Linkage, then go to the Calendar Linkage screen and tap Linkage (design will be modified later).


Then, a sign-in screen with a google account opens in the in-app web view.

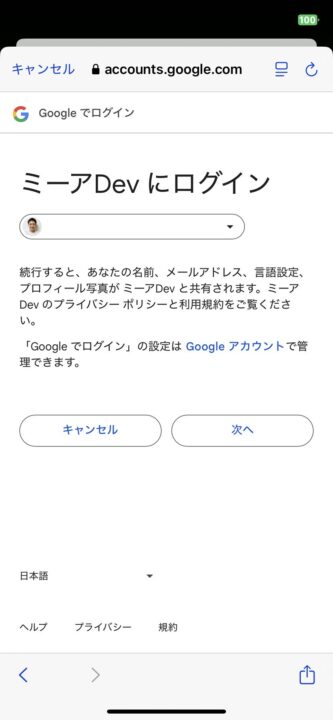
When signing in, you will be asked to agree to obtain calendar information. Check the box and click “Continue.
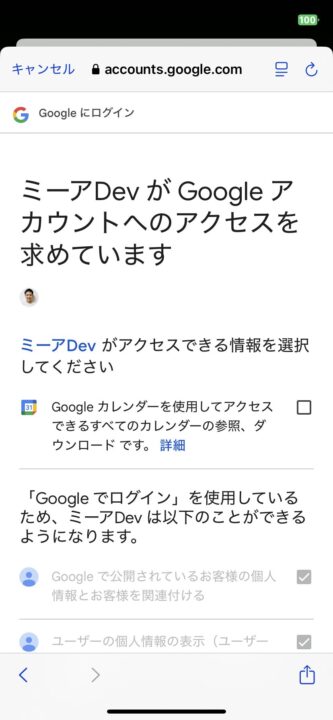
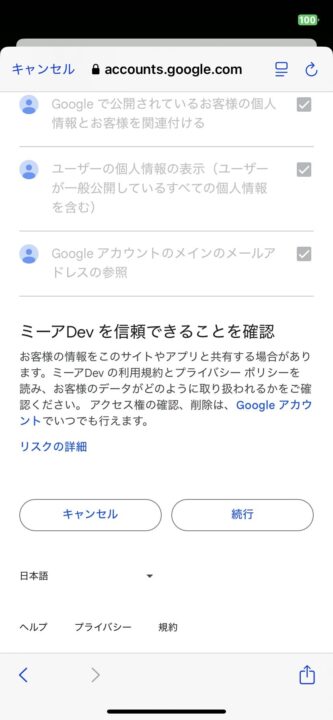
Then, the calendar linkage was completed and the day’s schedule was displayed on the app console screen as shown below.
flutter: 当日の予定: 6件
flutter: 予定: 子供保育園送り・移動, 開始時間: 2024-11-20 22:00:00.000Z
flutter: 予定: 移動, 開始時間: 2024-11-21 04:30:00.000Z
flutter: 予定: XX先生, 開始時間: 2024-11-21 05:45:00.000Z
flutter: 予定: 移動, 開始時間: 2024-11-21 08:30:00.000Z
flutter: 予定: 子供迎え・風呂, 開始時間: 2024-11-21 09:00:00.000Z
I was able to successfully get to the point of outputting the day’s schedule to the app console.
In practice, since users may change their Google Calendar even on the same day, only the day’s events are checked from the app in the background (e.g., flutter_background_fetch package) every few hours, and the retrieved events are held locally in the app once, and then each When it is “5 minutes before” the event, send the text information of the event to the server.
The implementation of this is to be done in the next issue. This implementation will be discussed in the next issue.
