Introduction.
I am developing “Mia,” a talking cat-shaped robot that speaks various dialects.
We previously described an article on “SNS Marketing: How to Create and A/B Test Verification of FB and Insta Ad Reel Videos”.
In this article, we describe the steps to install a Facebook (Meta) pixel and create a retargeting ad in WordPress + WooCommerce for visitors to the site after viewing the FB/Insta ad reel video once.
What is Meta Pixel?
The Meta pixel is a tool to track whether a user who clicks on an ad has accessed the website. It is important to place the pixel on every page of the website.
Retargeting ads collect the following user behavior data through pixels
- Site Visit (PageView)
- Add to Cart (AddToCart)
- Purchase completed (Purchase)
Without pixels, access to the website cannot be captured on the Meta side, and custom audiences such as “visitors within the past 30 days” or “cart-added users” cannot be created.
So, before creating a retargeting ad, first install a Meta pixel on your website.
Facebook pixel in WordPress (Cocoon theme + WooCommerce)
Generating Meta pixels
- Log in to Meta Ads Manager.
- Go to Event Manager and select “Connect Data Source” > “Web”.
- Select “Meta Pixel” to create a new pixel.
- Name the pixel and enter the website URL (optional).
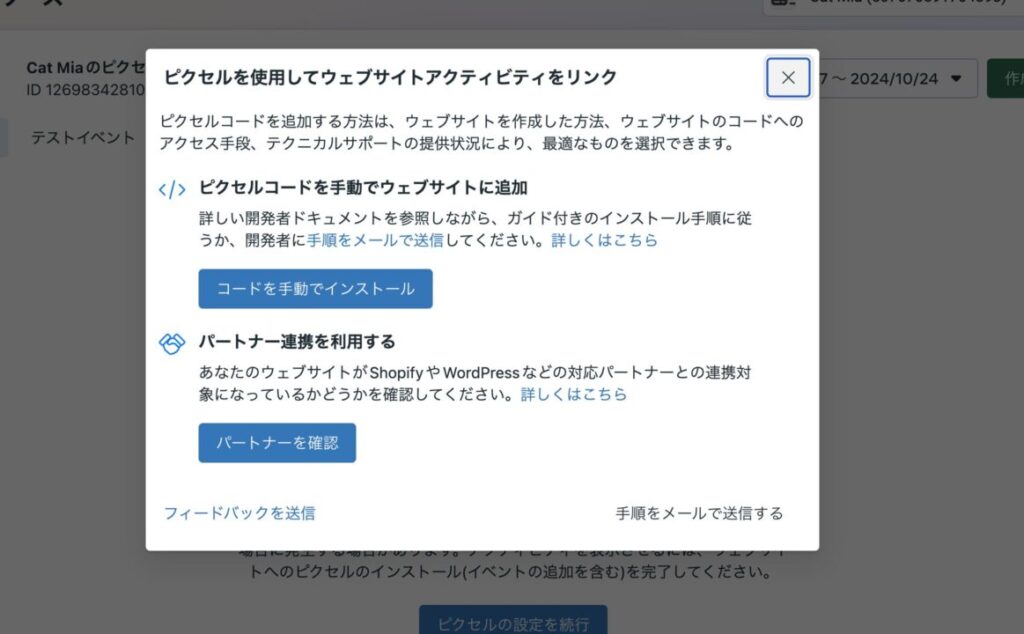
- Click on “Install Code Manually” and copy the code as the HTML tags appear.
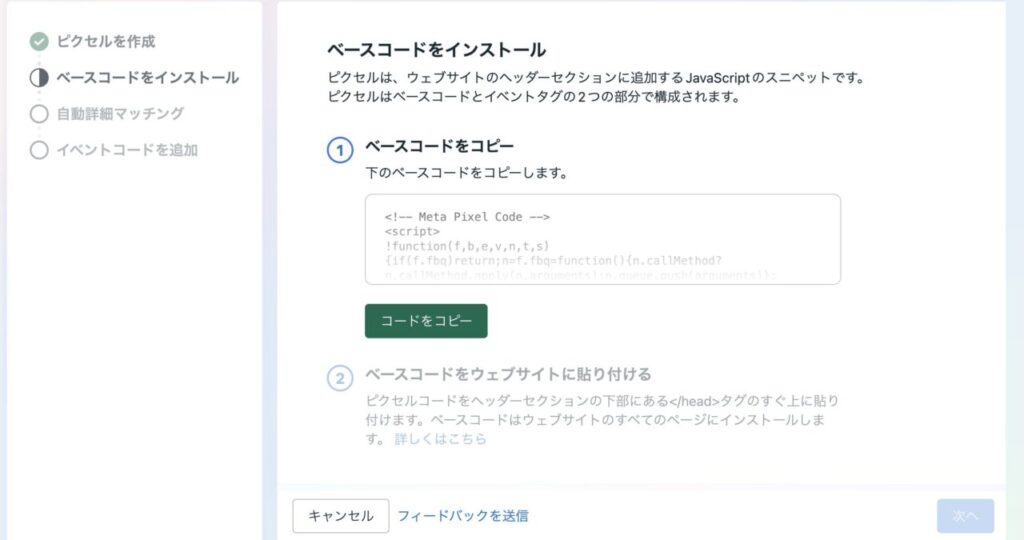
Installing Pixels in WordPress Themes
- Log in to the WordPress admin panel.
- Go to “Cocoon Settings” > “Access Analysis and Authentication”.
- Paste the Meta pixel code you retrieved into the “Code for Head” field and click “Save Changes
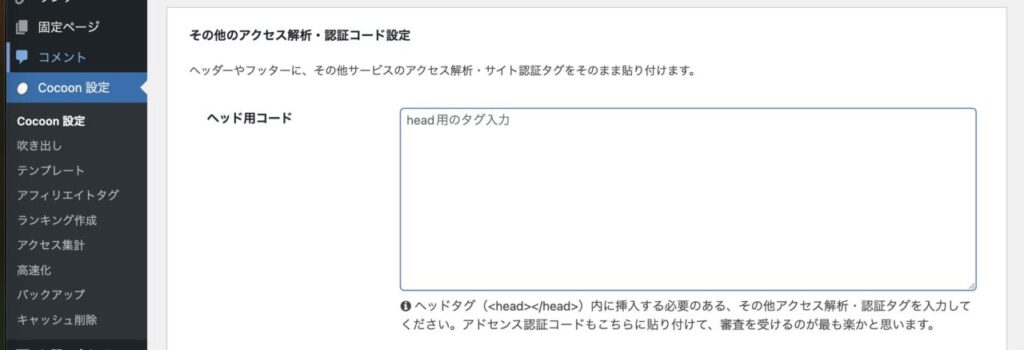
Tracking WooCommerce events (optional)
- Install the “Facebook for WooCommerce” plugin to automatically track events such as “add cart”, “checkout”, and “purchase completed” in WooCommerce.
- Search for “Facebook for WooCommerce” under “Plugins” > “Add New” and install and activate it.
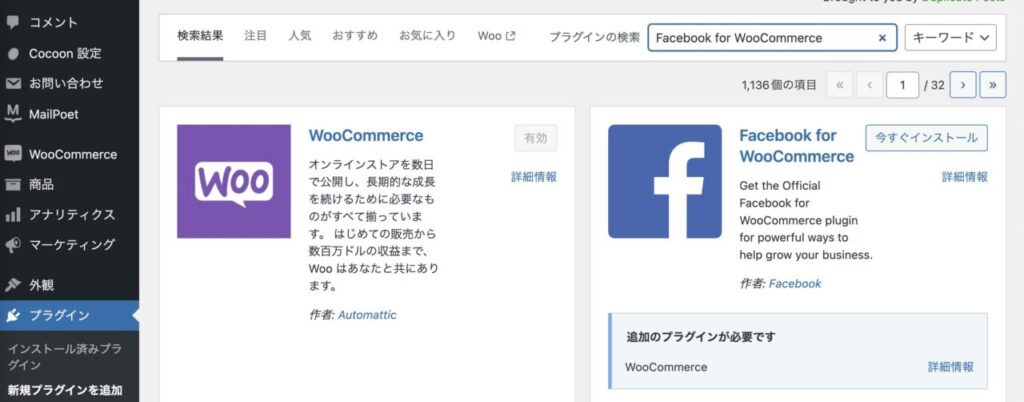
After activation, go to WooCommerce > Settings > Integration to configure Facebook settings, log in to your Meta account and link your pixel to WooCommerce.
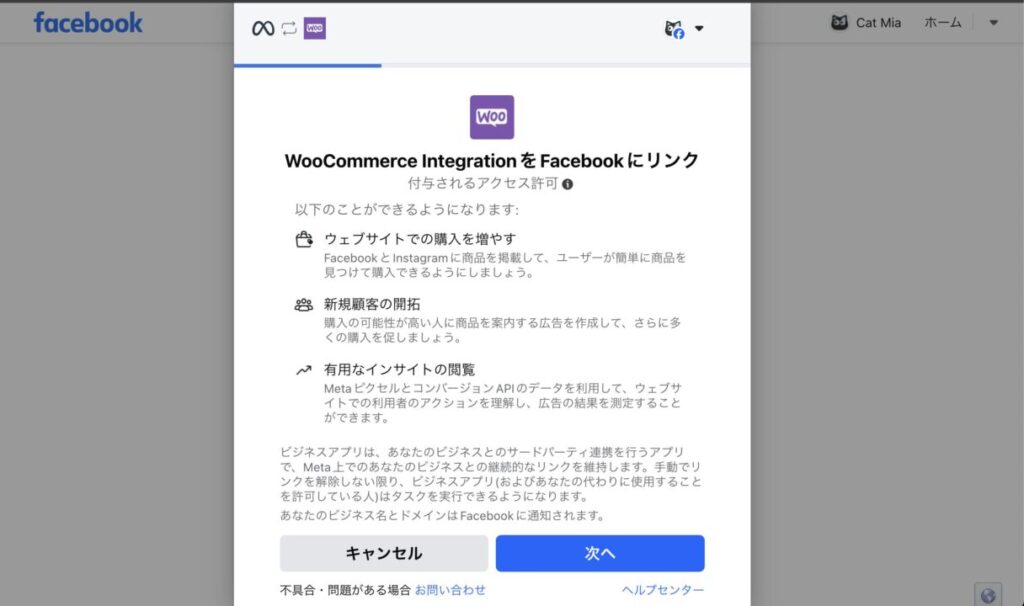
Confirmation of pixel operation
Install Meta pixel helper (Chrome extension).
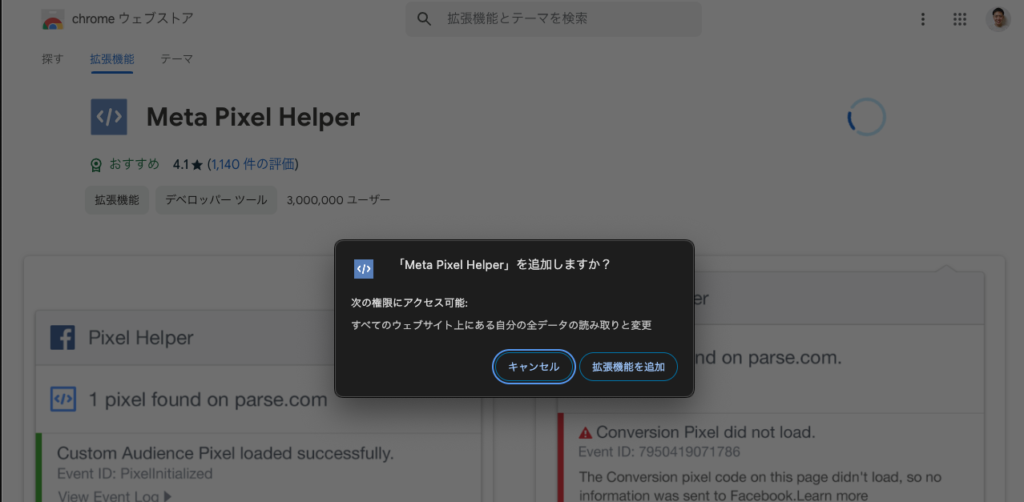
Go to the website and verify that the pixels are working properly.
If events are triggered correctly, such as “PageView” when the site is opened, “AddToCart” when added to the shopping cart, etc.


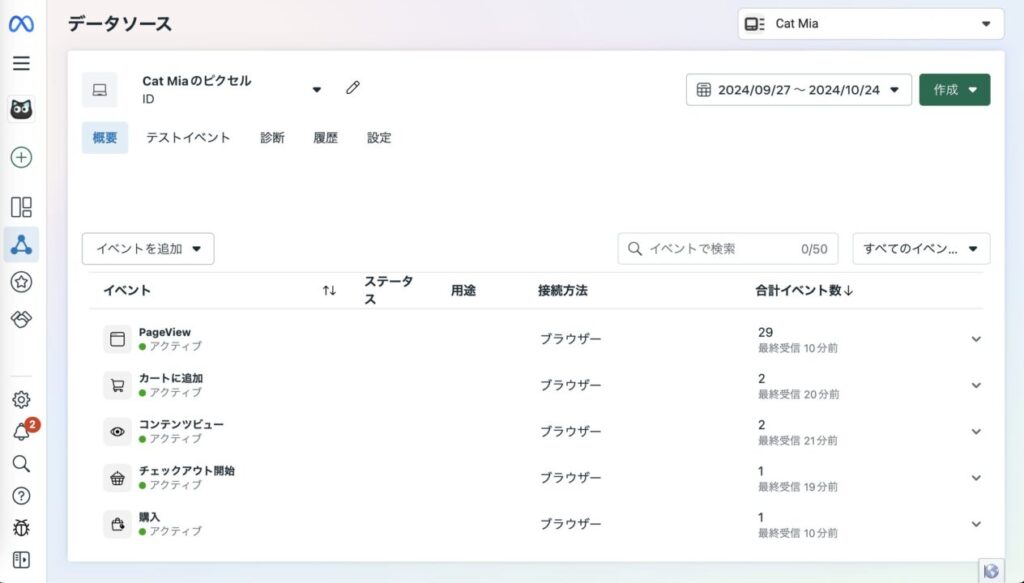
You can check the status of the pixel from the “Data Source” in the Facebook Ads Manager. As shown below, you can see that events such as “PageView”, “AddToCart”, and “Purchase” are “active” and are being received.
Set up event configuration tools (optional; done in FB Ads Manager)
- The Event Settings tool is a tool to add events to specific website elements (button clicks and link clicks) from the Meta ad manager.
- WooCommerce events (add cart, complete purchase) are already tracked automatically by the Facebook for WooCommerce plugin. Therefore, there is no need to reconfigure them in the Facebook Ad Manager’s Event Settings tool.
- However, if you want to track buttons or page elements that are not related to WooCommerce (e.g., “play a product introduction video” or “click on a specific link”), you can use the event configuration tool for additional tracking.
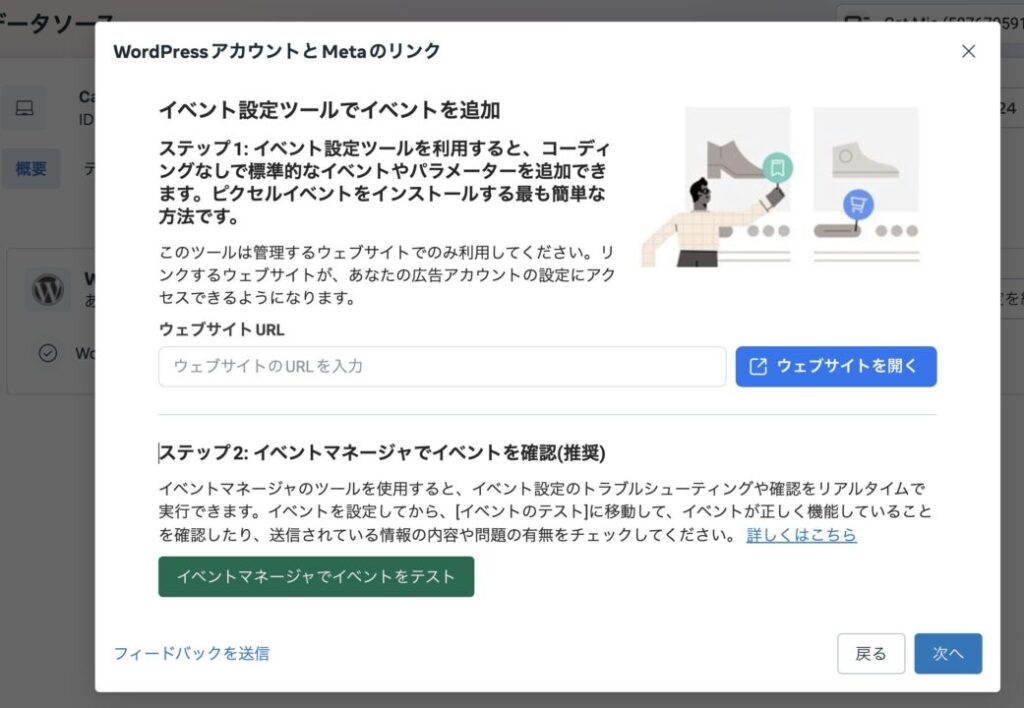
This time, do not set it up and move on.
This is the end of the Facebook pixel setup. Next, we move on to creating retargeting ads.
Steps to create a retargeting ad
In the case of retargeting ads, the ads are basically displayed to a specific population of people who have once visited a website, so it is necessary first to specify the target attributes of the ad-serving destination. Therefore, the first step is to create a custom audience, and then create ads for that custom audience.
Create custom audiences
Log in to Meta Ads Manager and select “Audiences” > “Create Custom Audience” in the left sidebar.
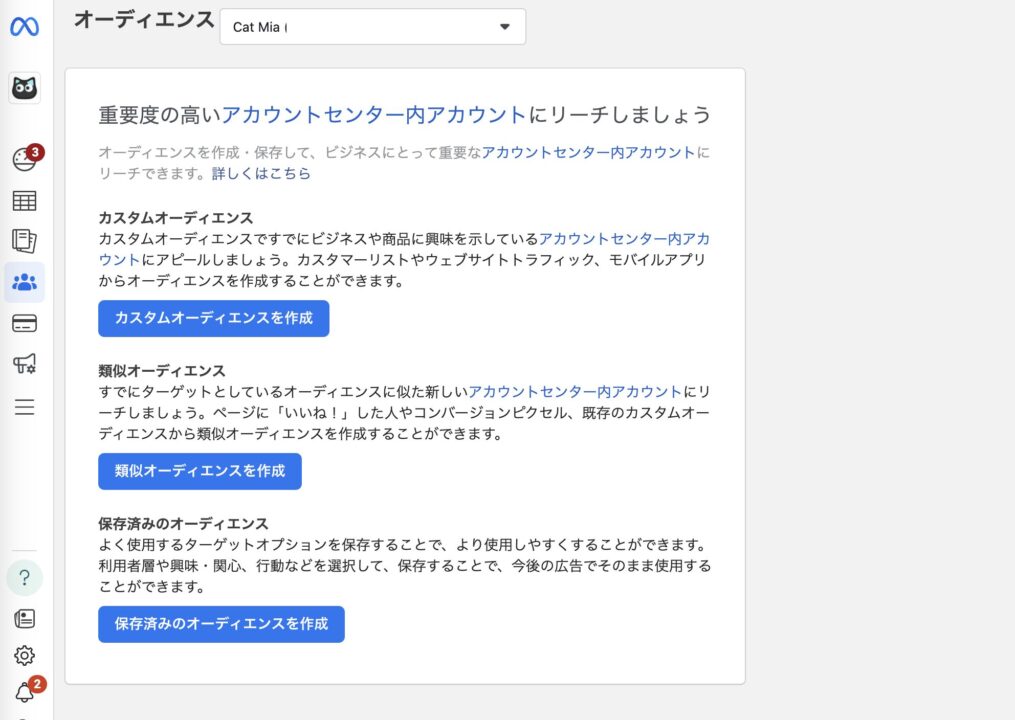
Select “From Website” to create an audience based on the events tracked by the pixel.
Conditions can be specified, including exclusions. In this case, we set the target to “all users who have accessed the website within the past 30 days” who have not made a purchase. For purchases, select the “Purchase” event that was set up in the facebook for woocommerce plugin earlier.


Note: If you have just created a custom audience, it may take several hours to be reflected

Create retargeting ads
Create a new ad campaign in Meta Ads Manager.
Select a campaign objective. Since this is for people who have already visited the site once via Facebook/Instagram ads, select “sales” rather than leads or traffic for the objective.
You will then be recommended to select Advantage+ Shopping Campaign, but this time you want to select the custom audience you just created, so select the “Manually Created Sales Campaign”.
The Advantage+ Shopping Campaign (formerly known as the Dynamic Ad Campaign) is designed to be automatically optimized by Meta’s AI to deliver ads. In this campaign, Meta automatically selects audiences, which may limit the selection of custom audiences.


The Create Ad Set screen will also prompt you to select Advantage+ Audience in the Advantage+ Audience section, but press the “Switch to original audience option” button. A pop-up will also alert you, but select “Use original audience”.

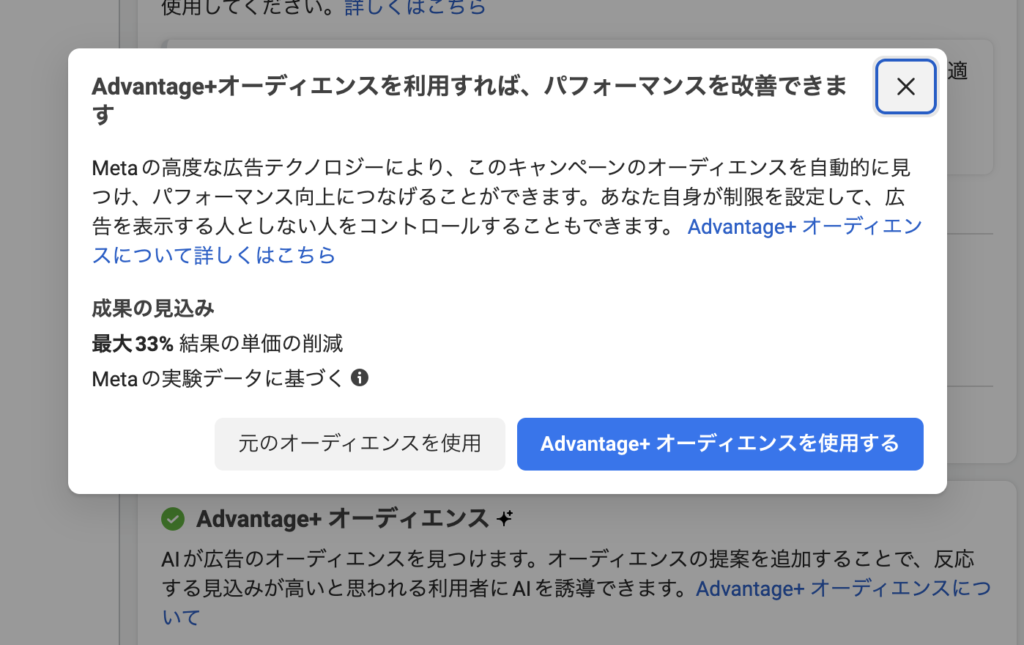
Finally, you will see a tab titled “Create New Audience,” and below that, hover over the search field for custom audiences and select the audience you just created from the search for existing audiences.


Setting up ad creatives
Set up the ad creative again.
Add media (still images, video, etc.) and fill in the main text, headline, description, links, etc.

As for media, we decided to use the following five still images for this project. Since they are aimed at people who have already visited the site, to encourage them to buy, we focused on creative that might lead to decision-making, such as availability, testimonials from users who have purchased, size, and price.

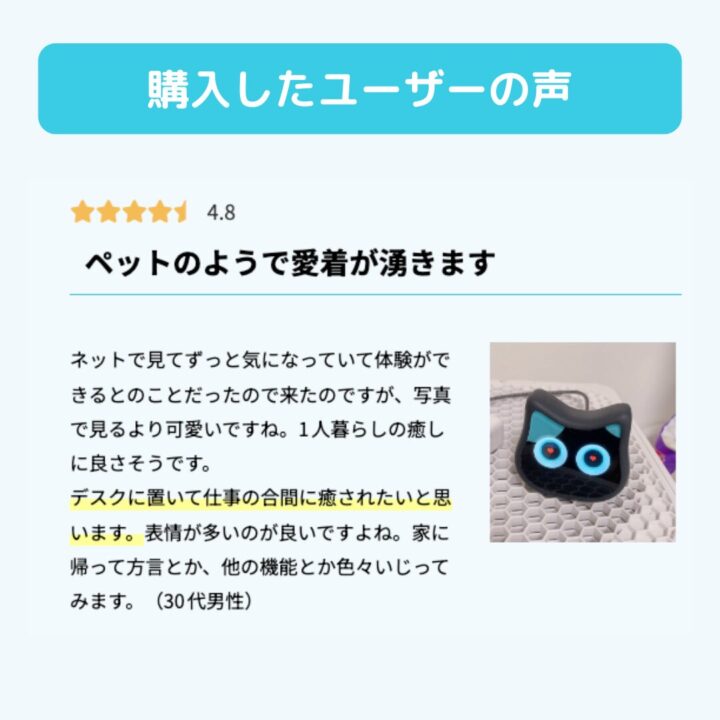

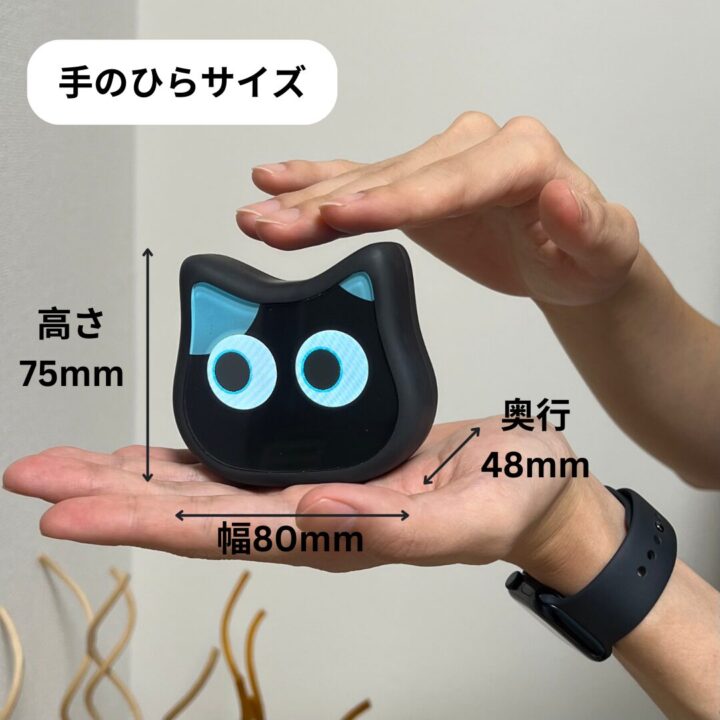

Since the ad format was chosen to be flexible, Meta’s AI will automatically optimize the ad so that only the best-performing image is displayed alone in some cases, while in others, all five images set are displayed in a carousel.
In addition, up to five main texts, headings, and descriptions can be registered for each, so that messages that are likely to lead to purchases can be described.
(e.g.) That dialect Nekrobo, still waiting.
After setting up, click the Publish button.
summary
We have described the steps to install a Facebook (Meta) pixel and create a retargeting ad in WordPress + WooCommerce. In this case, the retargeting ads were designed to advertise to “visited the site but not yet purchased” users. A separate creative ad was created that would lead to a purchase, separate from the ad to maximize site clicks to the homepage, which was originally run as a Facebook/Instagram ad.
After installation, we will check from time to time whether the pixels are acquiring data properly and see how effective the ads are.
