Introduction.
Talking cat-shaped robot “Mia” that speaks various dialects is under development.

In this article, we describe the procedure for building the application on an actual Android device.
The actual Android device used in this project is Android One X4.
Enable developer options on actual Android device
First, the actual Android device on which the Flutter application is to be built must be recognized as a development device.
Connect the Android device to the PC with a USB cable.
Open the “Settings” application on the device, scroll down the “Settings” menu to find “System” or “Device Information” and tap it.


Find the “build number” in “device information” and tap the “build number” seven times in succession. Then a notification will pop up at the bottom of the screen saying “Developer mode is enabled.
If you return to the “Settings” menu again, you will see “Developer Options” in the “System” section.


Open “Developer Options” and enable “USB Debugging”. If a pop-up appears, follow the confirmation message and tap “OK” or “Allow”.


Once USB debugging is enabled, the Android One X4 can be used as a development device; re-run the flutter devices command to see if the device is recognized.
Confirmed that X4 SH (mobile) and android models were successfully displayed
~/dev/clocky/clocky_app feat-voice-record ⍟22 flutter devices ✔ 6094 07:42:04
Found 4 connected devices:
X4 SH (mobile) • 3534930XXXXXXXX • android-arm64 • Android 10 (API 29)
macOS (desktop) • macos • darwin-arm64 • macOS 14.5 23F79 darwin-arm64 (Rosetta)
Mac Designed for iPad (desktop) • mac-designed-for-ipad • darwin • macOS 14.5 23F79 darwin-arm64 (Rosetta)
Chrome (web) • chrome • web-javascript • Google Chrome 127.0.6533.89Android Studio Setup
Download Android Studio
To develop Android applications with Flutter, you need to set up the Android SDK using Android Studio.
Download Android Studio from the link below and select either Intel Chip or Apple Chip.

Introducing the Flutter Plugin
To create and manage Flutter projects within Android Studio.
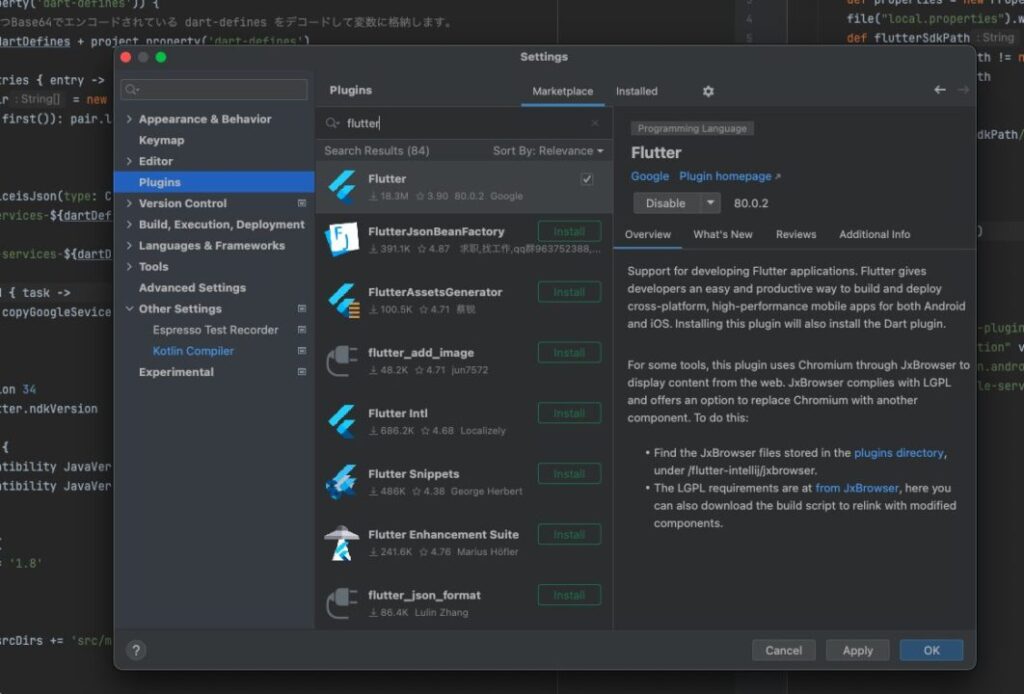
- Open Android Studio and select “Settings” from the menu.
- Select “Plugins” from the menu on the left and search for “Flutter” on the “Marketplace” tab.
- Install the “Flutter” plug-in. The “Dart” plug-in will be installed at the same time.
- After installation is complete, restart Android Studio to activate the plugin.
Java Installation
JDK is required for the Flutter build process; to install the latest version of Java, download the JDK from Oracle’s official website. Or, if you are using homebrew on macOS, install it with the following command
$ brew install javaJDK environment variable settings (for macOS)
- Open a terminal and open the
~/.bash_profileor~/.zshrcfile (depending on which shell you are using). - Add the following line to set the JDK path
export JAVA_HOME=/Library/Java/JavaVirtualMachines/jdk<version>.jdk/Contents/Home- Save the file and restart the terminal or run
source ~/.bash_profileorsource ~/.zshrcto reflect the changes.
Run java -version in a terminal to confirm that it has been installed.
~/dev/clocky/clocky_app feat-voice-record ⍟22 java --version SIGPIPE(13) ↵ 6091 10:23:09
openjdk 21.0.4 2024-07-16 LTS
OpenJDK Runtime Environment Temurin-21.0.4+7 (build 21.0.4+7-LTS)
OpenJDK 64-Bit Server VM Temurin-21.0.4+7 (build 21.0.4+7-LTS, mixed mode)Configuration of build.gradle
This information was previously described in the following article.
Check your Flutter environment with the Flutter doctor command
After the above configuration in Android Studio, run the flutter doctor command in the terminal.
If “!” is displayed in the Android toolchain section, the Android SDK path may not be set. is displayed in the Android toolchain section, the Android SDK path may not be set. In that case, follow the flutter doctor's instructions to fix the problem.
~/dev/clocky/clocky_app feat-voice-record ✚ ⍟22 fvm flutter doctor ✔ 6092 07:30:26
[WARN] Found fvm_config.json with SDK version different than .fvmrc
fvm_config.json is deprecated and will be removed in future versions.
Please do not modify this file manually.
[WARN] Ignoring fvm_config.json
Doctor summary (to see all details, run flutter doctor -v):
[✓] Flutter (Channel stable, 3.22.0, on macOS 14.5 23F79 darwin-arm64 (Rosetta), locale ja-JP)
[✓] Android toolchain - develop for Android devices (Android SDK version 34.0.0)
[✓] Xcode - develop for iOS and macOS (Xcode 15.4)
[✓] Chrome - develop for the web
[✓] Android Studio (version 2023.3)
[✓] VS Code (version 1.91.1)
[✓] Connected device (4 available)
[✓] Network resources
• No issues found!Build on actual equipment
Execute the following command to build on the actual device.
fvm: Use thefvmcommand to use the Flutter SDK for the version of Flutter specified in the project. Optionalflutter run: Starts the Flutter application.-dart-define-from-file=dart_defines/dev.env: Read environment variables from thedev.envfile in thedart_definesdirectory and set them in the app. This option is used to inject custom definitions into the application at build time. Optional-d Device ID: Specify the device ID with the-doption (device option) and build on the specified actual device.
fvm flutter run --dart-define-from-file=dart_defines/dev.env -d 35349309XXXXXXXXXThe build was completed successfully.
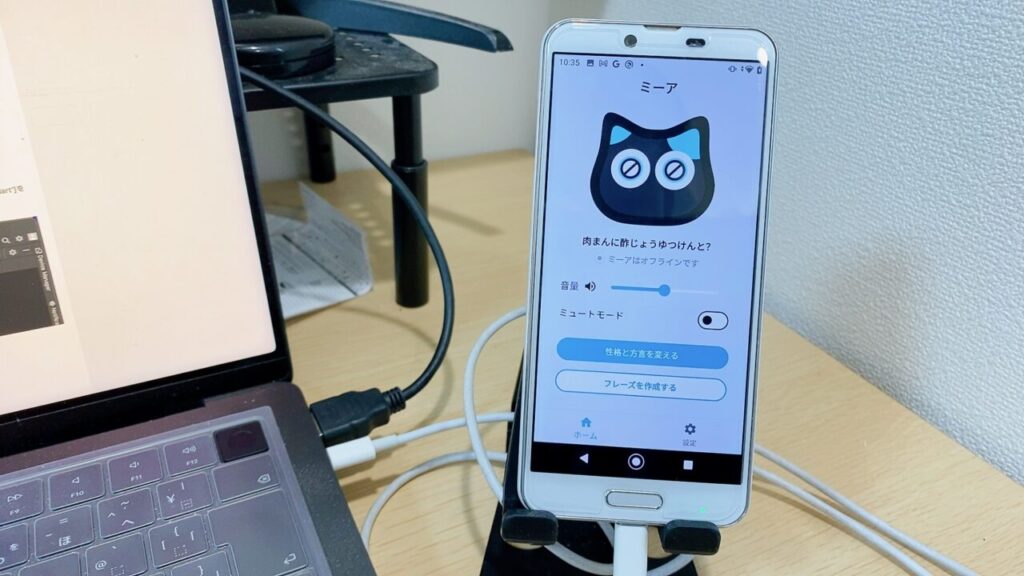
The Device Manager in Android Studio shows the actual device being built.

We will continue to verify the system on actual Android devices during development.
