
buying a new Mac
Personally, I don’t want to replace my iPhone or PC as much as possible because the hassle of setting up the migration (although it has been much simplified in recent years) is a hurdle for me (I’m lazy).
I bought a MacBook Pro (Intel chip) in 2019 and decided to replace it because some USB TypeC ports stopped working and it started acting up when connected to a display, so I thought “it’s been 5 years and I should replace it”.
Which MacBook to buy?
The combination of higher-specification PCs and the weak yen has made MacBook prices higher year after year. The entry-level model price seems not to have changed much from the ¥100,000 range, but the top-end model’s price has skyrocketed sharply.
By the way, I remember that the MacBook I used to use was a 2019 MacBookPro from Intel Mac, which cost about $450,000 because it had specs stacked to the highest price at the time (memory and storage).
However, even compared to that time, the top-of-the-line MacBook Pro 16-inch M3 Max model has skyrocketed to 650,000 yen. It is now almost like changing a used car.

Now, let us consider whether we really need this level of specifications based on the following three variables.
- MacBook Air / MacBook Pro
- Size: 14″ or 16
- Chip: M3 / M3 Pro / M3 Max
By the way, my Mac usage is as follows
- Programming: somewhat frequently; Docker and XCode are often up all the time
- Video Editing: Edit short videos daily with CapCut
- Frequency of PC use: Almost every waking moment of every day. However, I work mostly at home, so there are not many cases when I use it on the go.
- Display: always use the following display, not 4K (38402160 ), but one resolution lower, 25601080

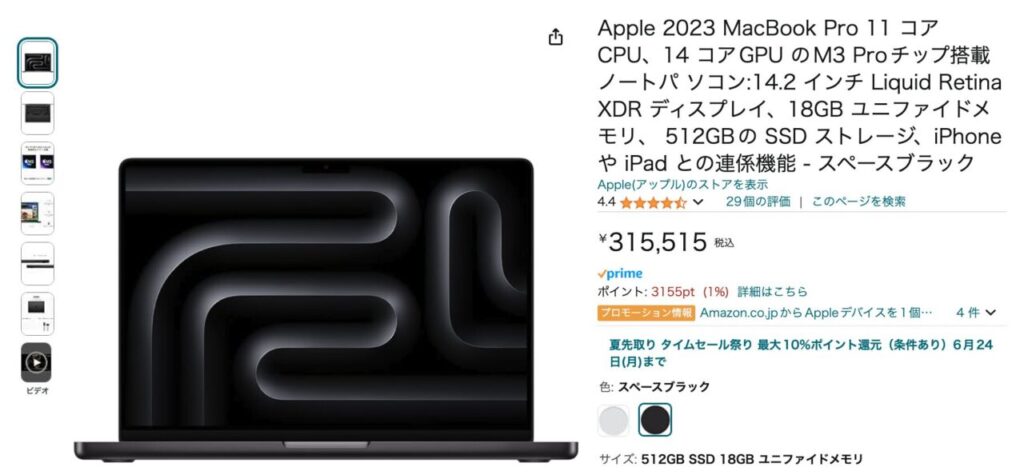
After reading several reviews, I decided to purchase a MacBook Pro 14″ M3 Max.
- MacBook Pro: The Air is cheaper than the Pro, but I read that the Pro is better for programming.
- M3 Pro: There is a top-of-the-line model called M3 Max, but I found a review on video editing that somehow the export time became longer, and since I don’t edit videos for a long time using an amazing gimmick, I don’t think it’s necessary to go this far.
- 14″: The price varies considerably between 14″ and 16″, but this time I decided to go with 14″, which is one size smaller than the 16″ I have used so far. Basically, I work with a dual display by connecting it to a display, so I thought it would not make much difference whether the notebook PC is 14″ or 16″.
- 512GB of storage: My current Mac has 1TB of storage, but I didn’t actually use 1TB. Videos take up a significant amount of space, but after uploading them to YouTube and other sites, they are basically no longer needed, so they are deleted from the local PC, and it feels like I haven’t even used half of the 512GB.
The price is 328,800 yen; the top-of-the-line model purchased at the time of 2019 was around 450,000 yen.

Trade-in + Buy at Apple vs. Buy at Purchase + Buy at Amazon
iPhones and Macbooks can be traded in for your current phone or PC when you replace it. However, this must be done in conjunction with a replacement. It is not possible to request only a trade-in.
Since Apple products are basically forbidden to lower the price, I wondered if they were sold at the same price elsewhere, and when I looked on Amazon to test it out, I found that it was sold at a lower price than Apple. Including points, the actual price is 312,360 yen, which is 16,440 yen cheaper than Apple’s regular price.
However, in this case, you will need to look for another purchase for your current Mac. Here are the Macs we are offering for trade-in/purchase this time.
MacBook Pro i9 2.4GHz 16″ (Late 2019) 1TB SSD
Trade-in estimate on Apple purchase site : discount for trade-in value: 82,000 yen.
In the case of private Mac high-value buyers, it is said that some of them will buy the above model for about 80,000-100,000 yen. So, perhaps I could get a total of 20,000 to 30,000 yen cheaper by purchasing from Amazon + private buyers, but considering the high uncertainty of the purchase price and the hassle involved, I decided to trade in my Mac for a new one.
Select installment payment with payee
I have never opted for installment payments before, but I was told that installment payments can be selected through a post-payment plan called Payday. Moreover, it is a 24-month installment plan with a 0% installment fee.
I thought that if there is 0% installment fee, I don’t have a choice not to choose installment from a cash flow point of view, so I create a payday account and choose installment payment.
The difference in the trade-in was automatically calculated, bringing the total payment to 246,800 yen and the monthly payment to 10,283 yen. With this, I placed my order.

proceed with a trade-in
To make a trade-in, you must first take a picture of your identification information (my number OR driver’s license). Follow the procedure.
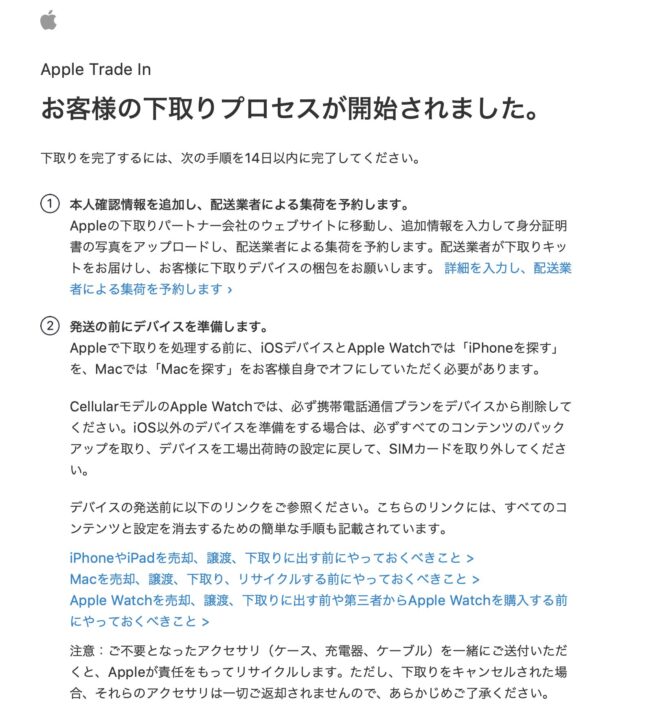
I proceeded with my number card, but the result was NG. Since I had changed my address, the new address was printed on my number card, but the address was blurred because it was blurred. I switched to my driver’s license and tried again.


I need to schedule a pickup, which I did about a week from now. I need to finish the data migration and turn off Find My Mac by then.
Next day M3 Pro MacbookPro arrives
It was faster than I expected, and my new Mac arrived the day after I ordered it.
I had never cared about packaging before, but now that I am in the position of packaging and shipping myself with the talking cat-shaped robot “Mia, ” I have become curious about what other companies’ packaging looks like.
In the case of the MacBookPro, there is an outer box that can be opened by splitting the cardboard in the middle of the back side.


The serial number, Wi-Fi ID, and Bluetooth ID are listed on a sticker on the back of the box.


This is what it looks like when you take out the contents
- Slightly thicker than the 2019 Intel model?
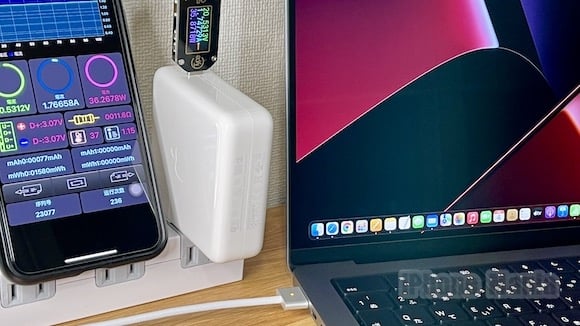
- The charging format supports MagSafe3 ports as well as USB C ports (accessories are designed to use MagSafe3).

The comparison of USB-C and MagSafe3 charging formats was easy to understand in this article.
- There is not much difference in overall charging speed, but MagSafe3 charges faster until the battery reaches 80% remaining charge, and then it charges more slowly (to reduce the load on the battery and extend its service life by slowing down the charging speed once the remaining charge exceeds 80%).
- Benefit of protecting the MacBook Pro by allowing the connector to detach from the port when strong force is applied to the cable (this is surprisingly large).
The setup and data transfer from here is a hassle, and I always end up putting it off. But I decided to proceed. The deadline for trade-in pickup is approaching.
Data Migration with Migration Assistant
As shown below, connect the old Mac (right) and the new Mac (left) with a USB-C cable, then launch the Migration Assistant to migrate data.
When I put them side by side, I see that there is a difference between the 14-inch size and the 16-inch size quite a bit. Also, the screen of the old Mac is dirty.

When I tried to transfer the data, the new Mac asked me to update the OS first, so I did the update.

Data migration was then initiated.
Before starting, the amount of data to be migrated is calculated. This took unexpectedly long, about 20 minutes. We ended up with about 600 GB total on the old Mac, which exceeded the 512 GB of storage on the new Mac, so we decided to thin out the data to be imported.
The data cannot be migrated because there is too much data storage. Please delete the data from the source Mac and try again.” I thought it would be “Please delete the data from the source Mac and try again,” but I was relieved to find that it was not the case.
Unnecessary video data occupied more than 200 GB, so we deleted it and transferred a total of about 420 GB. We later realized that we should have examined the amount of data to be transferred more carefully beforehand.


Data transfer started. At first it was transferring at about 50MB/s over Ethernet, but when I moved two Macs in the middle of the transfer, for some reason the connection was not recognized and the transfer stopped. I was impatient and wondered if I had to start from the beginning again. I was impatient, but was relieved to find that it automatically switched to Wi-Fi Peer-to-Peer mode. However, the transfer rate dropped to 30-40 MB/s compared to when I had a physical Ethernet connection.
The data to be transferred was over 400 GB, so transferring the data at 40 MB/s would take 400*1000/40/60 = 166 minutes = over 2.5 hours. I thought to myself, “How long is this going to take? I left it as it was for a while. The Wi-Fi speed of the router at home is slow. Is it because it’s crowded during the daytime on holidays?

I had plans to go out in the middle of the day, so I went out and looked at it when I got home and found that the transition had been completed successfully!

I was then able to complete the rest of the setup and boot up.
I remember that various settings such as .zshrc, XCode, Slack account, etc. were not taken over before and I had to set them up by myself again, but this time it was not the case and they were successfully taken over. This time, however, it was not the case and was successfully transferred!
Impressions after actually starting the work
When I actually started working on it, I could not deny the feeling that it was one size smaller than the 16-inch model, and I wondered if I would have preferred the 16-inch model, but I guess it is just a matter of getting used to it.
I have not yet used it for serious programming or video editing at this point, but it probably looks fine. I will add my impressions after I actually do it.
Good points are.
- It runs faster (of course. (It’s probably also because the fans haven’t collected dust yet). I have no problems at all when I connect the display.
- It has an HDMI port; the 2019 Intel MacBook Pro only had a USB-C port, so I had to buy a separate adapter to connect USB-C and HDMI to the display, but that is no longer necessary. I had previously forgotten the USB-C to HDMI adapter when doing presentations outside, which was annoying.
What I felt this time was that switching costs had decreased more than I had imagined. This made me think that I might be able to replace my PC a little more frequently. Next time I buy a new PC, I will keep in mind to clean up unnecessary data on the original MacBook beforehand, and to perform the data migration before going to bed and have it completed when I wake up.

