Introduction.
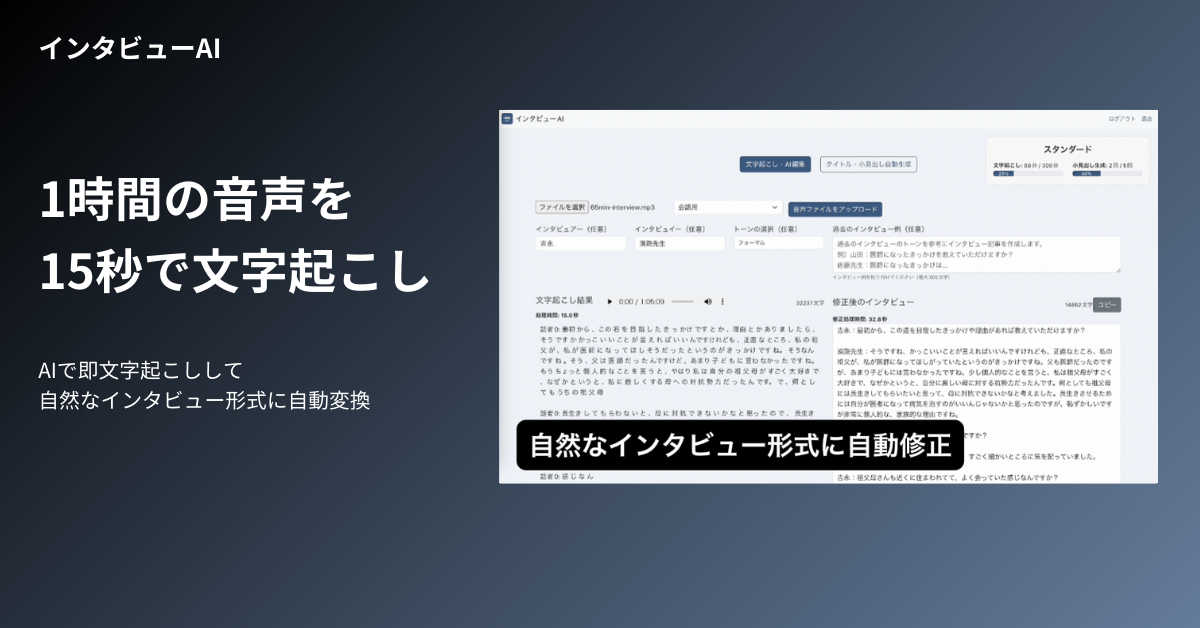
Developing an “interview AI” that can transcribe an hour of audio in 15 seconds and automatically convert it into a natural conversational format.
Currently, the service is available in Japanese for the Japanese domestic market, but we would like to make the service available in multiple languages as we would like to promote overseas development as well. In this article, we describe the procedure for making a React project multilingual.
To proceed with English support for the front end, proceed as follows
Introducing the i18n Library
Internationalization libraries such as react-i18next are useful for multilingual support in React projects. First, install react-i18nextandi18next in the frontend/ directory with the following command.
In this case, we also want to automatically switch the language based on the display language of the user’s browser, so we will also install i18next-browser-languagedetector, a plugin provided by i18next that detects browser settings and automatically sets the language Install i18next-browser-languagedetector
npm install react-i18next i18next i18next-browser-languagedetectorMultilingual directory structure (front end)
Store translation files (e.g. en.json andja.json ) for multilingual support under src/locales/ for use throughout the app
project-root/
  └── src/
      ├── components/
      ├── locales/        <-- ここに言語ファイルを格納
      │     ├── en.json   <-- 英語の翻訳ファイル
      │     └── ja.json   <-- 日本語の翻訳ファイル
      ├── App.tsx
      ├── i18n.js         <-- i18nの設定ファイル
      └── index.tsx
Creating i18n configuration files
Next, create an i18n configuration file and set it up for use throughout the project. For example, write the following in src/i18n.js
import i18n from 'i18next';
import { initReactI18next } from 'react-i18next';
import LanguageDetector from 'i18next-browser-languagedetector';
import en from './locales/en.json';
import ja from './locales/ja.json';

i18n
  .use(LanguageDetector) // 言語検出機能を使用
  .use(initReactI18next)
  .init({
    resources: {
      en: { translation: en },
      ja: { translation: ja },
    },
    fallbackLng: 'en', // 言語が検出されない場合のフォールバック
    interpolation: { escapeValue: false },
    detection: {
      order: ['querystring', 'cookie', 'localStorage', 'navigator', 'htmlTag'], // 言語の検出順序
      caches: ['localStorage', 'cookie'], // 言語を保存する場所
    },
  });

export default i18n;
This setting allows the system to automatically detect the display language of the user’s browser and set the initial language accordingly. For example, if the browser is used in a Japanese environment, it will automatically be set to ja.
Next, write the text for each language in locales/en.json andlocales/ja.json.
Creating Language Files
Next, create a text for each language in the locales folder. For example, create the en.json file as follows
en.json:.
{
  "welcome": "Welcome",
  "logout": "Logout",
  "delete_account": "Delete Account",
  "transcription": "Transcription",
  "summary": "Summary",
  "title_header": "Title & Headings"
}
en.json:.
{
  "welcome": "ようこそ",
  "logout": "ログアウト",
  "delete_account": "退会",
  "transcription": "文字起こし",
  "summary": "要約",
  "title_header": "タイトル・小見出し"
}
Apply i18n to the entire app
Import i18n in src/index.js or src/index.tsx and apply it to the entire app.
import React from 'react';
import ReactDOM from 'react-dom';
import App from './App';
import './i18n';

ReactDOM.render(
  <React.StrictMode>
    <App />
  </React.StrictMode>,
  document.getElementById('root')
);
Change existing components to translation-ready
Next, translate each file. As a trial, first, translate the “Transcription,” “Summary,” and “Title and Subheading buttons” in App.tsx into English.

In App.tsx, make the following changes
- Import
react-i18nextanduseTranslationhook. - Translate each text using
t()to correspond to the translation.
import React from 'react';
import { useTranslation } from 'react-i18next';
// その他のインポートは省略

const App: React.FC = () => {
  const { t } = useTranslation();

  // 他のコードはそのまま
  return (
    <Elements stripe={stripePromise}>
      <div className="app-container">
        <Navbar
          currentUser={currentUser}
          onLogout={handleLogout}
          onDeleteAccount={handleDeleteAccount}
        />

        <div className="container mx-auto mt-20 pt-5 px-4">
          {!location.pathname.includes("/login") &&
            !location.pathname.includes("/upgrade-plan") && (
              <div className="flex justify-center mb-12 mt-4">
                <div className="flex space-x-4">
                  <Link to="/transcription">
                    <Button
                      variant={
                        activeService === "transcription"
                          ? "primary"
                          : "outline"
                      }
                      className="w-auto"
                      onClick={() => setActiveService("transcription")}
                    >
                      {t('transcription')}
                    </Button>
                  </Link>

                  <Link to="/summary">
                    <Button
                      variant={
                        activeService === "summary" ? "primary" : "outline"
                      }
                      className="w-auto"
                      onClick={() => setActiveService("summary")}
                    >
                      {t('summary')}
                    </Button>
                  </Link>

                  <Link to="/title-header-generator">
                    <Button
                      variant={
                        activeService === "title-header-generator"
                          ? "primary"
                          : "outline"
                      }
                      className="w-auto"
                      onClick={() => setActiveService("title-header-generator")}
                    >
                      {t('title_header')}
                    </Button>
                  </Link>
                </div>
              </div>
            )}
        {/* その他のコード */}
        </div>
      </div>
    </Elements>
  );
};
In this way, useTranslation in each component to get the text from the language file.
Implementation of language switching function in Navbar
Add a drop-down menu for language selection to the Navbar if the user wishes to manually switch languages even after the browser language has been automatically set. Add a button to switch languages as follows manually.
Set i18n.language in the value attribute of the tag so that when the user loads the page, the language detected by the browser is automatically selected in the drop-down. For example, if the browser is set to English, the default choice in the drop-down will also be “English”.
In addition, navigation buttons (Plan, How to use, Contact, Login, Log out, Unsubscribe) should also be multilingual.
import { useState } from "react";
import { useTranslation } from "react-i18next";
import { AiOutlineClose, AiOutlineMenu } from "react-icons/ai";
import { Link } from "react-router-dom";
import { Button } from "./ui/button";

type NavbarProps = {
  currentUser: any;
  onLogout: () => void;
  onDeleteAccount: () => void;
};

const Navbar: React.FC<NavbarProps> = ({
  currentUser,
  onLogout,
  onDeleteAccount,
}) => {
  const [isOpen, setIsOpen] = useState(false);
  const { t, i18n } = useTranslation(); // i18nのインスタンスとt関数を取得

  const toggleMenu = () => setIsOpen(!isOpen);

  const changeLanguage = (lng: string) => {
    i18n.changeLanguage(lng); // 言語を変更
  };

  return (
    <nav className="p-4 fixed top-0 w-full z-10 bg-white">
      <div className="container mx-auto flex justify-between items-center">
        {/* ロゴ */}
        <Link to="/" className="flex items-center text-brand font-bold text-xl">
          <img
            src="/images/interview-ai-logo.png"
            alt="Logo"
            className="h-6 w-6 mr-2"
          />
          {t("app_name", { defaultValue: "インタビューAI" })}{" "}
          {/* デフォルト値として日本語を設定 */}
        </Link>

        {/* ハンバーガーメニュー(スマホ用) */}
        <div className="md:hidden">
          <button onClick={toggleMenu}>
            {isOpen ? (
              <AiOutlineClose className="h-6 w-6 text-gray-800" />
            ) : (
              <AiOutlineMenu className="h-6 w-6 text-gray-800" />
            )}
          </button>
        </div>

        {/* ナビゲーションリンク */}
        <div
          className={`${
            isOpen ? "block" : "hidden"
          } md:flex flex-col md:flex-row items-center md:items-center absolute md:static top-16 left-0 w-full md:w-auto bg-white md:bg-transparent`}
        >
          <Link
            to="/upgrade-plan"
            className="text-gray-800 hover:text-blue-600 mx-2 py-2 md:py-0"
          >
            {t("plan")}
          </Link>
          <a
            href="https://www.interview-ai.site/how-to-use-interviewai/"
            target="_blank"
            rel="noopener noreferrer"
            className="text-gray-800 hover:text-blue-600 mx-2 py-2 md:py-0"
          >
            {t("how_to_use")}
          </a>
          <a
            href="https://docs.google.com/forms/d/e/1FAIpQLSeGpCKSrHcT6HVzQNOL27-KPPli0LxYCXaphMv6QE8I-rA9KA/viewform"
            target="_blank"
            rel="noopener noreferrer"
            className="text-gray-800 hover:text-blue-600 mx-2 py-2 md:py-0"
          >
            {t("contact")}
          </a>

          {currentUser ? (
            <>
              <Button
                variant="ghost"
                onClick={onLogout}
                className="text-gray-800 hover:bg-gray-600 hover:text-white mx-2 py-2 md:py-0"
              >
                {t("logout")}
              </Button>
              <Button
                variant="ghost"
                onClick={onDeleteAccount}
                className="text-gray-800 hover:bg-gray-600 hover:text-white mx-2 py-2 md:py-0"
              >
                {t("delete_account")}
              </Button>
            </>
          ) : (
            <Link to="/login">
              <Button
                variant="ghost"
                className="text-gray-800 hover:bg-gray-600 hover:text-white mx-2 py-2 md:py-0"
              >
                {t("login")}
              </Button>
            </Link>
          )}

          {/* 言語選択ドロップダウンの追加 */}
          <div className="ml-4">
            <select
              value={i18n.language}
              onChange={(e) => changeLanguage(e.target.value)}
              className="border border-gray-300 rounded p-1"
            >
              <option value="ja">日本語</option>
              <option value="en">English</option>
            </select>
          </div>
        </div>
      </div>
    </nav>
  );
};

export default Navbar;
operation check
Stopping and building Docker containers
Incidentally, if you have added a new library and want to check its operation under the Docker environment, in this case, you can execute the following Docker commands in order to reflect the dependencies correctly.
docker-compose down: Stop and remove currently running containers.docker-compose build: Build a new Docker image. Usually, this step will incorporate the dependencies into the Docker image.docker-compose up: Launch the container with the newly built image.
However, if some data (for example, dependencies or configuration files) are cached on the volume, the latest image may not be reflected. docker-compose up may cause an error log about new library dependencies. In order to reflect the new dependencies, delete the cache and existing images using the following command, and then build & up
docker-compose down --rmi all --volumes --remove-orphans
-rmi all: Delete all images.-volumes: Delete volumes also to clear data.-remove-orphans: Remove isolated containers that are not currently needed.
Language display drop-down for language switching
When the top screen is opened, a drop-down menu for language display appears on the first right side of the navigation bar. It defaults to the browser display language, Japanese.
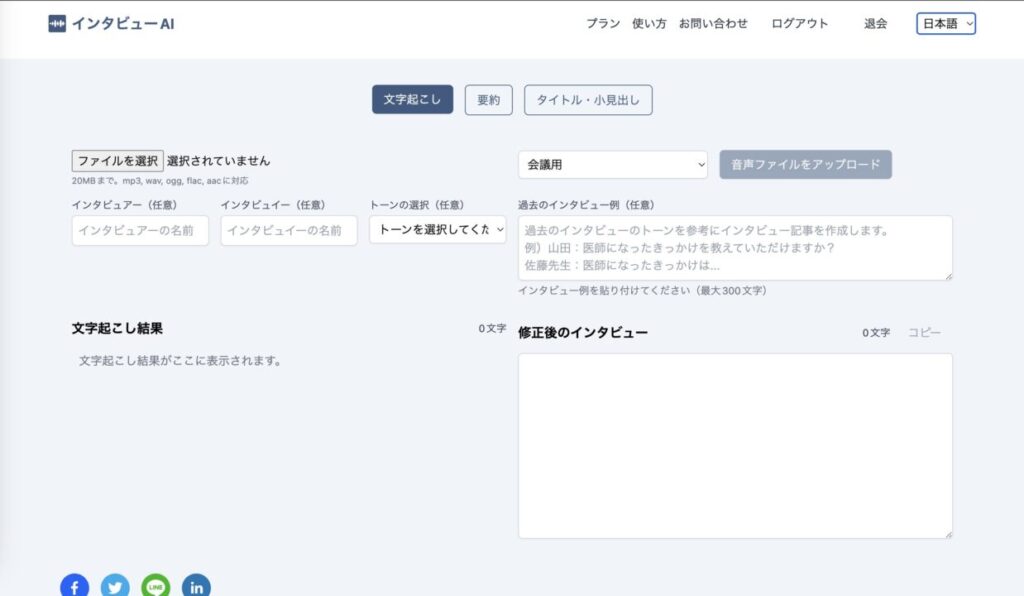
Click on the drop-down menu, “English” will appear under “Japanese”, click on it.

This time, the navigation with the English translation listed and the buttons for transcription, summary, and title commitments were successfully switched to English.
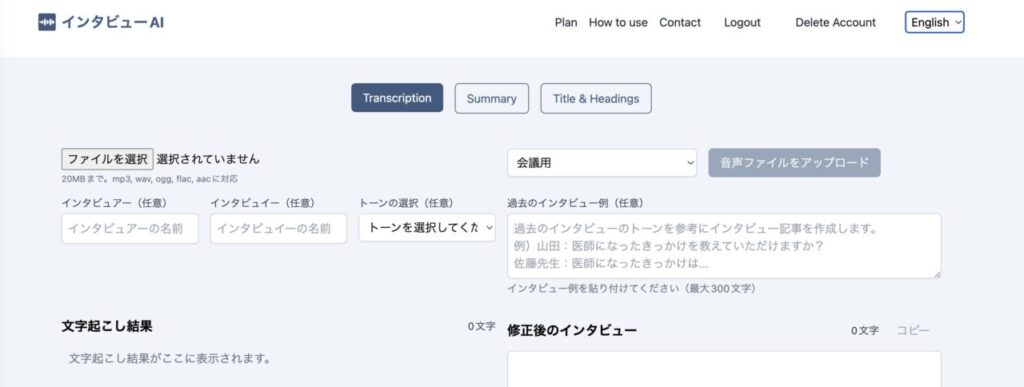
Try switching the Chrome browser’s display language preference from Japanese to English.
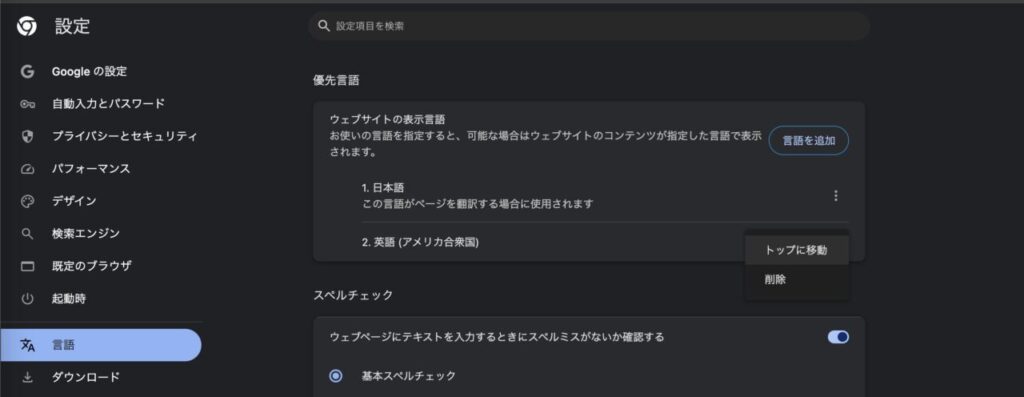
English was displayed safely.
The language bar is also switched to English.

I would also like to compile the other Japanese parts into a translated file to make it multilingual.
