Introduction.
When playing Mario Kart and other games with my child on the Nintendo Switch, the message “The device is too hot and will go to sleep” appears frequently, and even after taking some time to let the device cool down, the error appears again…
repeatedly, making it impossible to play properly (crying).
When I actually touched the Switch, it was very hot.
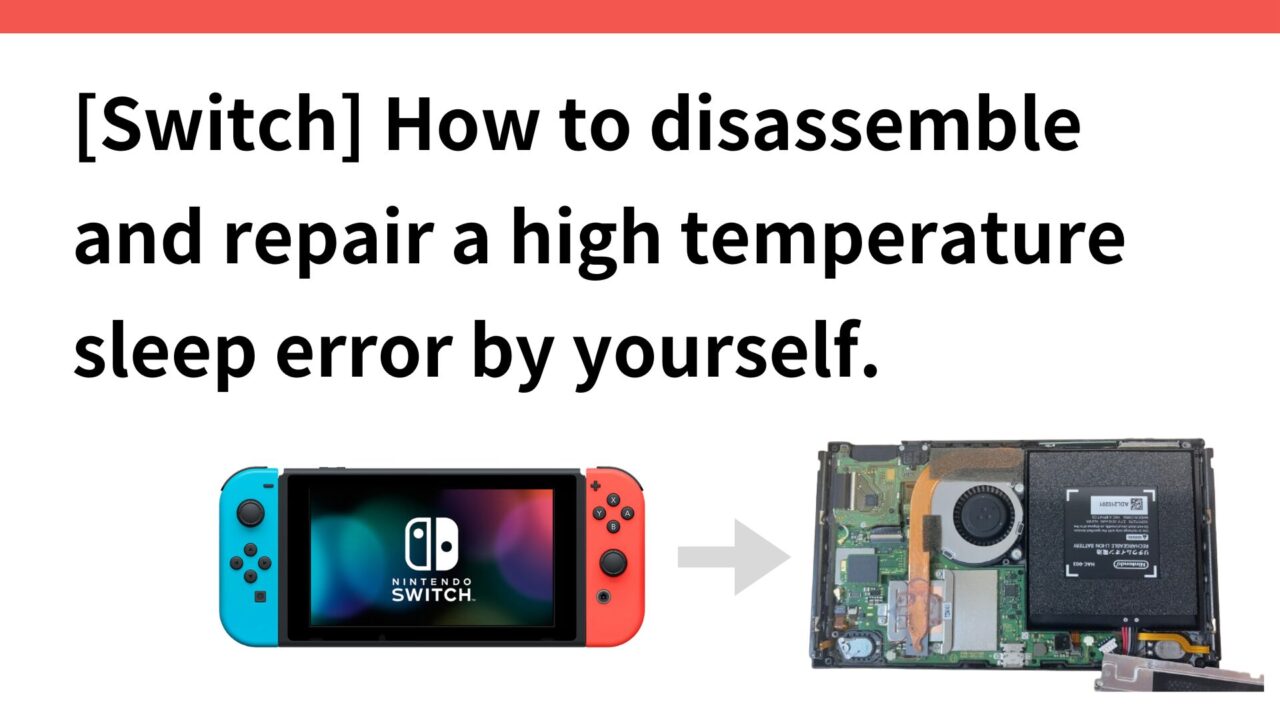
This article describes a do-it-yourself repair procedure for high-temperature sleep errors.

One cause of high pitch sleep errors is dust
The Switch is designed to cool the main unit to prevent it from getting too hot by spinning an internal cooling fan to release the heat generated by playing games to the outside.
If “dust” gets stuck around these cooling fans or in the intake and exhaust vents, the cooling fans will not turn properly, which will cause heat to build up inside the Sqitch, resulting in a high-temperature sleep error, which is the Switch’s automatic shutdown function.

Therefore, we need to disassemble the Switch and remove dust from the fan.
Disassembly requires 1.8mm Y-shaped screwdriver and 1.5mm + screwdriver
I first bought this one because I needed a Y-shaped screwdriver and a + screwdriver to disassemble it, but I gave up because I could not remove the Y-shaped screw on the back of the main unit for both 1.5mm and 2.0mm.
In the end, I had to buy another 1.8mm Y-shaped screw.
Incidentally, I learned later that there was a product that included screws, a cooling fan, and a thermal compound (cooling grease), so it would be better to buy this product. The cooling fan may already be broken.
But this set includes a 1.5mm Y-shaped screwdriver. Maybe the first 1.5mm Y-shaped screwdriver I happened to buy was defective!
Disassembly started
Remove the back cover with a Y- and cross-shaped screwdriver.
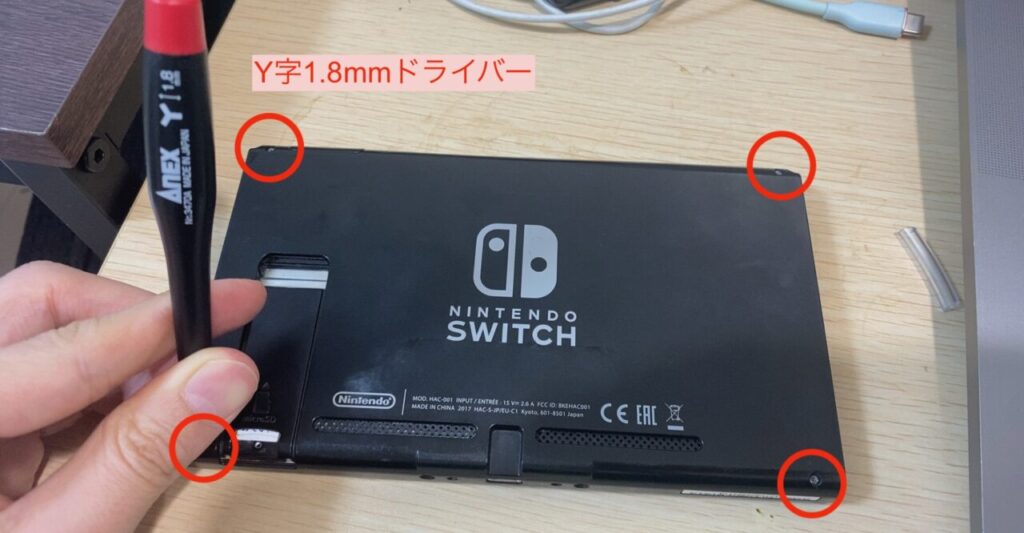
First, remove the back cover, which is screwed on at the four corners with Y-shaped screws, using a 1.8 mm Y-shaped screwdriver.
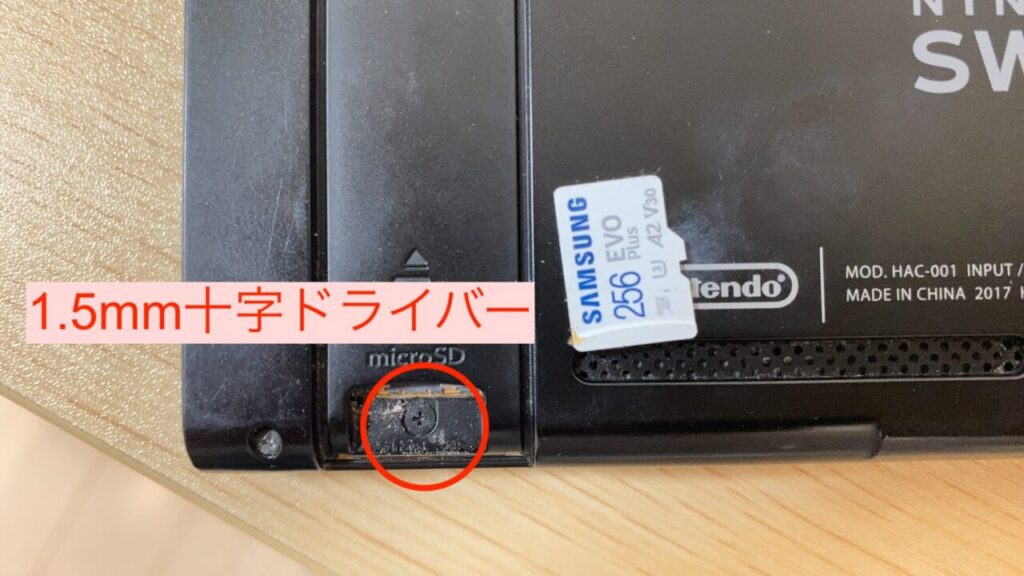
Remove the SD card and remove the part that holds the SD card (1.5 mm crossed screwdriver)
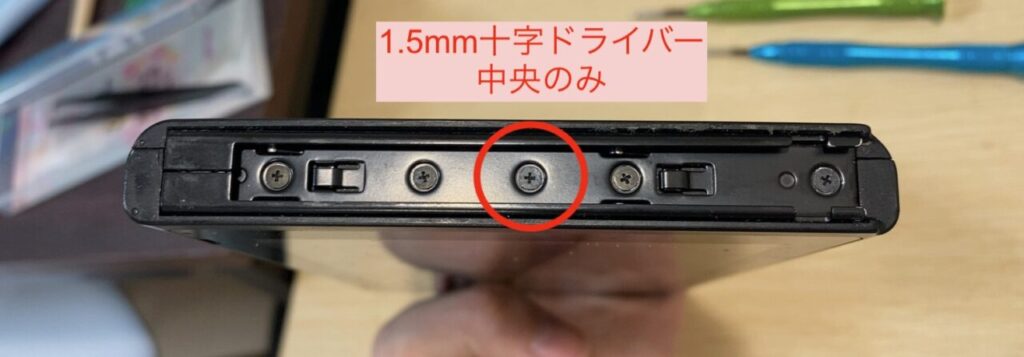
Remove only the center of the five cross-shaped screws on the side of the main unit using a 1.5mm cross-slot screwdriver.
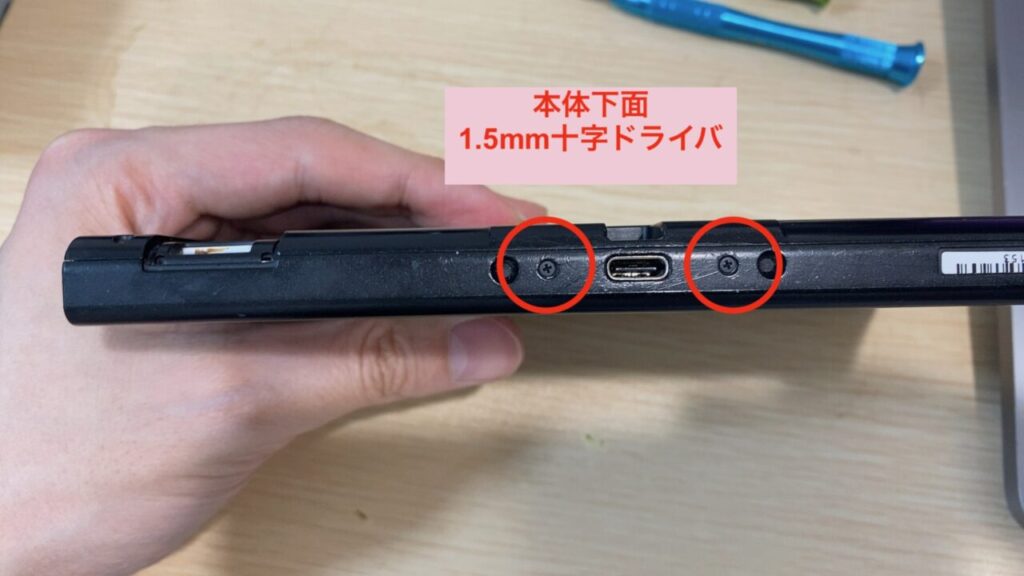
The two crosshead screws on the underside of the main unit are also removed with a 1.5 mm crosshead screwdriver.
Remove the back cover
Here is the back cover removed.
In the end, one of the Y-shaped screws in the four corners was completely crushed and beyond repair, so I had to break part of the back cover with nippers.

Remove the silver plate with a 1.5mm cross-slot screwdriver.
Next, remove the seven silver plates with a 1.5mm cross-slot screwdriver.
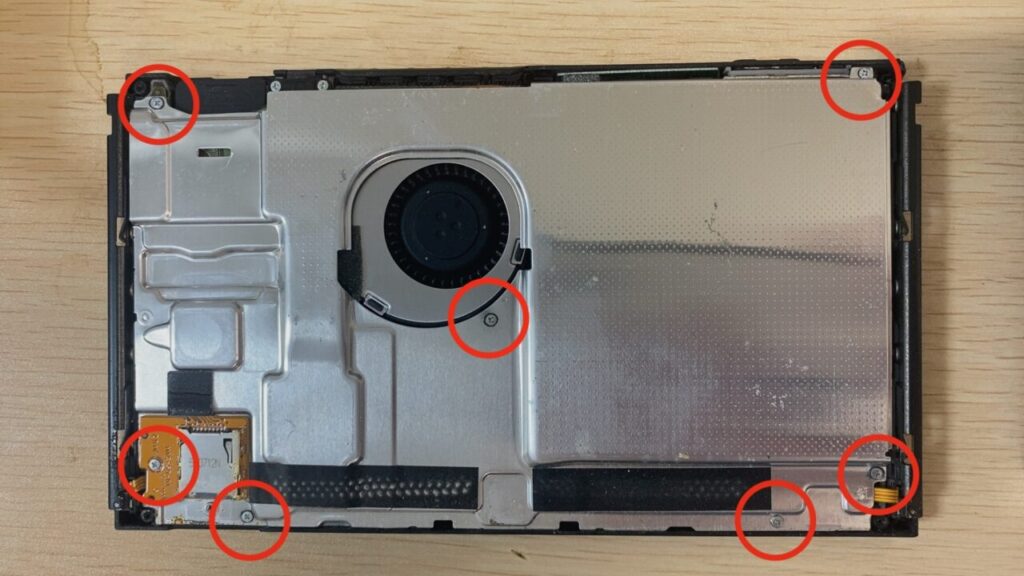
Lift the MicroSD card unit straight up and remove it.
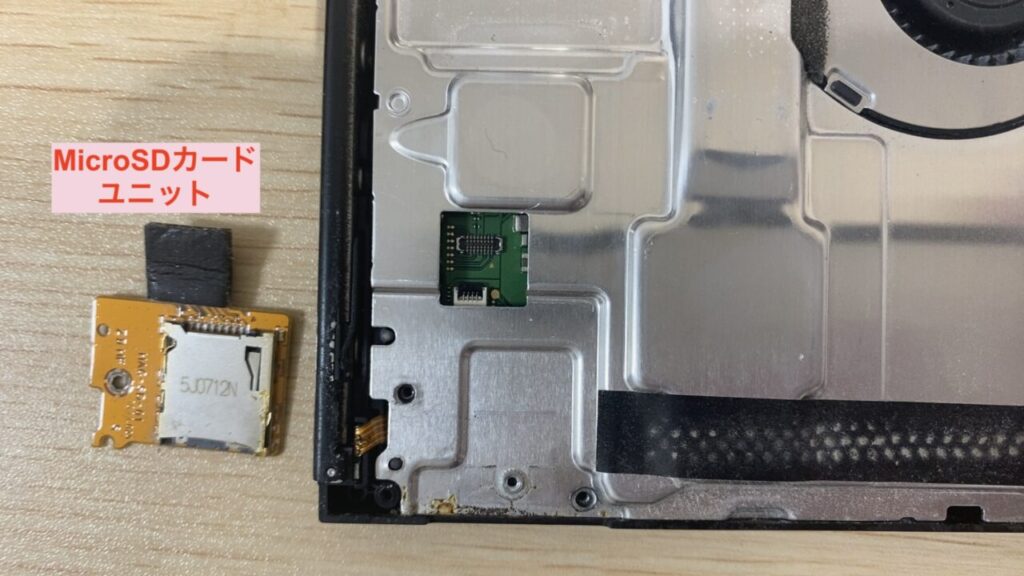
Here it is with the silver plate removed
For some reason, I could not remove the cross screw hole in the lower right corner (not a simple task), so I forced the silver plate to rotate starting from the screw hole that I could not remove.
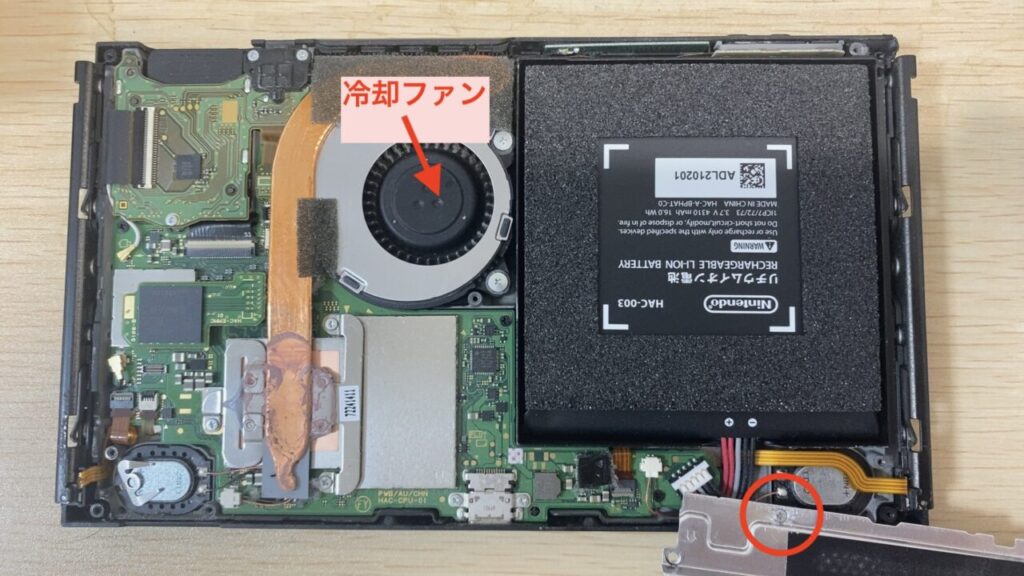
You can see that there is a battery, game card unit, cooling fan, SSD, speakers, and mainboard.
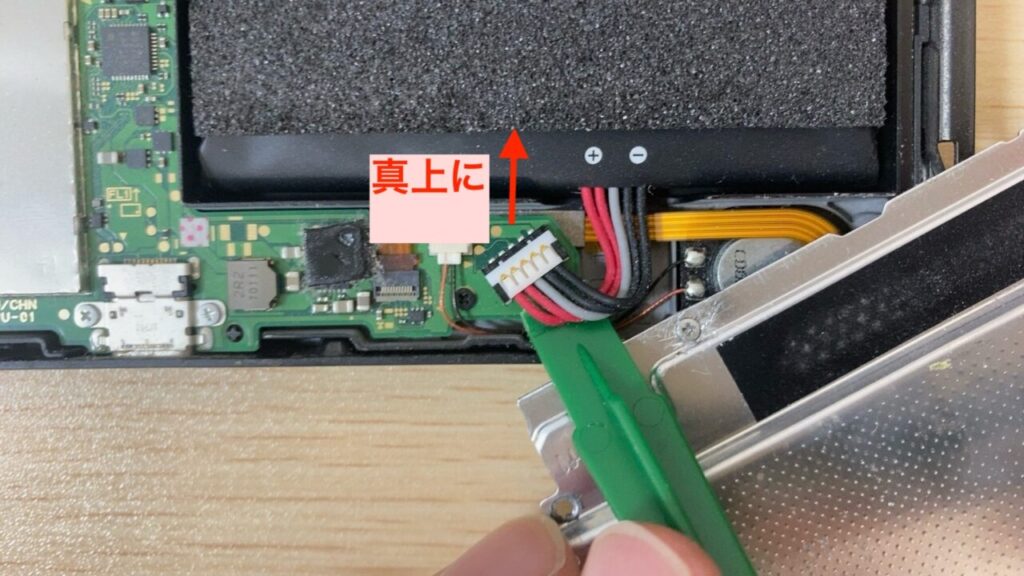
Disconnect the battery connector
Using the endpoint of the spudger (a small plastic or metal lever), lift the battery connector straight up and remove it from the motherboard.
Remove the heat sink
A heat sink is a component that efficiently dissipates heat generated by electronic devices. Remove the three Phillips-head screws secured to the motherboard with a 1.5mm Phillips-head screwdriver.
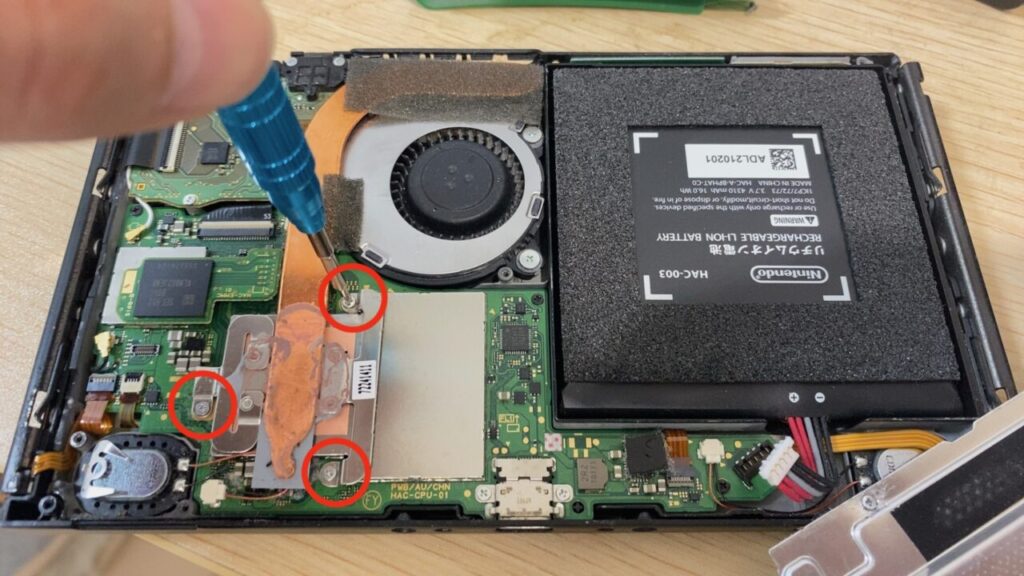
Then it will float, and the top part is lifted up and removed as it is.
Here is the heat pipe with the heat pipe removed.
*Do not wipe off the cooling grease (purple cream on the heat sink. Also known as thermal paste or thermal compound) should not be wiped off. Cooling grease is applied between the heat-generating components of a computer, such as the CPU and GPU, and the heat sink to improve thermal conductivity by filling the microscopic air gaps between the component surfaces and the heat sink.
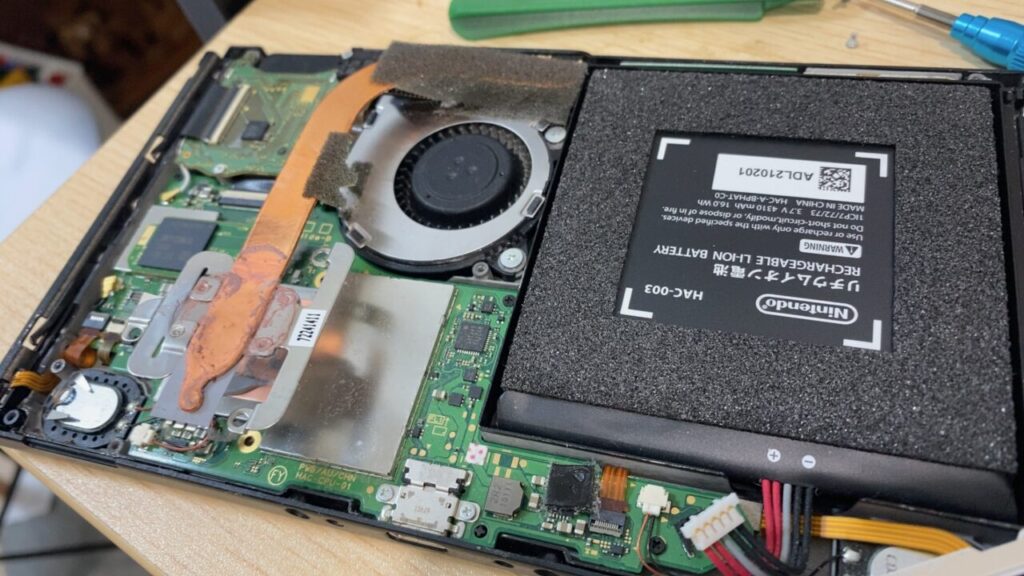
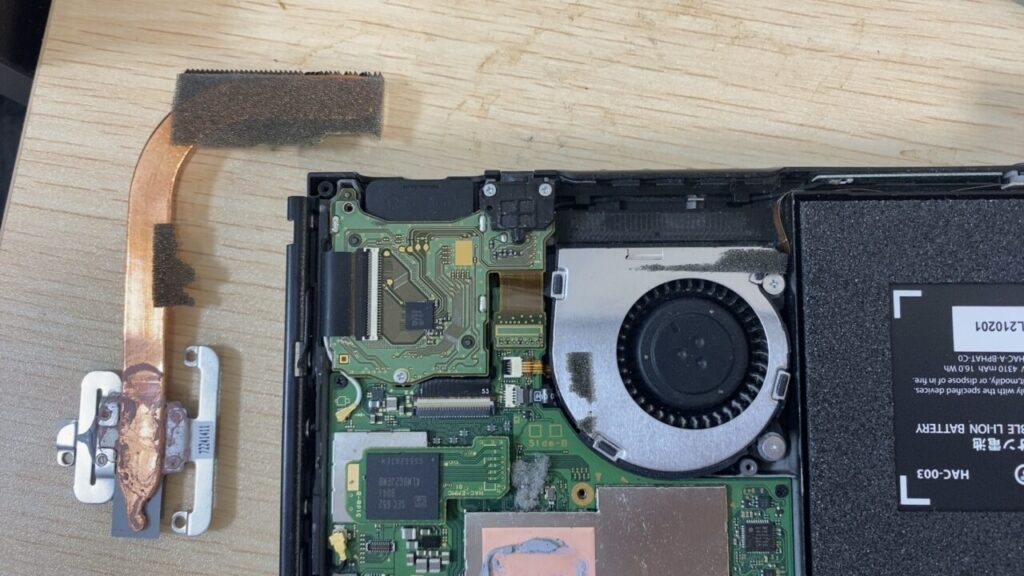
The screws around the fan and the screws on the game card unit are also removed with a 1.5 mm crosshead screwdriver.
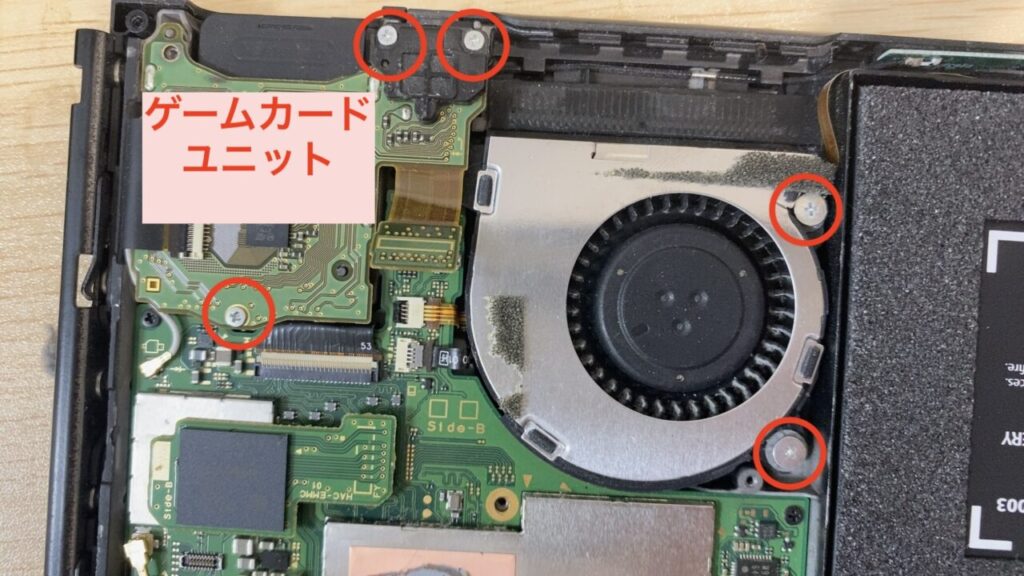
Using a spudger, lift the game card reader connector off the motherboard to disconnect it.

Flip the game card unit and remove the fan-fixing screws.
Flip the game card unit over to reveal the last of the three Phillips-head screws securing the fan, which can also be removed with a 1.5 mm Phillips screwdriver.
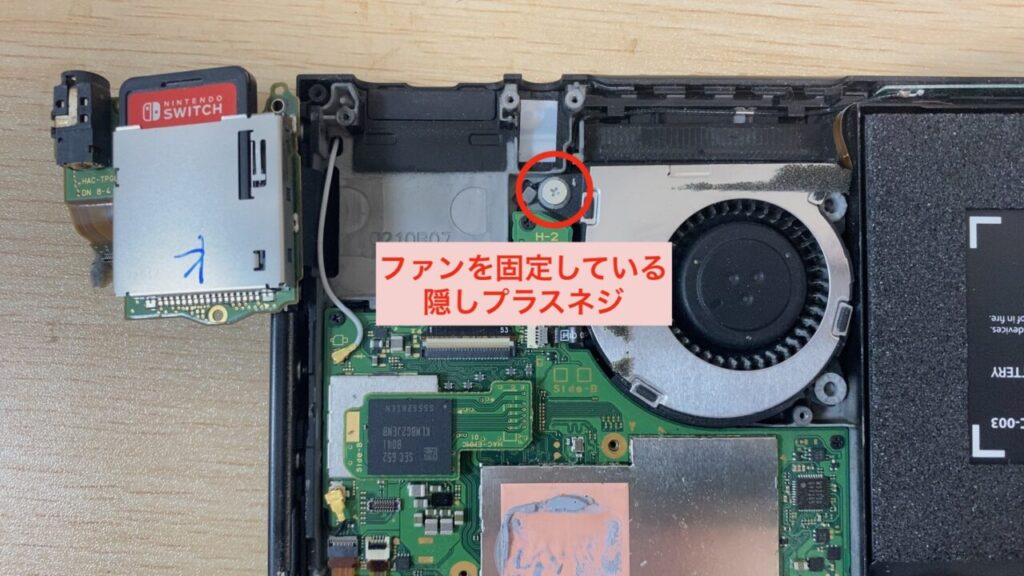
Finally, the cooling fan removal is complete!
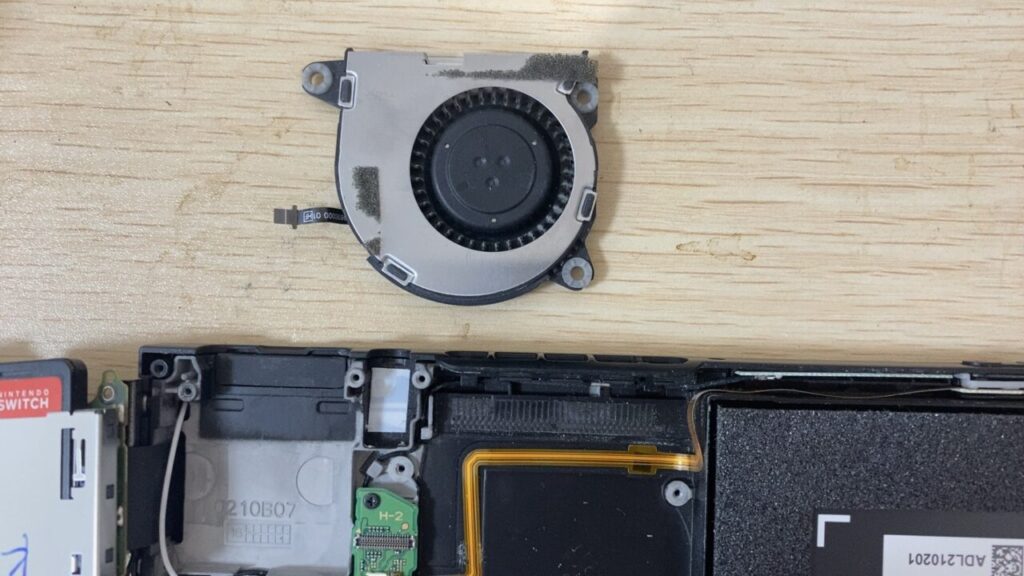
Clean or replace fan
The fans don’t seem to be as dusty as I thought they would be, but I’ll try to clean them.
However, in most cases, the fans themselves have been damaged by dust, and in such cases, they need to be replaced.
The “Nintendo Switch Cooling Fan” sells for less than 1000 yen by itself. You can also use the first product I mentioned, which is a set of screwdrivers, cooling grease, and cooling fan (is that better?).
After cleaning the fan, screw it back into the Switch body again in the reverse order of the disassembly procedure.
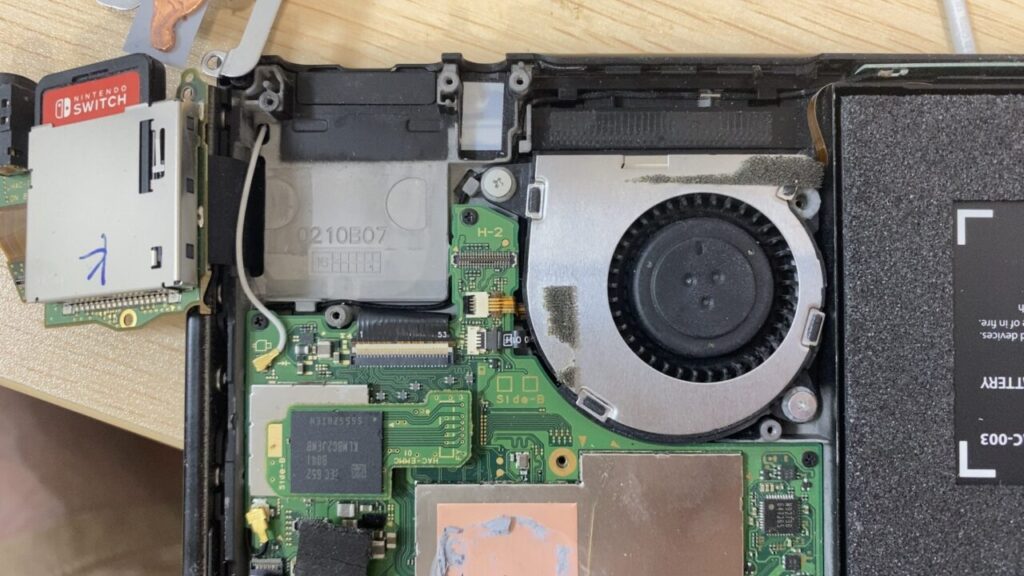
Done! But then…
Now I was able to counter the high-temperature sleep error! I turned on the power and found that the screen was completely black and the fan was not running.
The touch panel (digitizer) and audio worked fine, so I assume the power is on, but only the LCD is not showing.
Although the LCD connector was not tampered with during this operation, we checked the connection, thinking that the LCD connector might have been unintentionally loosened during the operation.
The LCD connector on the Switch has 53 pins, and if even one connection is bad, it will not show up. Looking at it with a magnifying glass, it looks fine to me (I’ve removed the latch), but it must have a bad connection somewhere.
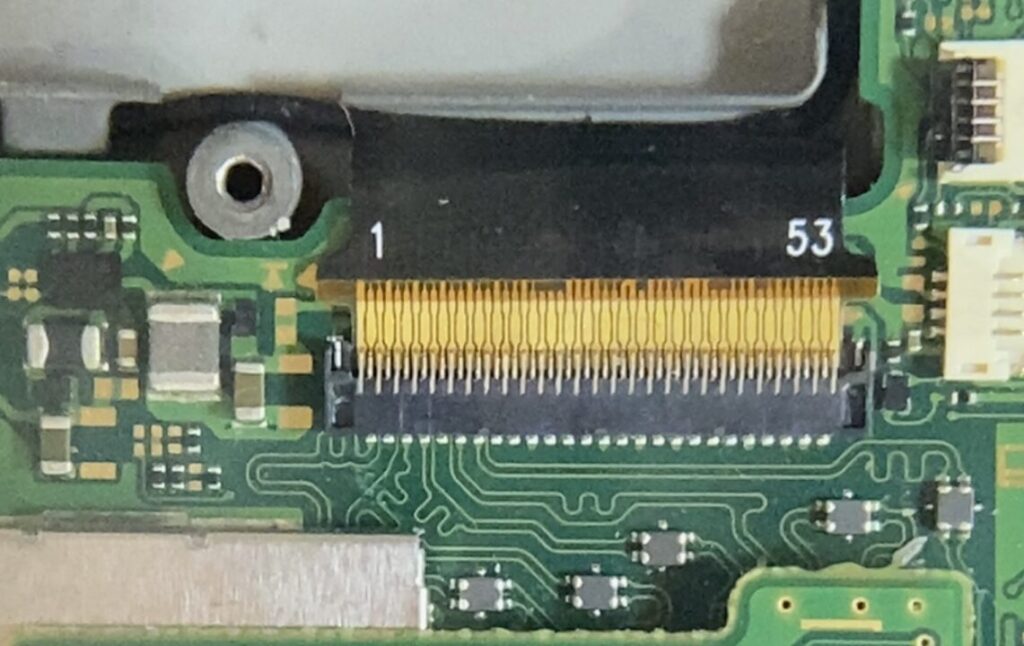
The connectors on the game card reader and motherboard also seem to be connected correctly.
Other
- Forced restart: press and hold the power button for more than 12 seconds to completely shut down the device, then press the power button to restart
- Attempt to boot in safe mode: press and hold the Power and Volume Up buttons simultaneously to boot the Switch in safe mode
I tried everything, but it just wouldn’t work.
It was going to take a long time to repair it, so I ended up buying a newer model (2021 battery-enhanced, OLED model). I decided to completely disassemble my current Switch (older 2017 model) and use it as a study of electronics; it also had a bad USB Type-C connector connection, so I may experiment with replacing it.
I got off on the wrong foot, and as expected, my son was angry with me the next morning, but I think the procedure for repairing/replacing the cooling fan itself is correct as described. However, I think the procedure for repairing and replacing the cooling fan is correct.

コメント